


I like my networks like my roller coaster lap bars: locked down and secure. This often means limiting what application settings users can modify. While nobody enjoys restricting user access (okay, maybe sysadmins enjoy it a bit), we do it in the name of security. So, for security’s sake, here’s how to lock down and secure Google Chrome using PDQ and Group Policy.
Securing Chrome
With 65% of the browser market share, Google Chrome is an application that’s definitely worth securing. To do so, we’ll use three pillars of application security:
Identify: Identify which users/devices can and should have access to an application, and identify out-of-date installations. This is an essential security measure.
Patch: Quickly distribute security patches to improve an organization’s cybersecurity posture. Automated patch management can significantly reduce patching costs.
Secure: Configure secure application settings and limit user modifications.
Implementing these security fundamentals may sound time consuming and perhaps even difficult, but I’m going to show you how quick and easy it can be with the right tools.
Identifying targets with PDQ Inventory
In only a matter of minutes, PDQ Inventory can scan and collect data from hundreds of machines, from hardware and software information to local users and services. We can use this information to quickly identify which computers have the latest version of Google Chrome installed, which have an old version of Chrome installed, and which are missing Chrome.
To view the Google Chrome collections in PDQ Inventory, expand Collection Library > Applications > Internet Browsers > Chrome Enterprise.
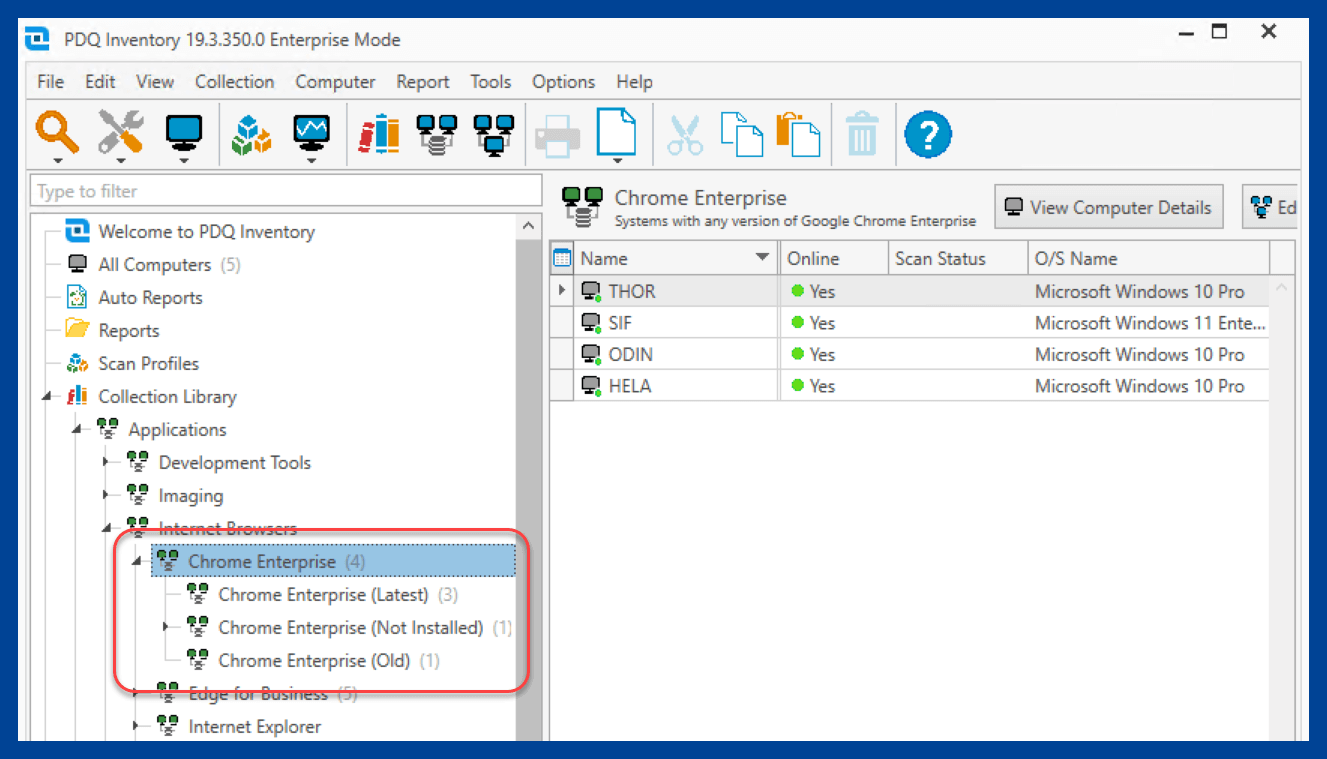
I have five total devices in my environment. At a glance, I can quickly see that three devices have the latest version of Chrome, one machine doesn’t have Chrome, and one has an old version of Chrome installed. I can click on each of these collections to see which computers belong to each collection.
But what if we want to identify computers that have Chrome installed but shouldn’t? We can use a static collection combined with a custom dynamic collection to identify these devices. Here’s how:
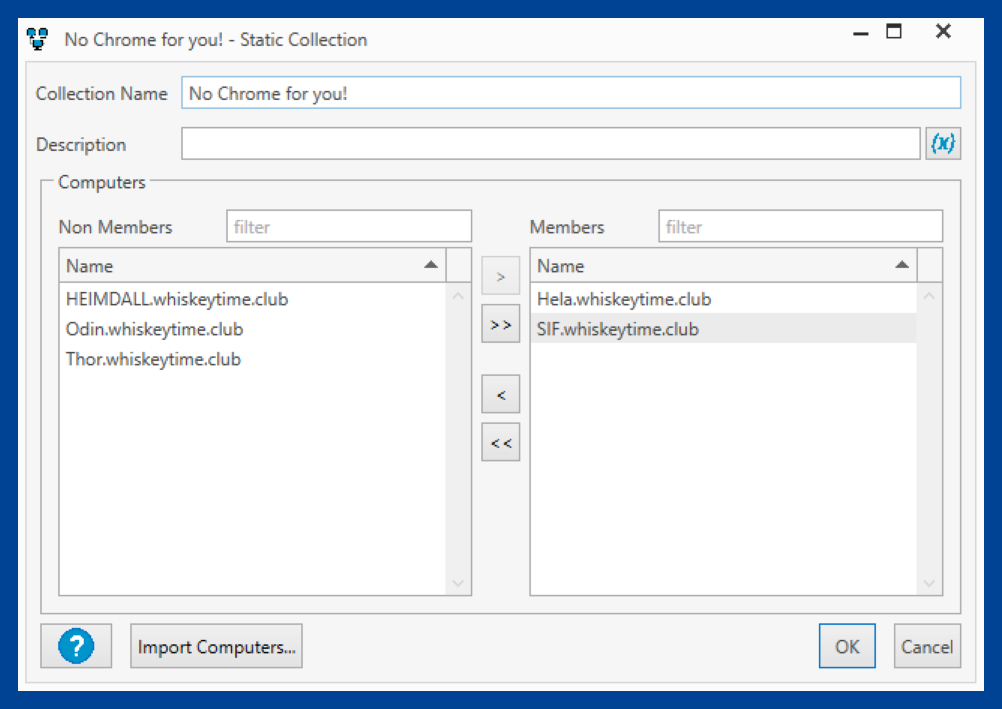
Click the New Static Collection button in PDQ Inventory.
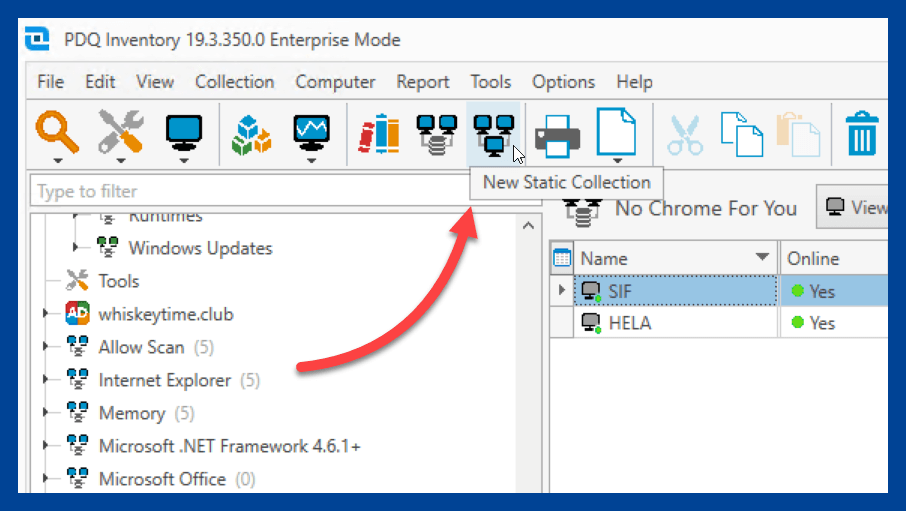
Name the collection and add the computers which should not have Chrome installed, then click OK.
Click the New Dynamic Collection button.
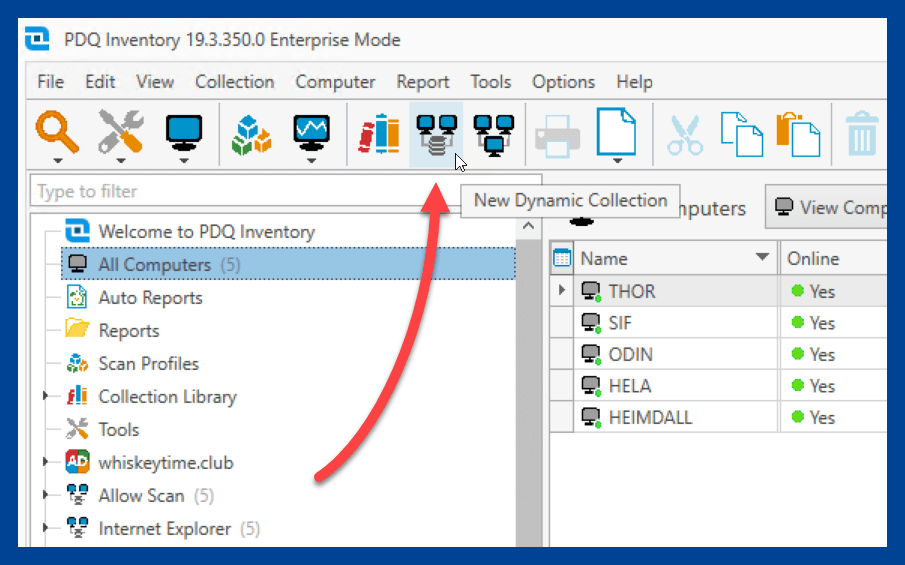
Name the collection, and add the following filters:


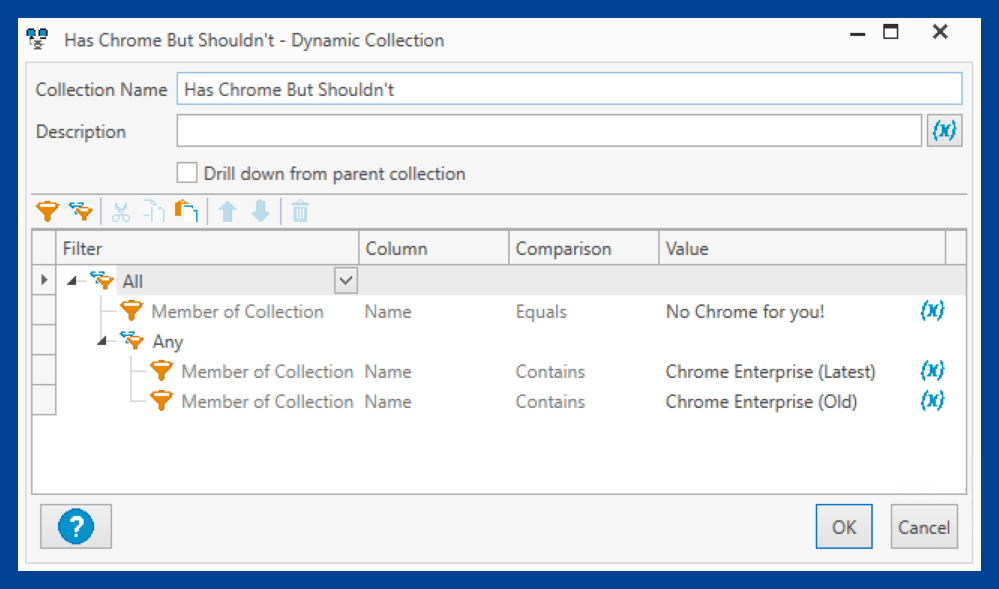
5. Click OK to save, and close the Dynamic Collection window.
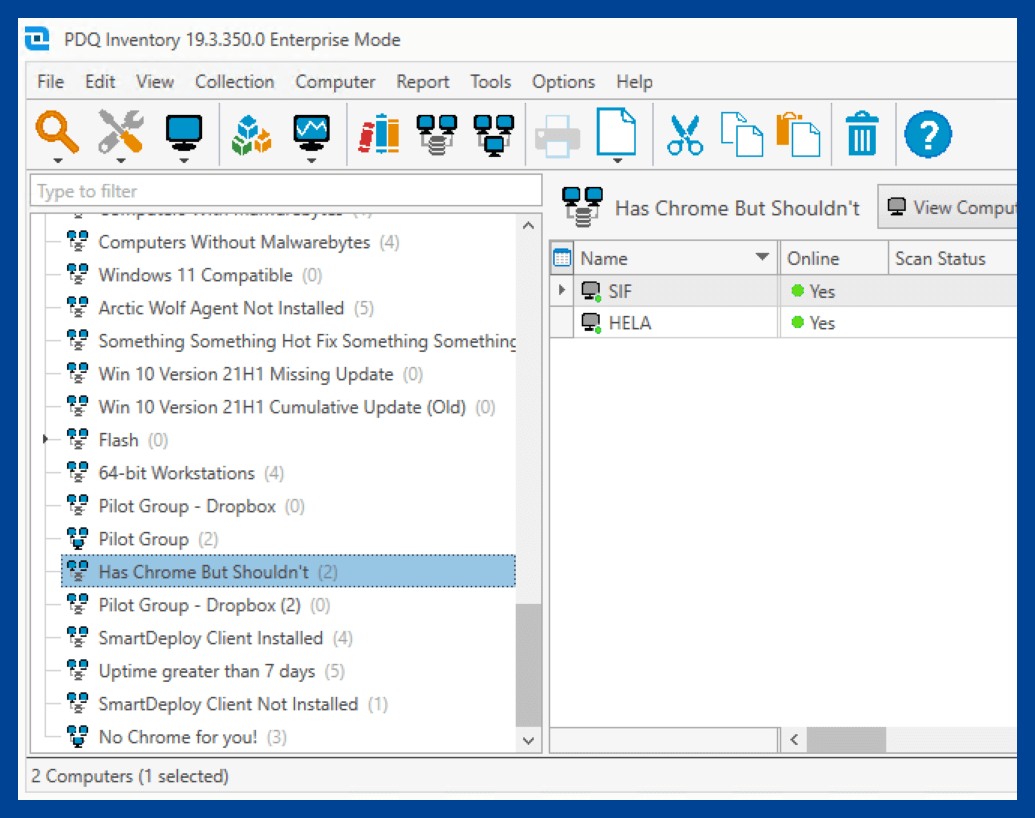
With the collections created, I’ve identified two computers that have Chrome installed that shouldn’t.
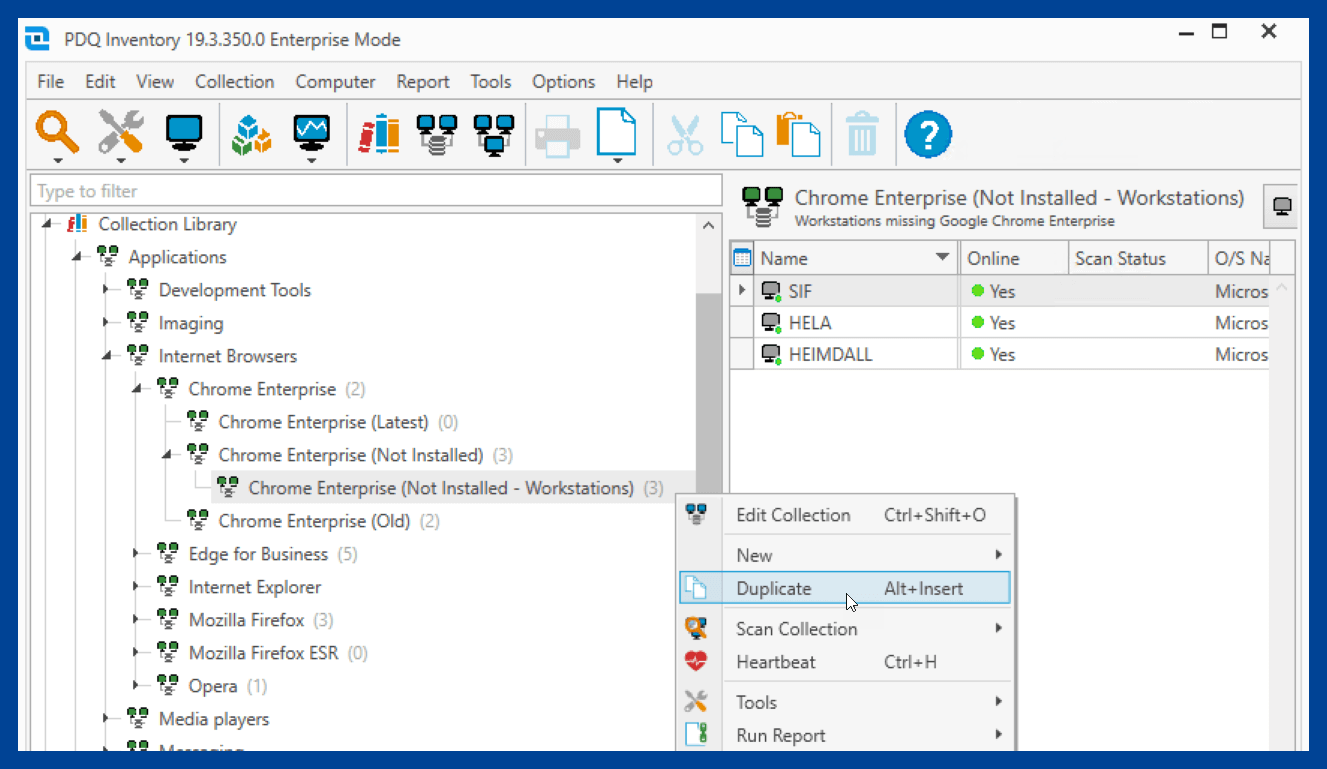
Next, we’ll create a collection to identify targets that should have Chrome installed but don’t.
Expand the Chrome Enterprise (Not Installed) collection, then right-click on the Chrome Enterprise (Not Installed - Workstations) collection and click Duplicate.
Scroll down to the bottom of your list of collections, and double-click on the duplicated collection.
Rename the collection to something descriptive like Needs Chrome.
Add the following to the Not Any filter:

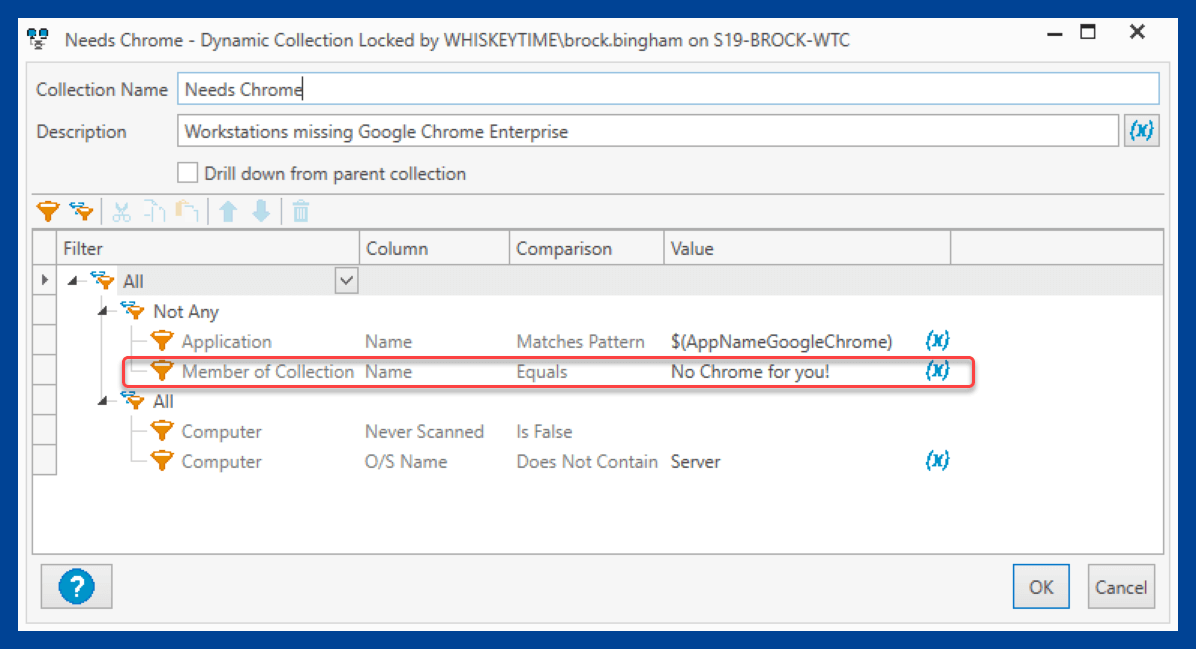
5. Click OK to save, and close the collection.
With this information, we’re ready to configure our deployments in PDQ Deploy, including removing Chrome from the computers that shouldn’t have it.
Deploying, patching, and removing Google Chrome with PDQ Deploy
If you need an application, patch, or script deployed to your devices, PDQ Deploy has you covered. PDQ Deploy simplifies deployments and makes automated deployments easy to configure.
We’ll first use PDQ Deploy to remove Chrome from the devices that shouldn’t have it.
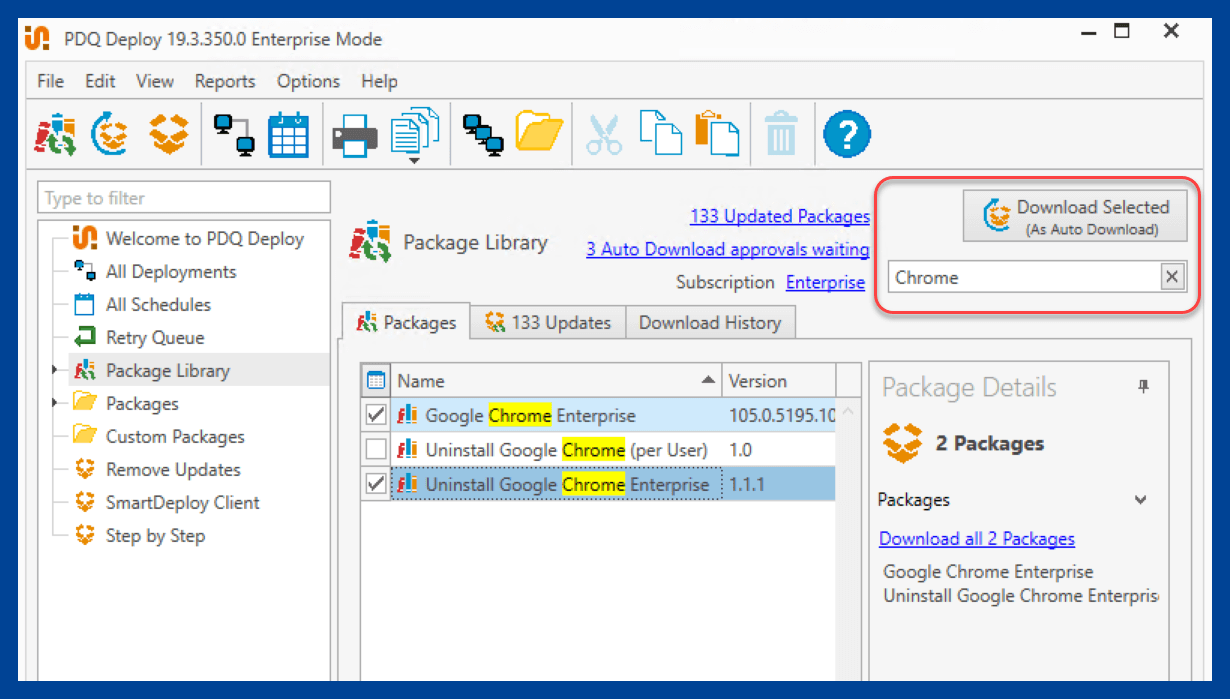
Click the Package Library button in PDQ Deploy.
Enter Chrome into the filter field.
Select the Google Chrome Enterprise and the Uninstall Google Chrome Enterprise packages, then click Download Selected (As Auto Download).
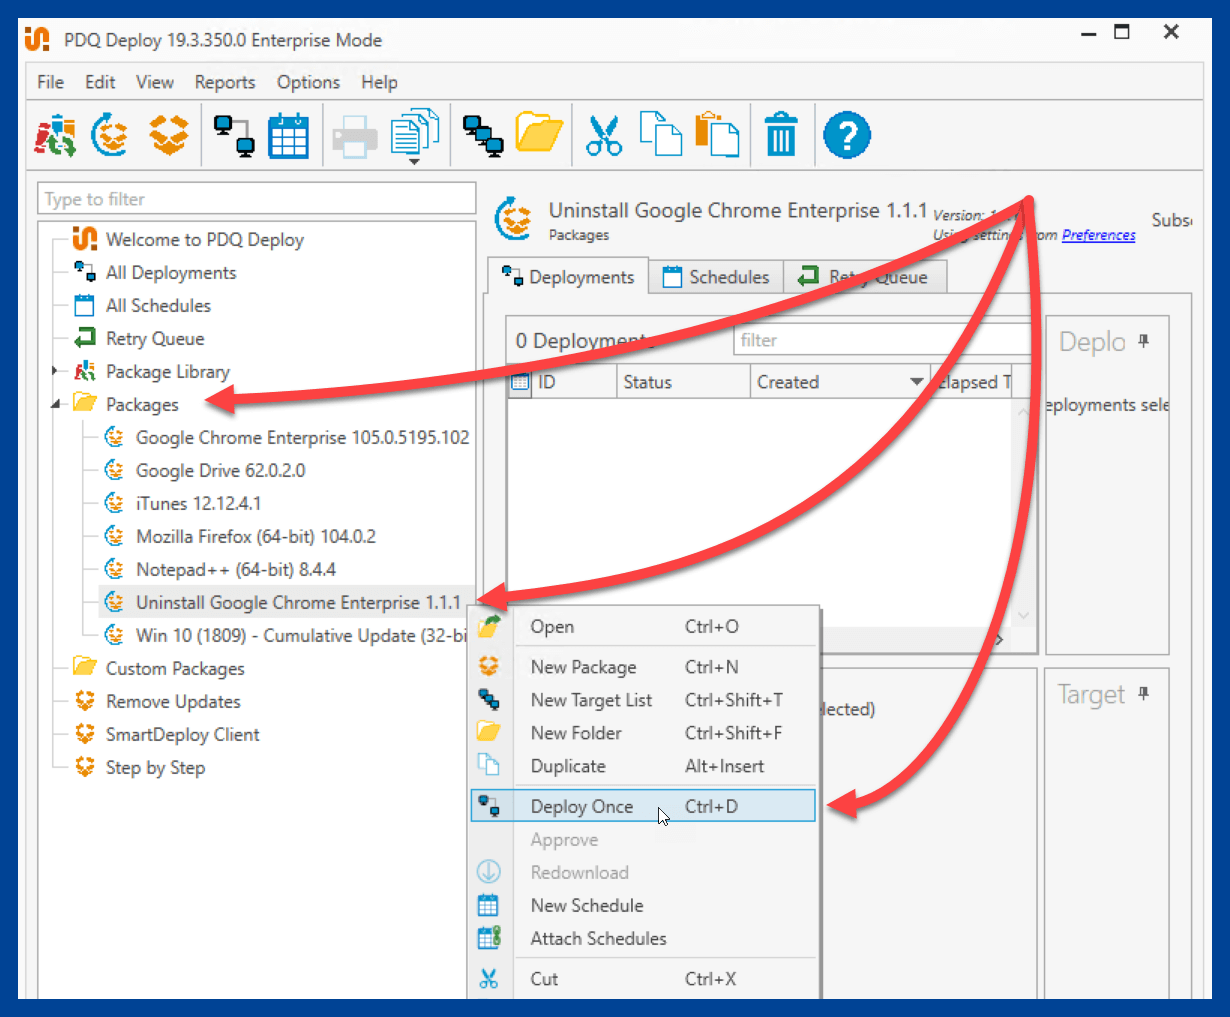
Expand the Packages folder, right-click on the Uninstall Google Chrome Enterprise package, then click Deploy Once.
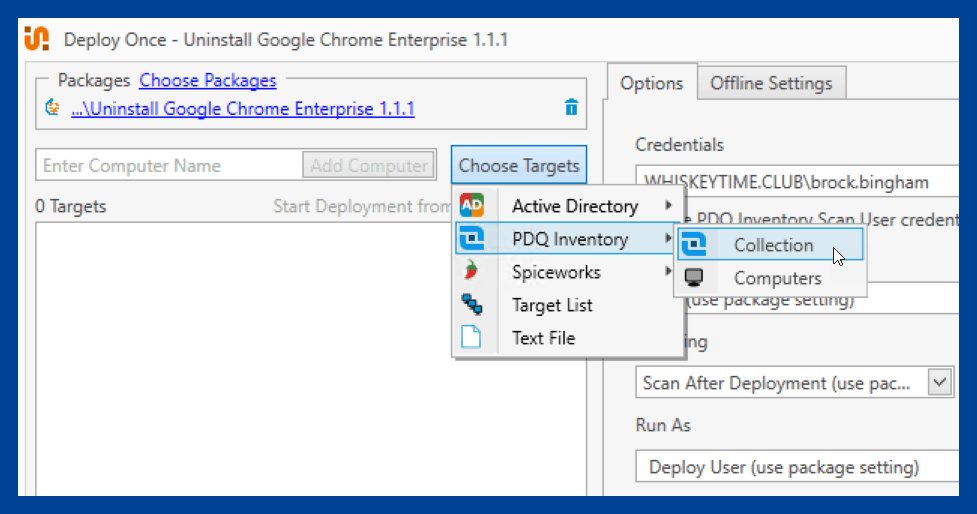
Click Choose Targets > PDQ Inventory > Collection.
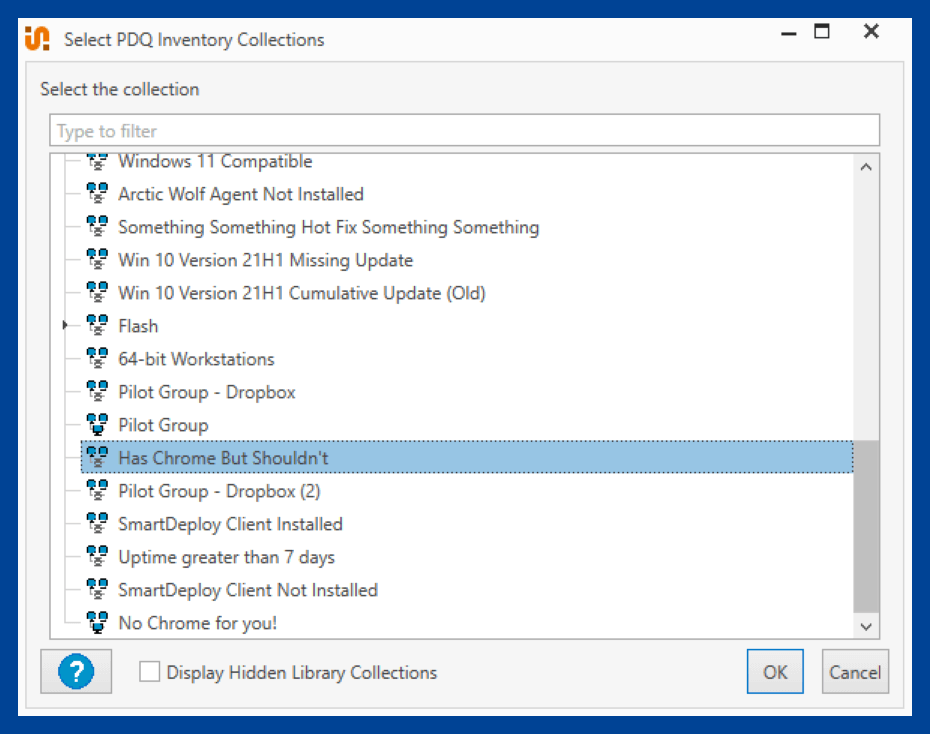
Select the Has Chrome But Shouldn’t collection we built in PDQ Inventory, then click OK.
Review the target list, then click Deploy Now if everything looks okay.


After the deployment finishes and the devices are scanned, the Has Chrome But Shouldn’t collection in PDQ Inventory shouldn’t have any more devices assigned to it.
Next, we’ll focus on installing Chrome on devices that need it and patching old versions of Chrome. We’ll also automate this process so Chrome stays up to date in the future.
Click the New Schedule button in PDQ Deploy.
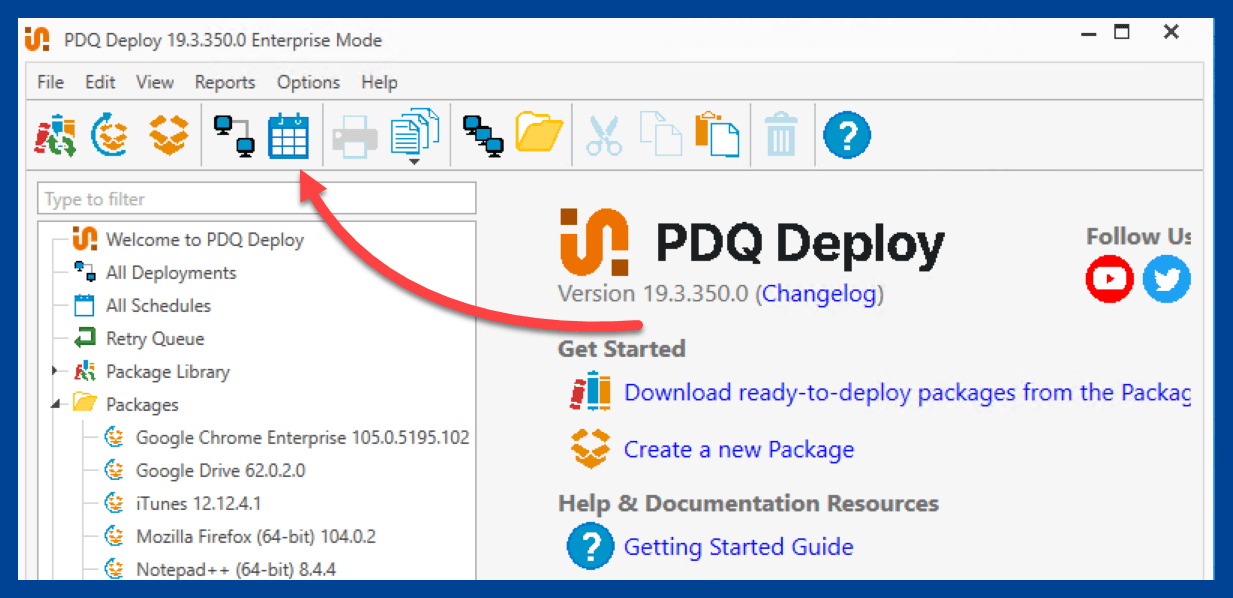
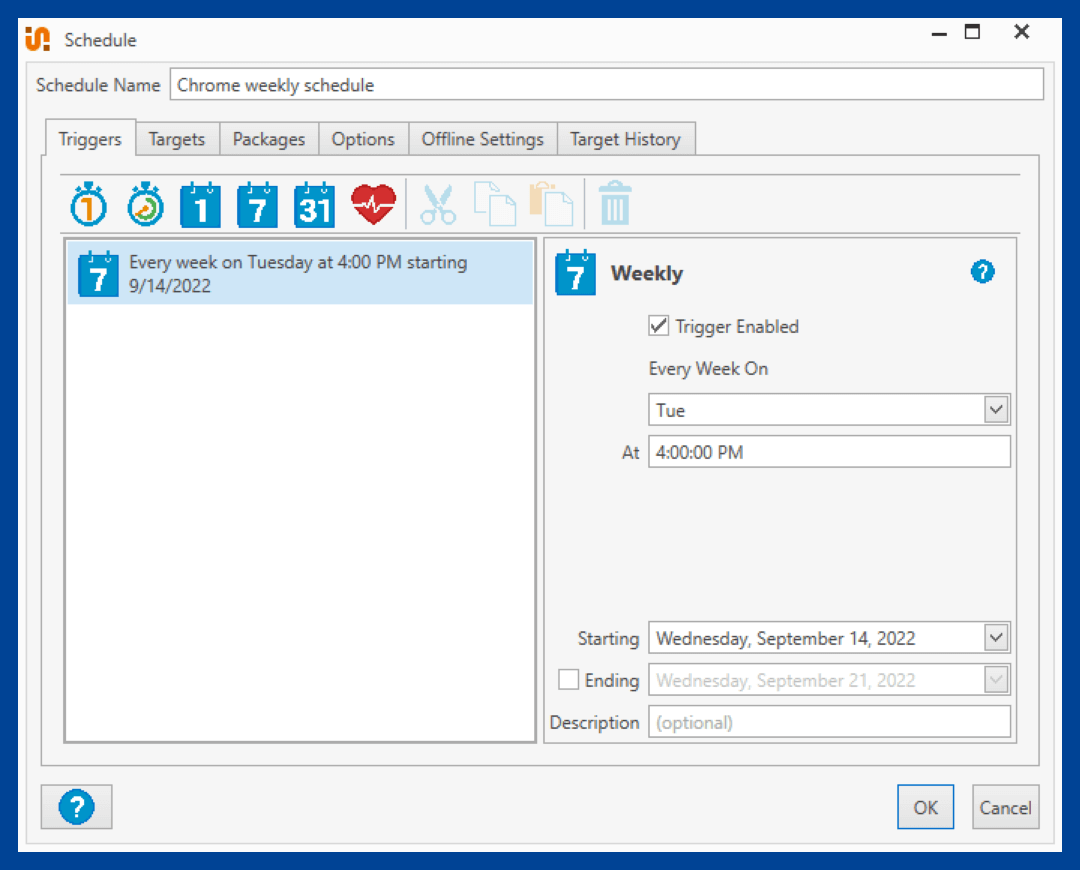
Add and descriptive schedule name, then click the Triggers tab.
Create a schedule that works for your organization. I’ll create a weekly schedule by clicking on the Weekly trigger button and configure it to run every Tuesday at 4 p.m.
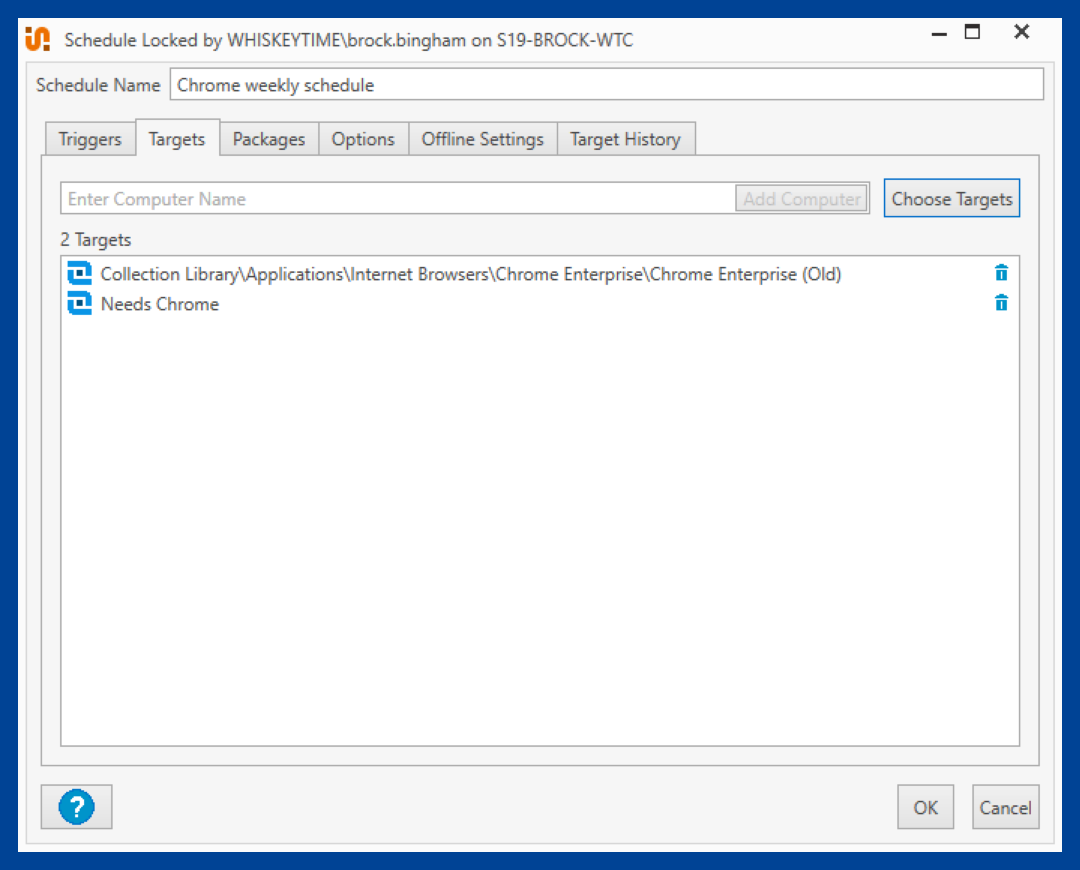
Click on the Targets tab, then click Choose Targets > PDQ Inventory > Collection.
Expand Collection Library > Applications > Internet Browsers > Chrome Enterprise, then select the Chrome Enterprise (Old) collection. Click OK.
Repeat step 4, then select the Needs Chrome collection we created. Click OK.
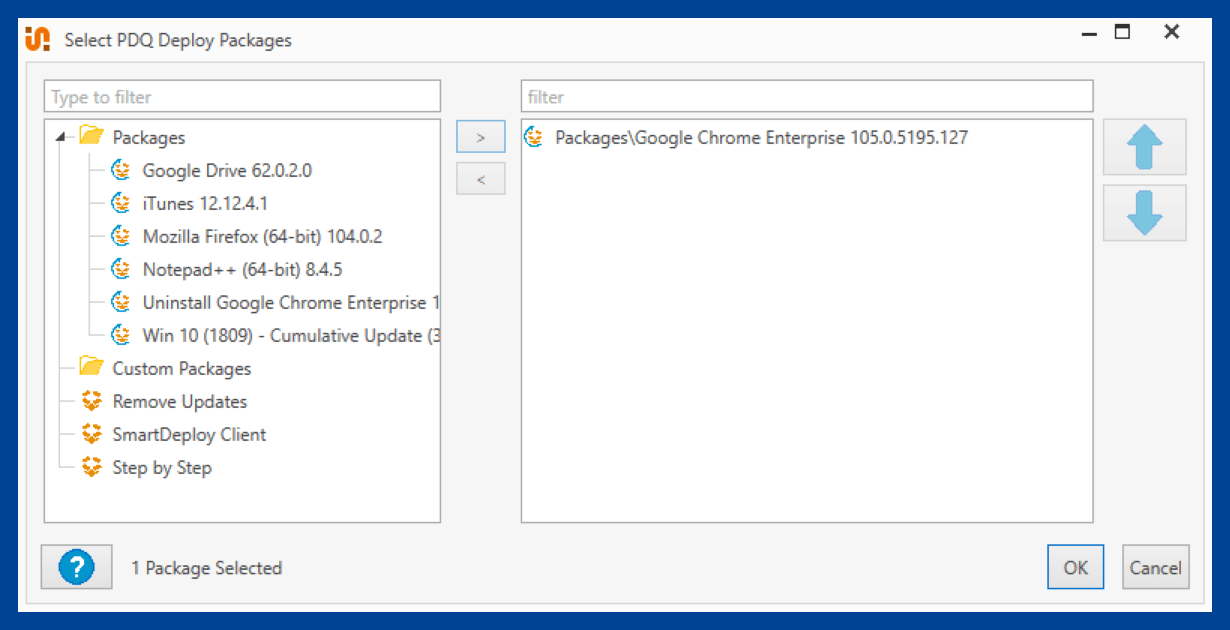
Click the Packages tab.
Click Attach Packages.
Select the Google Chrome Enterprise package, click the arrow to add it, then click OK.
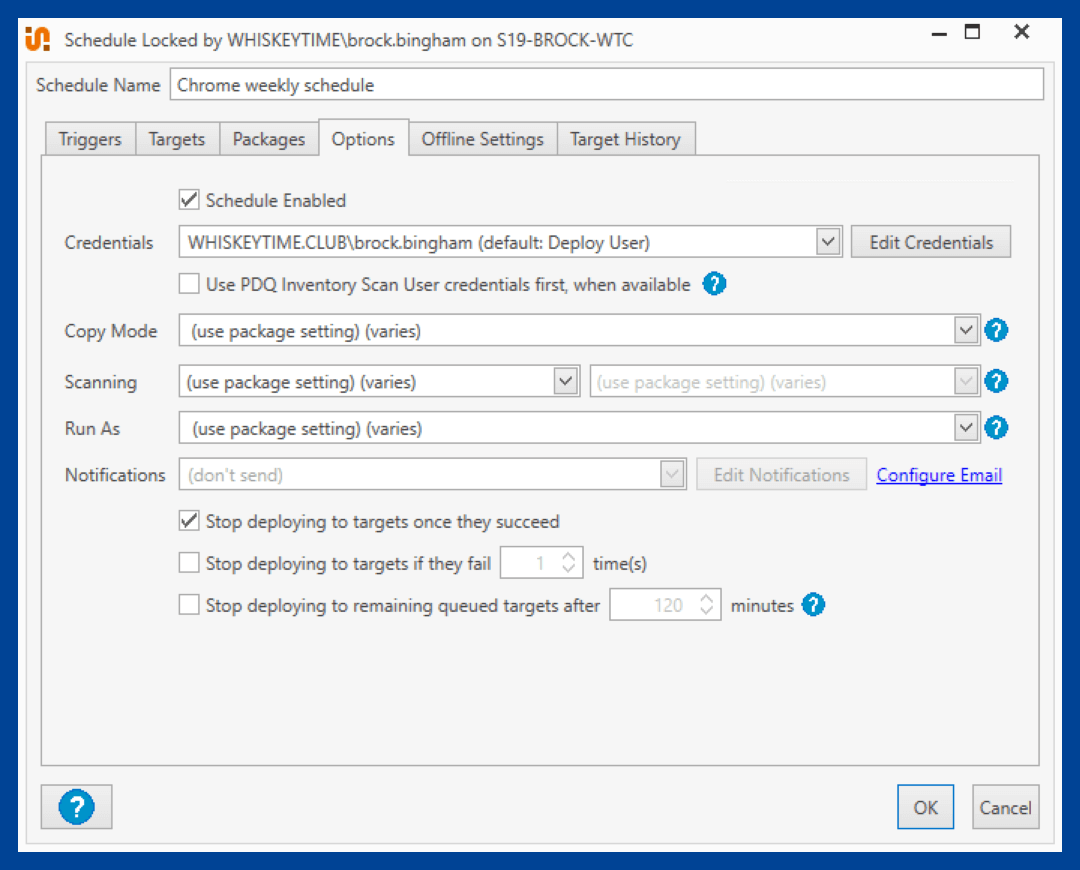
Click the Options tab, and ensure Stop deploying to targets once they succeed is checked. Click OK.


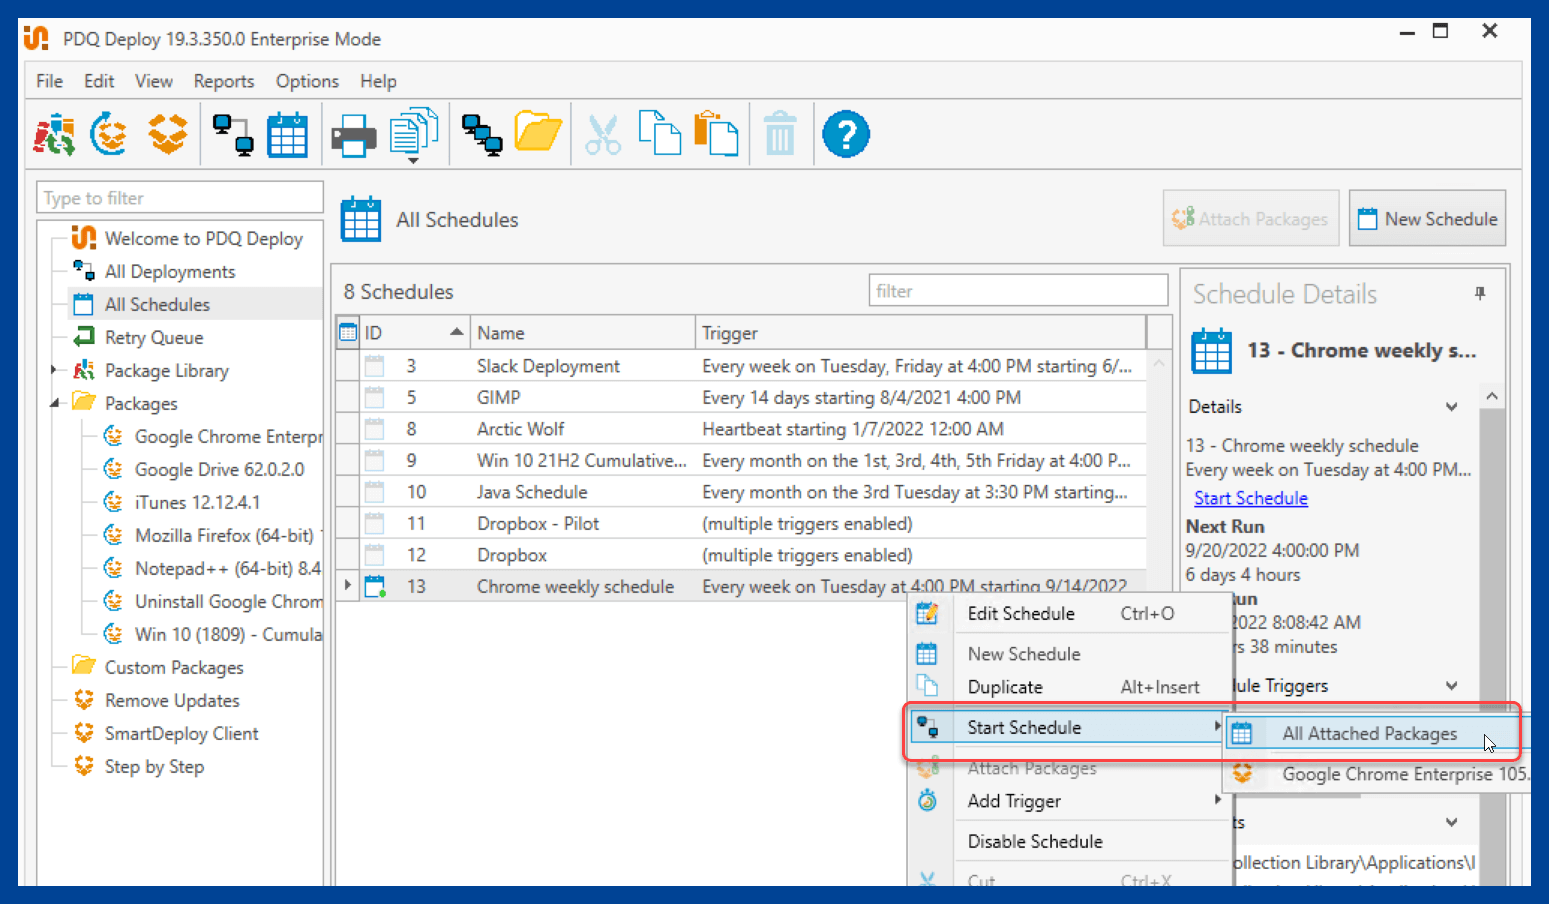
With the schedule created, your Chrome deployments have been automated. Congratulations, you’re winning at life. If you want to get the first deployment out of the way, you can manually trigger the schedule to run. Click All Schedules, right-click on the Chrome schedule, then select Start Schedule > All attached packages.
Managing Chrome with Group Policy
Now that we’ve got our Chrome installations under control, it’s time to lock it down — in the name of security, of course. To accomplish this, we’ll use Group Policy to enforce configuration settings. However, Group Policy doesn’t provide Google Chrome policies by default. We’ll need to add Chrome’s policy templates manually. Here’s how:
Tip: It may help to have File Name Extensions and Hidden Items checked in File Explorer to follow this guide.
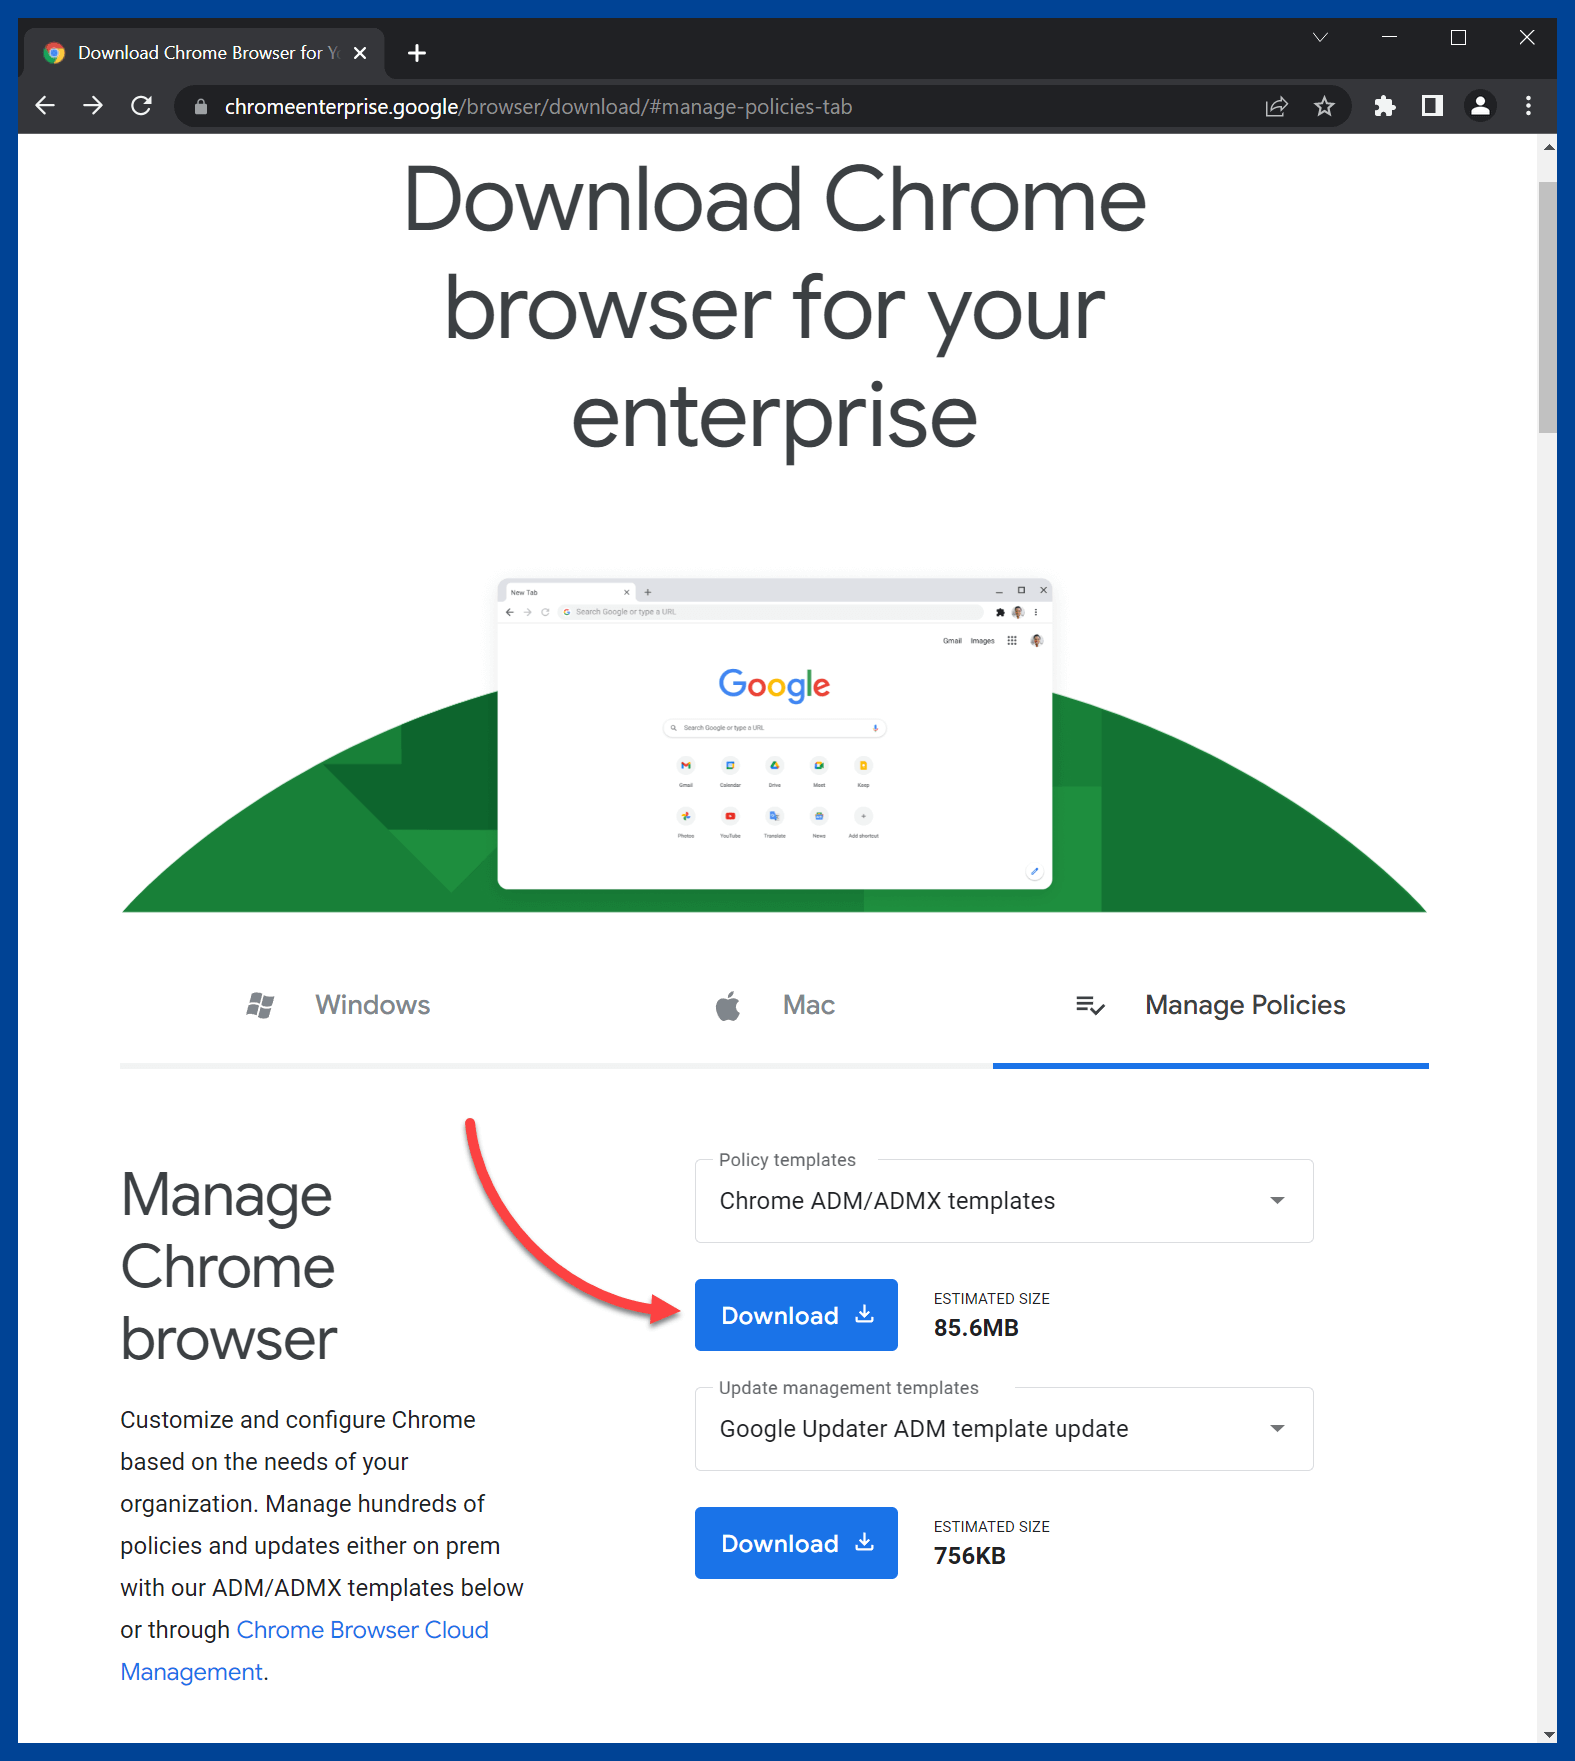
Head over to Google’s policy templates downloads page.
Click Download located under the Policy templates drop-down menu. This downloads a ZIP file containing the AMDX and ADML files we need.
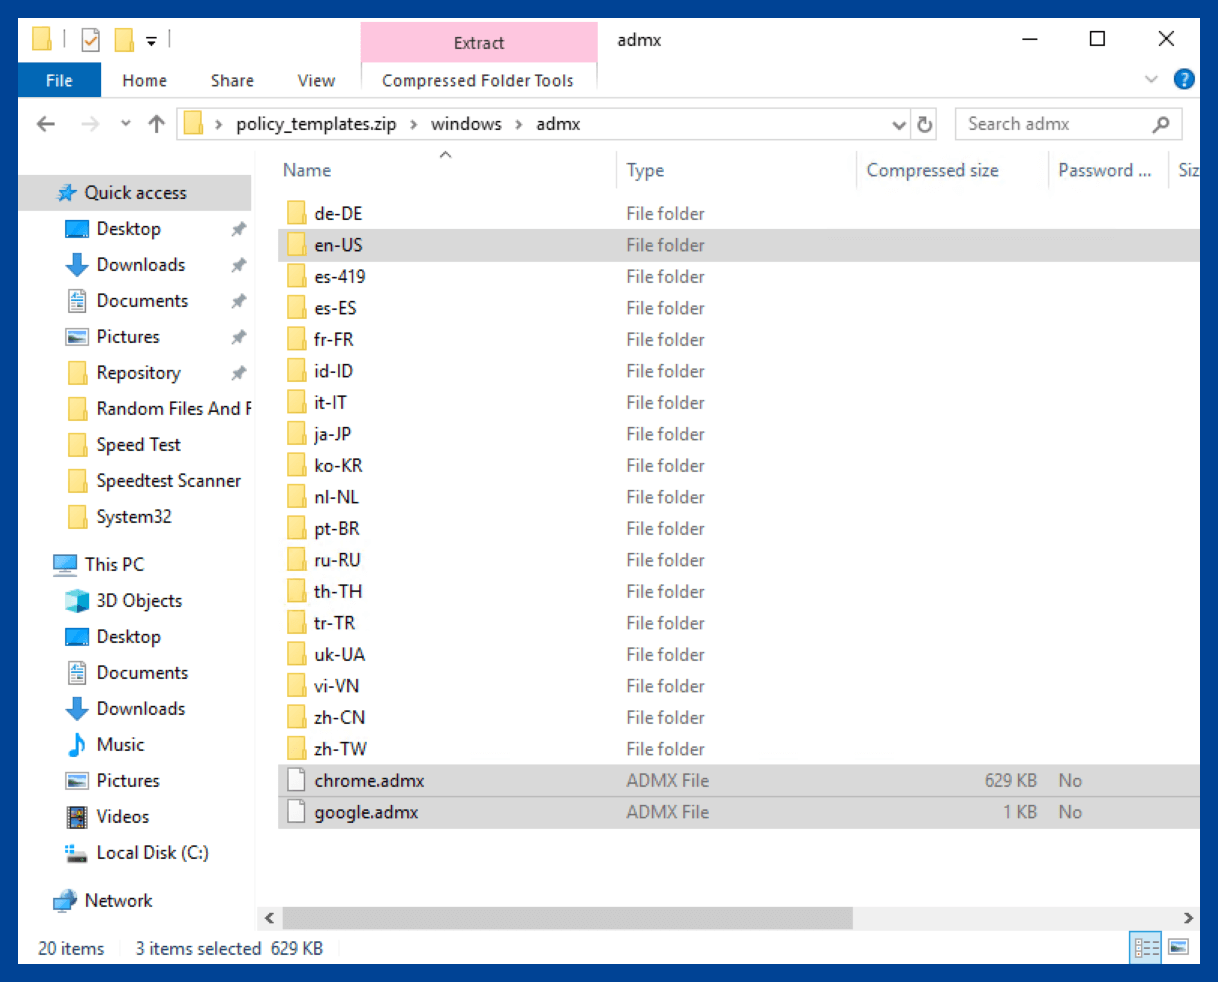
Open the ZIP file, and navigate to windows\admx. Copy chrome.admx, google.admx, and the en-US folder.
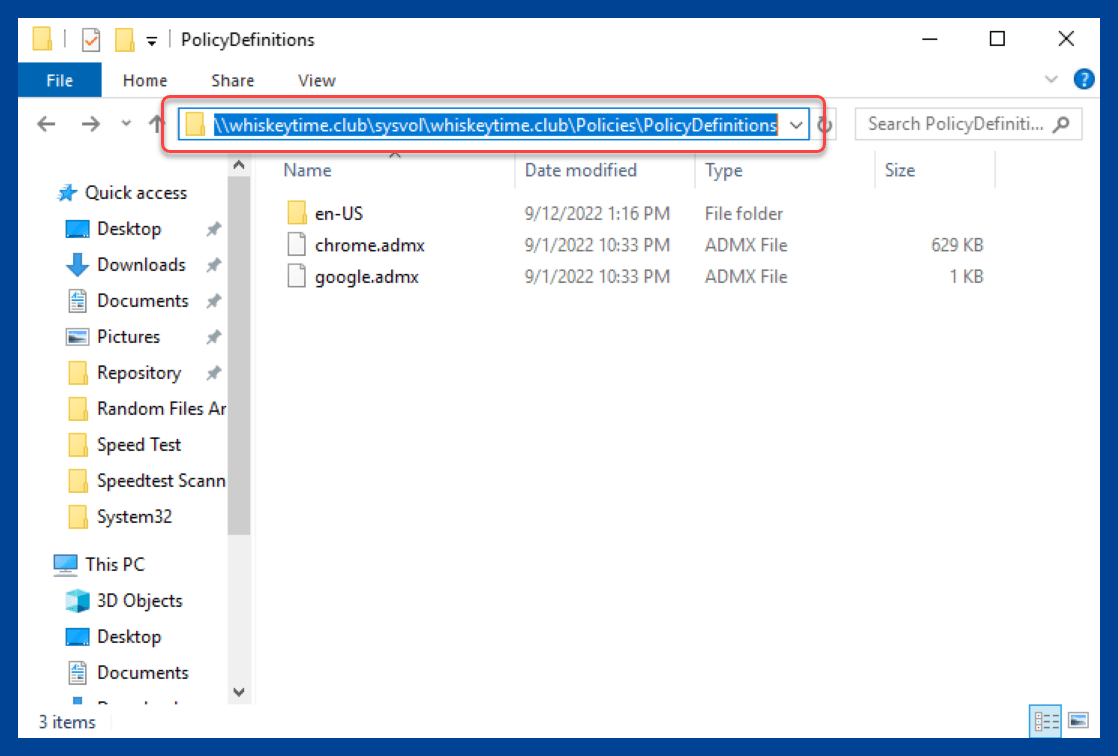
Navigate to your policy definitions folder. This folder should be located in SYSVOL at \\domain.com\sysvol\domain.com\Policies\PolicyDefinitions.
Paste the two files and the folder into this directory. If an en-US folder already exists, copy the two ADML files out of the en-US folder located in the downloaded ZIP file and manually copy them over. Do not overwrite an existing en-US folder. Your policy definitions folder should resemble this once you’ve finished copying the files and folders.


With the policy templates in place, we’re ready to start enforcing Chrome policies.
Open Group Policy Management. If you don’t have Group Policy Management, you’ll either need to add it using Remote Server Administration Tools (RSAT) or perform these steps on a server with Group Policy Management.
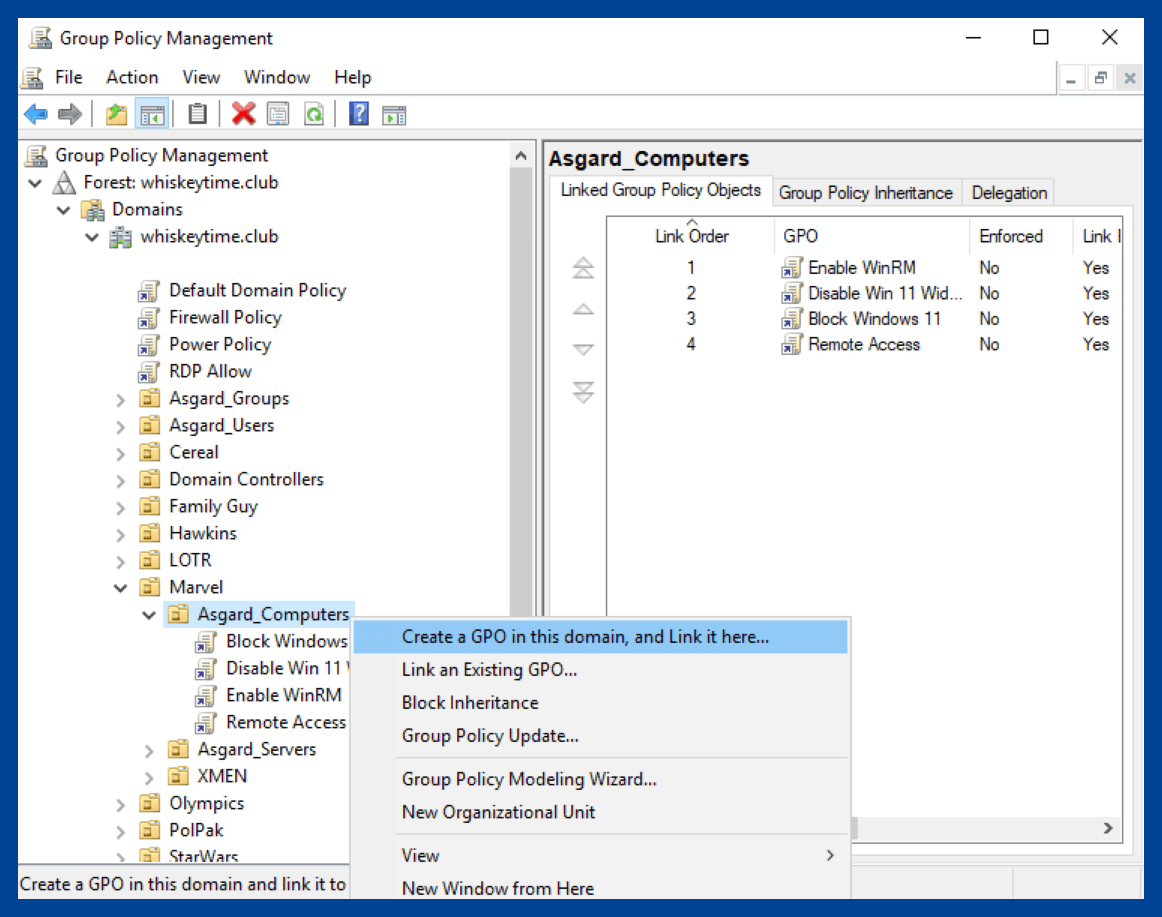
Right-click on the OU where you want to apply the Chrome policy, then click Create a GPO in this domain, and Link it here…
Give the Group Policy Object (GPO) a descriptive name, then click OK.

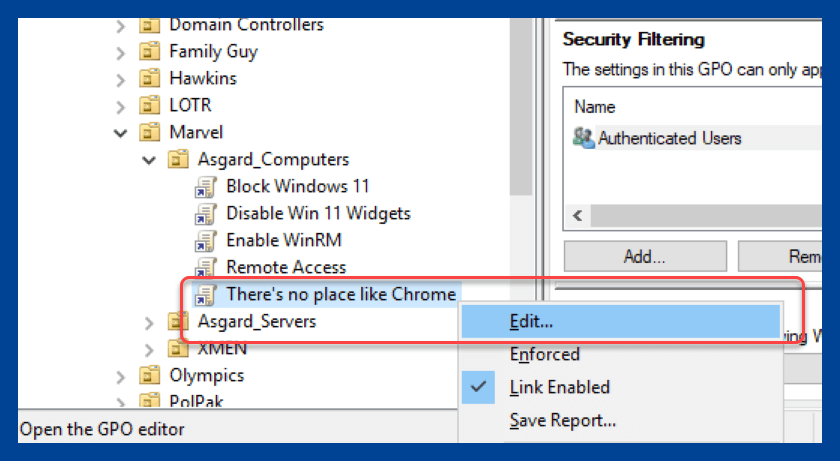
Right-click on the GPO, and click Edit.
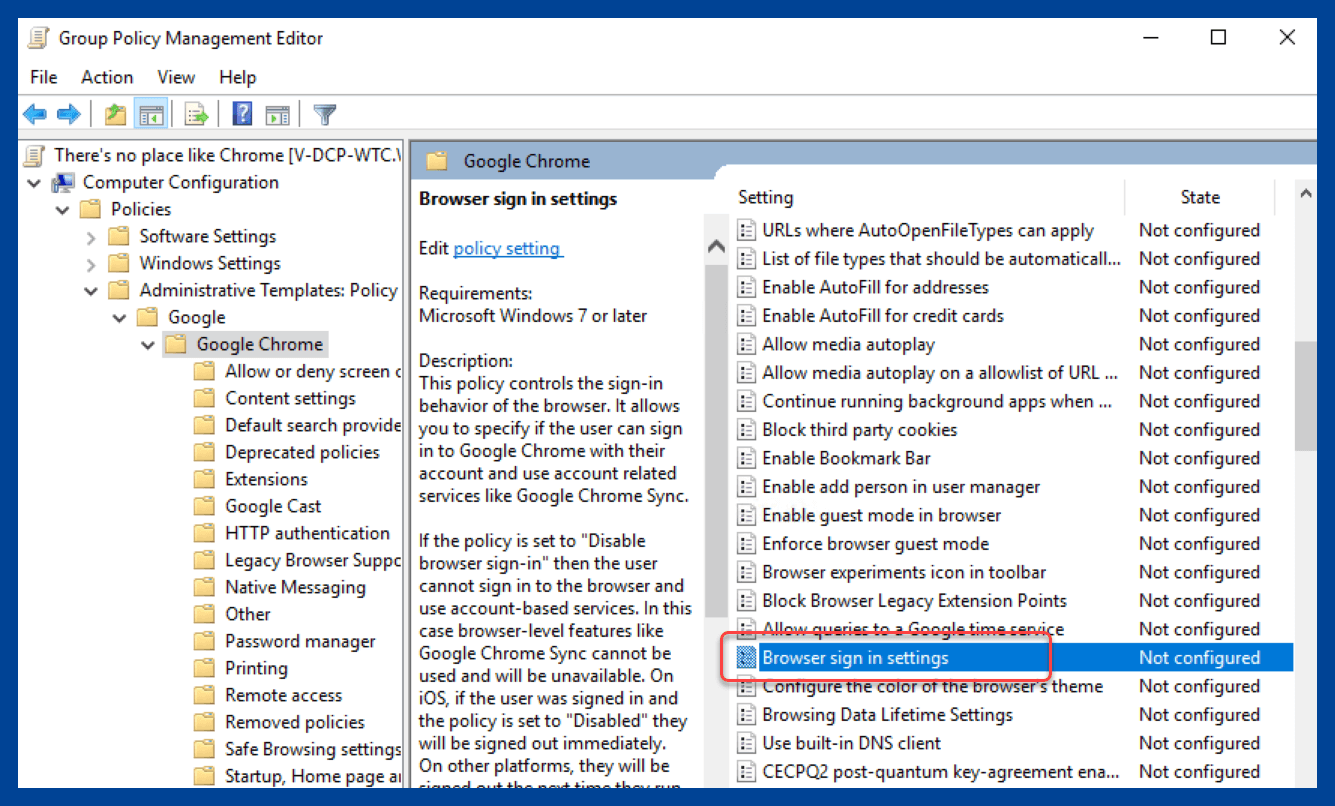
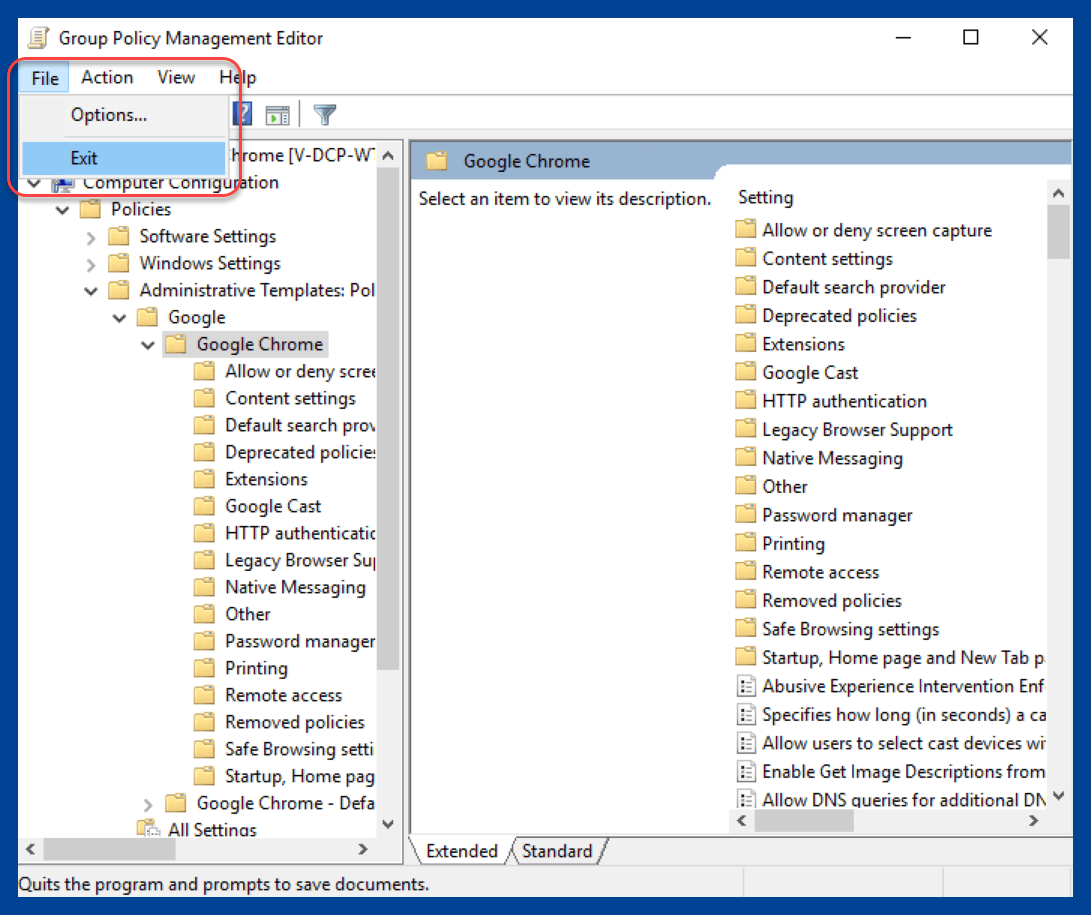
With the editor open, expand Computer Configuration > Policies > Administrative Template > Google > Google Chrome.
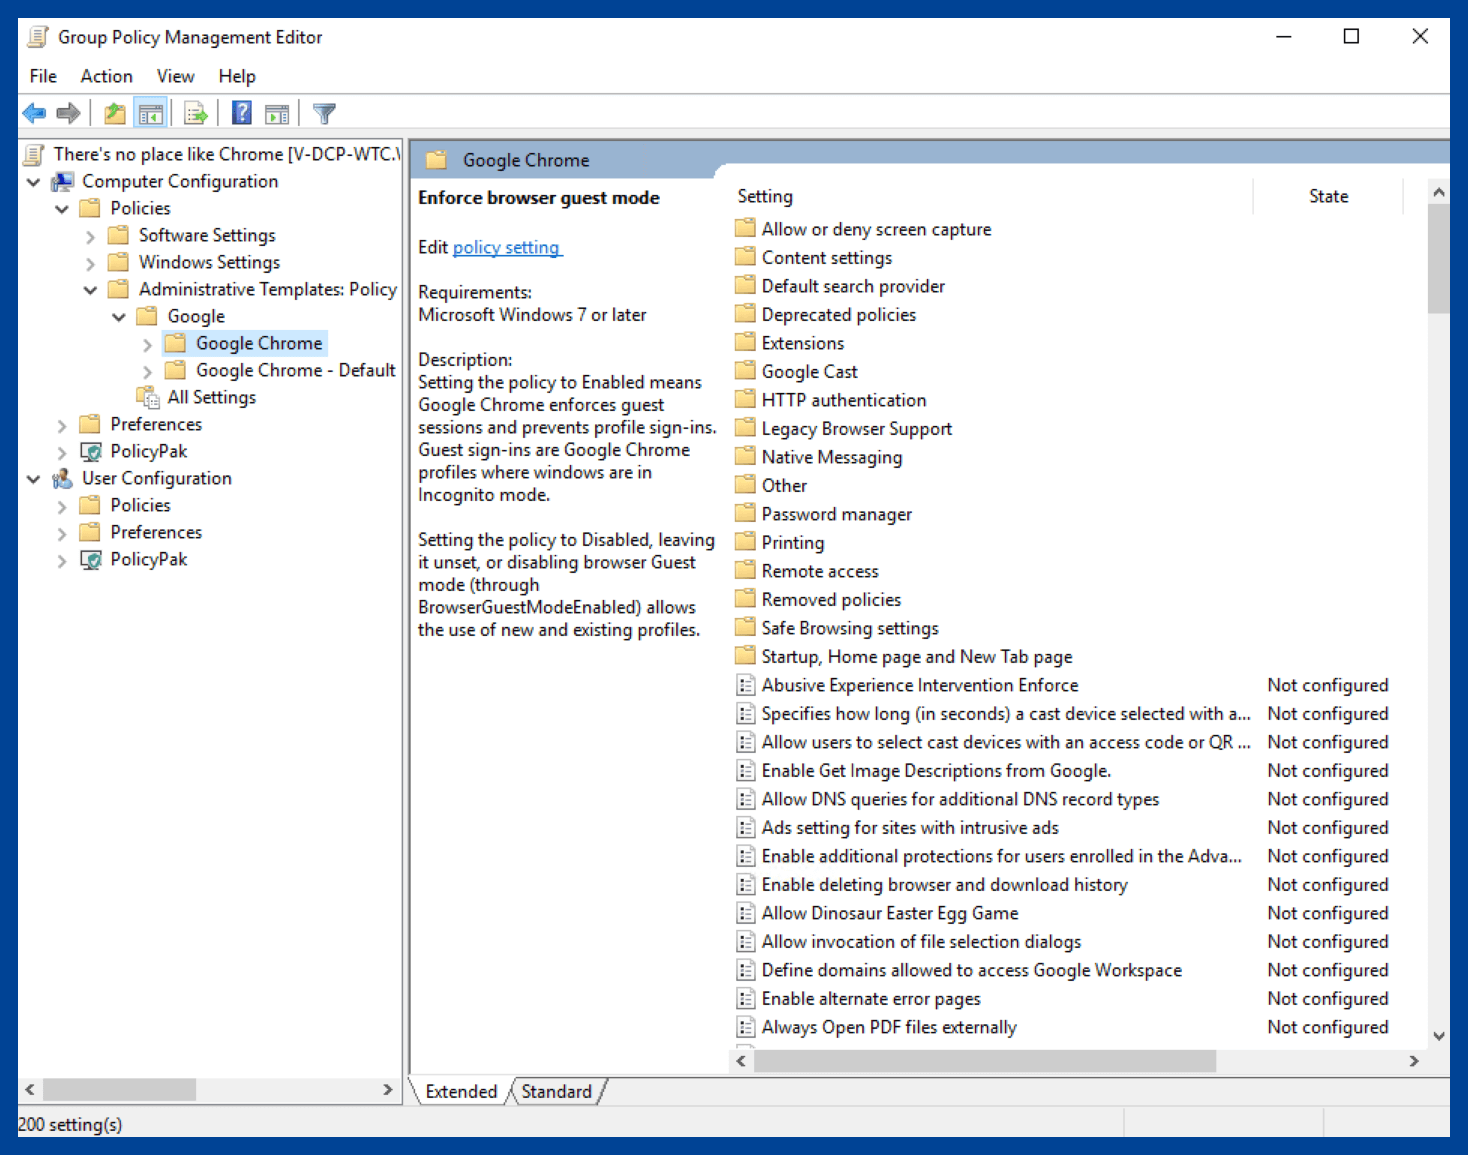


Here, you’ll find a very extensive list of Chrome settings that can be configured. There are well over 300 settings available. Policies configured here are applied to the computers in the OUs linked to this GPO. Clicking on each policy provides a description of what that policy does and how it works.
As an example, I’ll set the default homepage URL and lock the browser in guest mode so users can’t sign into the browser.
Double-click on the Browser sign in settings policy.
Select Enabled.
Use the Browser sign in settings drop-down menu to select Disable browser sign-in.
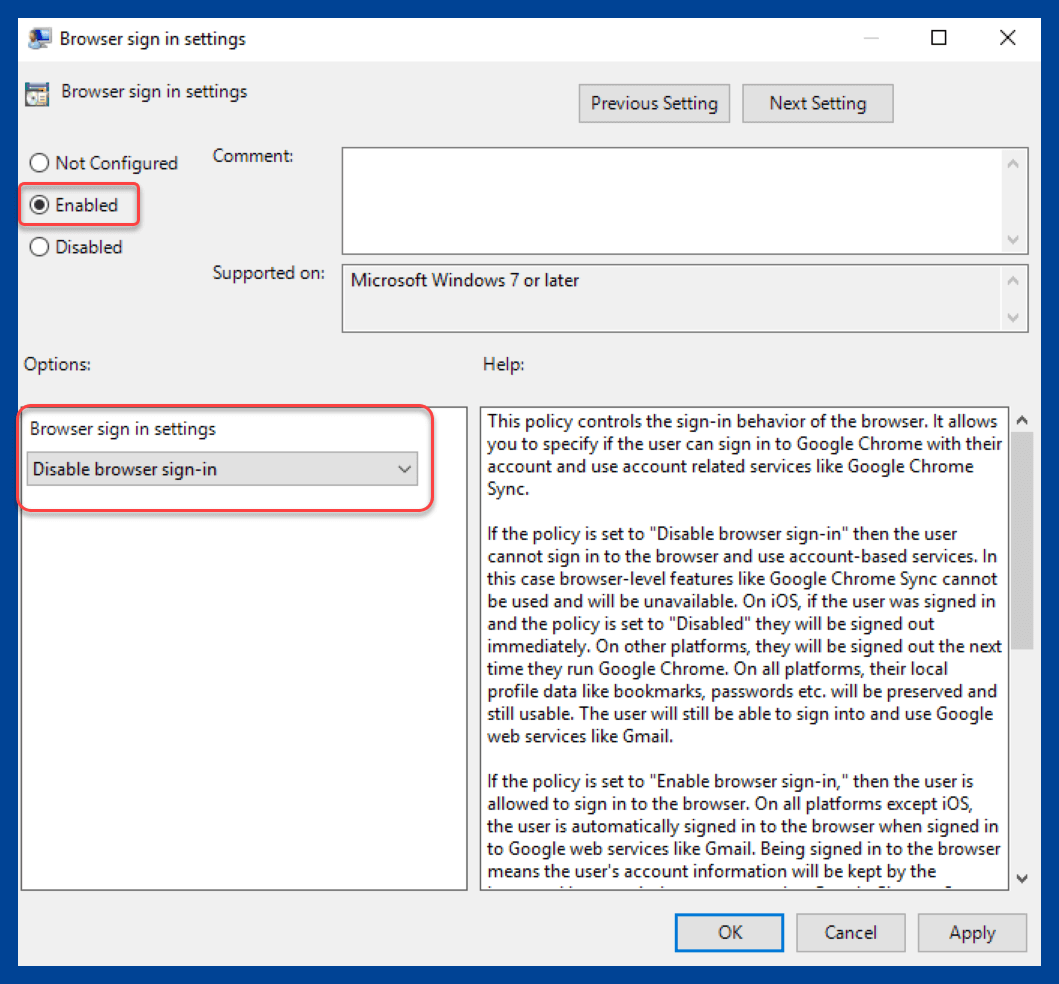
Click OK to save, and close the setting.
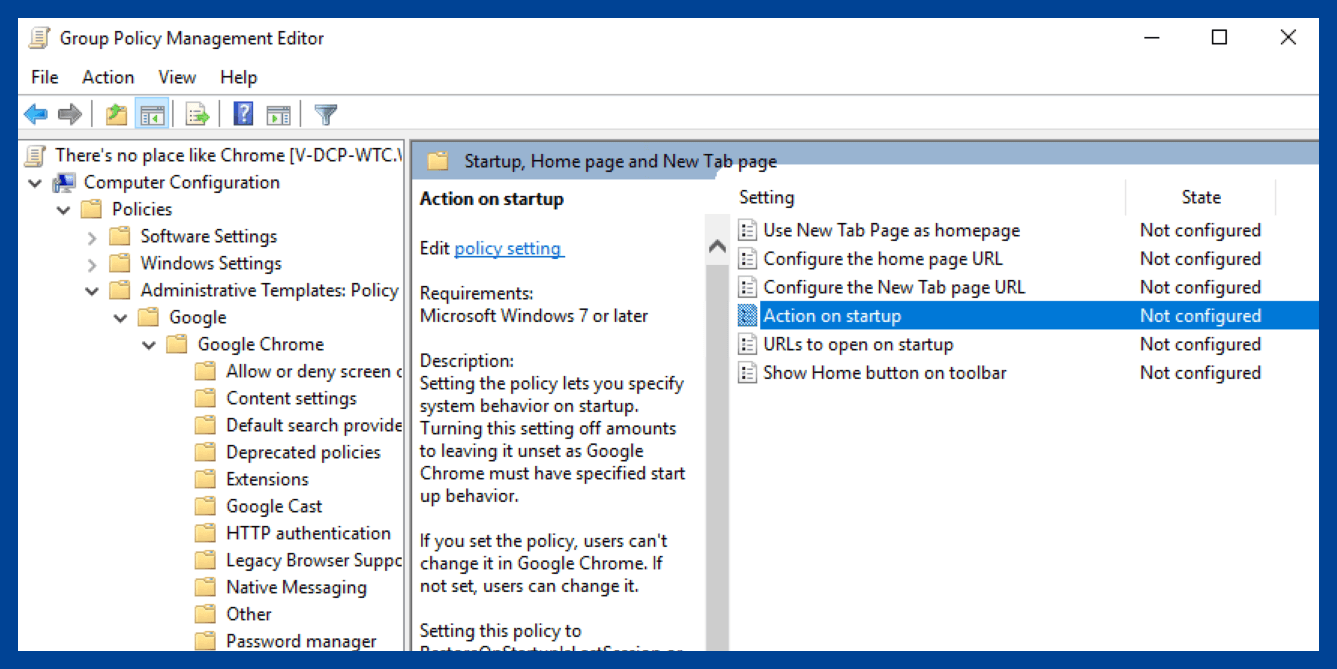
Double-click on the Startup, Home page, and New Tab page folder to open it.
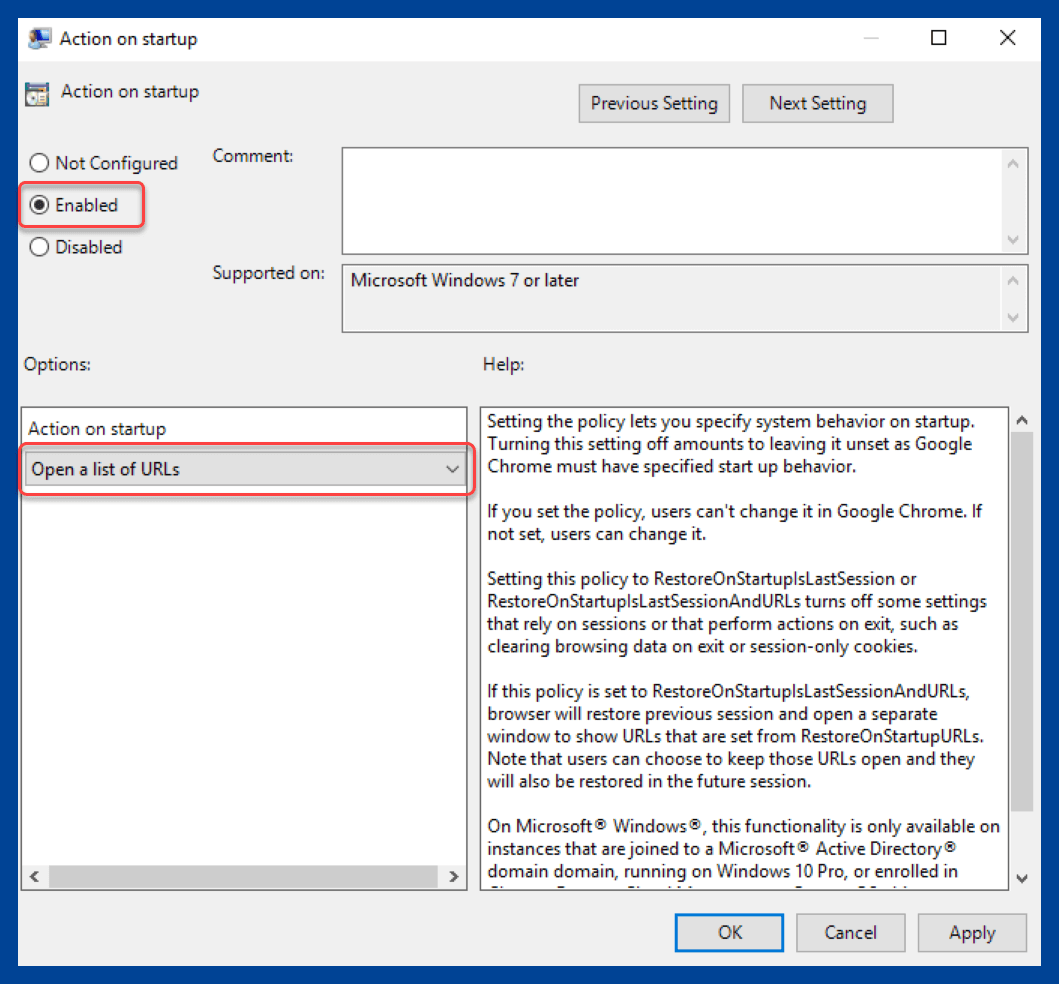
Double-click on the Action on startup setting.
Select Enabled.
Select the Open a list of URLs option from the Actions on startup drop-down menu, then click OK.
Double-click the URLs to open on startup setting.
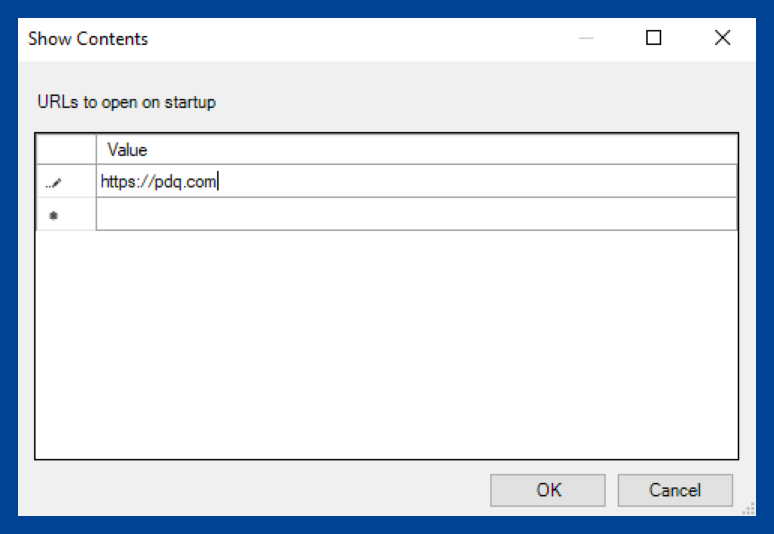
Select Enabled, then click the Show… button.
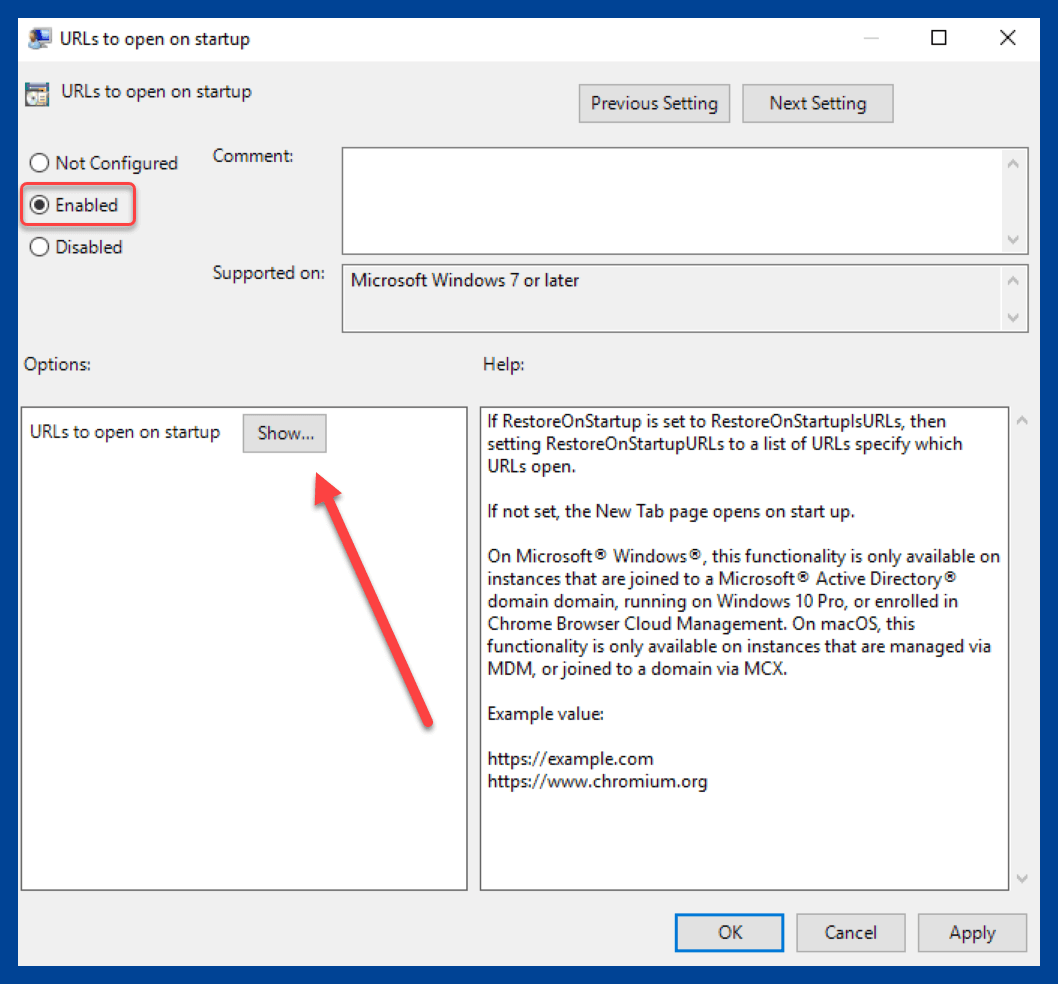
Enter the URL or URLs you wish to display when Chrome launches, then click OK.
Click OK to save and close the setting.
Click File > Exit to close Group Policy.


With the GPO saved, we’re ready to see the fruits of our labors. Log into a computer that has the policy applied. To ensure the machine’s group policies are up to date, open a PowerShell console window by right-clicking on the Start button, then clicking on Windows PowerShell.
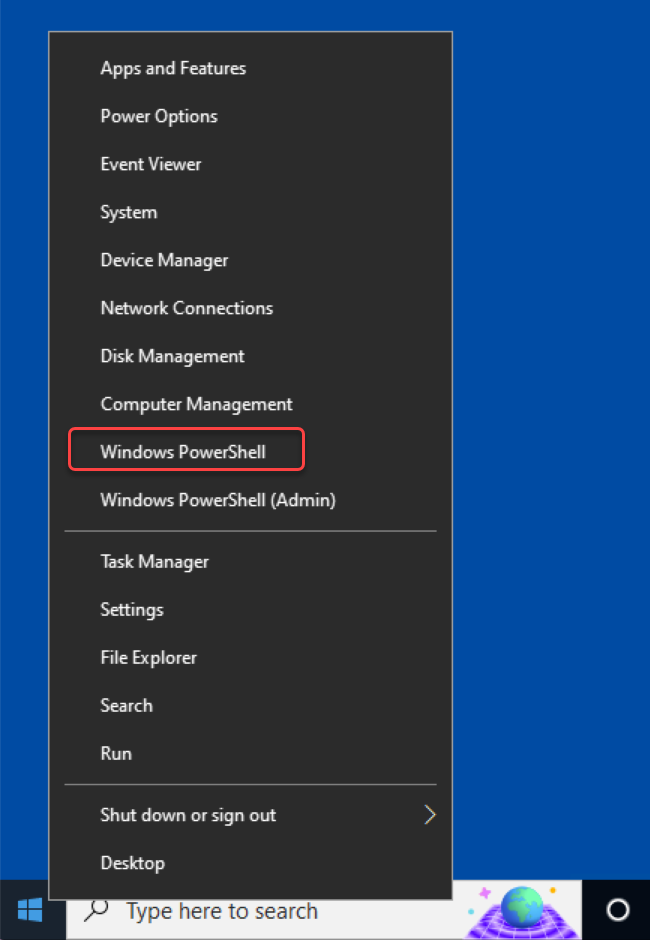
Enter and run the command gpudpate.exe /force.

With the policies updated, launch Chrome. The homepage we set in Group Policy should appear.

If we click on the profile button, we’ll also notice that we are unable to log in and sync our browser settings.

Show Chrome who’s boss
I know what you’re thinking. “Brock, I’ve read books that are shorter than this.” And that’s a fair point. But let’s face it, Chrome is everywhere. It’s on our phones, our computers, and even our smart TVs. It’ll probably be on our smart refrigerators soon if it isn’t already. Knowing how to get Chrome to bend the knee gives you control of one of the most widely used applications on the planet. To put it bluntly, knowing how to manage Google Chrome is knowledge worth having.
Know what else is worth having? PDQ Deploy and Inventory. Manage Chrome and hundreds of other applications with ease. Start your 14-day free trial of Deploy and Inventory today.