


The world is a confusing place, but your network doesn’t have to be. I’ll show you how to improve visibility into your managed IT environment and reduce workload using a handful of features in PDQ Inventory. If you’re ready to get started, disconnect your help desk line, disable your Slack notifications, and tell your coworkers they’re on their own. Done? Great, let’s get started.
This guide highlights several features in PDQ Inventory that simplify and streamline asset management. If you’re new to PDQ Inventory and want to follow along, we’ve got you covered. Download a free trial today and discover how PDQ Inventory can elevate your sysadmin game.
Use variables to reduce your workload
Variables in PDQ Inventory can streamline workflows and provide more accurate insights into your managed environment. Plus, they’re super easy to implement. It’s a classic win-win situation.
Variables are centrally stored and managed, meaning you can reference them in dozens of places and manage them in one. For example, you can create a variable that stores the version number of an application and use that variable in multiple collections or reports. When the time comes to update the version number of that variable, simply change it in the variable menu. All other systems that use the variable automatically reference the new version number.
System variables
Out of the box, PDQ Inventory uses hundreds of prebuilt variables called system variables. To view the list of system variables, click on Options > Variables, then click the System tab.
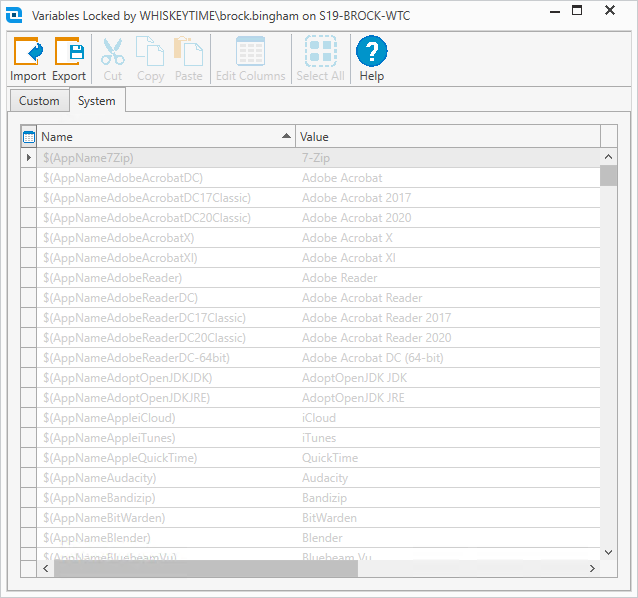
Notice that each variable consists of a name and a value and that each name starts with a $ symbol. The dollar symbol serves as an identifier for all system variables so users can easily recognize them. While users are unable to edit system variables, they can still utilize them when building collections, tools, scanners, and reports.
Custom variables
PDQ Inventory gives users the ability to create custom variables. To navigate to the custom variables menu, click Options > Variables, then click on the Custom tab.

From the custom variables menu, you can add, edit, and delete custom variables. Notice that custom variable names are prefaced with the @ symbol. The different symbols help users quickly distinguish between system and custom variables.
To create a custom variable, click New Variable, or click into the bottom row of the variables table. Enter the name of the variable, followed by the value. Keep in mind that the @ symbol and the parentheses are required in custom variable names and are automatically added if left off.
While you can utilize custom variables in many ways, a common use is to monitor software installations. As an example, I’ve created two variables that help me track 5KPlayer installations. One variable stores the application name, while the other stores the application’s current version information.
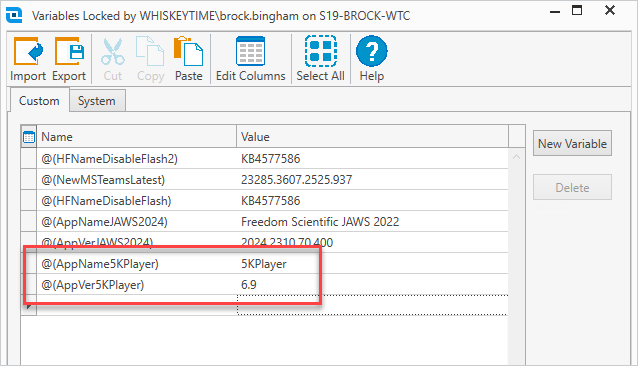
Notice that I follow the naming convention used by the system variables, which is AppName5KPlayer and AppVer5KPlayer. While this isn’t necessary, it helps keep the variable names short yet descriptive.
Combine variables and dynamic collections for unparalleled asset tracking
Let’s look at a simple yet powerful example of how you can use the variables we just created in PDQ Inventory. We’ll start by building a dynamic collection that references the variables. Again, as we modify the variable, the collections automatically reference the new values assigned to the variables.
In PDQ Inventory click New Dynamic Collection.
Enter a name for the collection. Since I’m using 5KPlayer for this example, I’ll call this collection 5KPlayer Installed.
Add the value filter Application | Name | Contains. In the value field, click the variable icon, then click Custom. Finally, select the custom variable you want to add. In this case, I’ll select the @(AppName5KPlayer) variable.
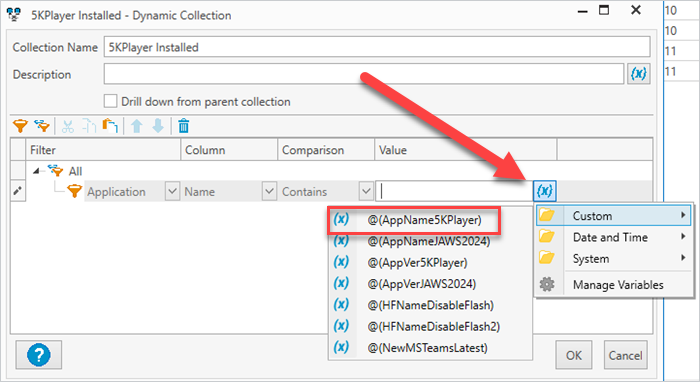
Click OK to save the dynamic collection.

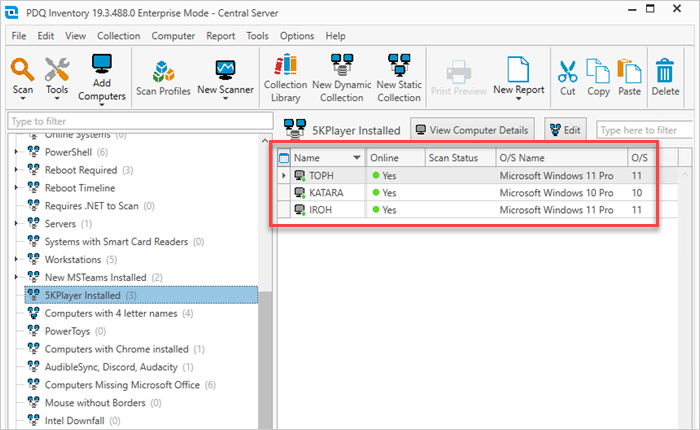
This collection should now contain all computers that have 5KPlayer installed. I’ll select the collection to verify the results. In my environment, I’ve got three computers with 5KPlayer installed.
Now let’s take it a step further and create a collection that only contains computers that have the latest version of 5KPlayer installed.
Right-click on the 5KPlayer collection, then click Duplicate.
Double-click the duplicated collection to edit it.
Change the name to 5KPlayer (latest).
Add a second value filter with these settings: Application | Version | Equals | @(AppVer5KPlayer).
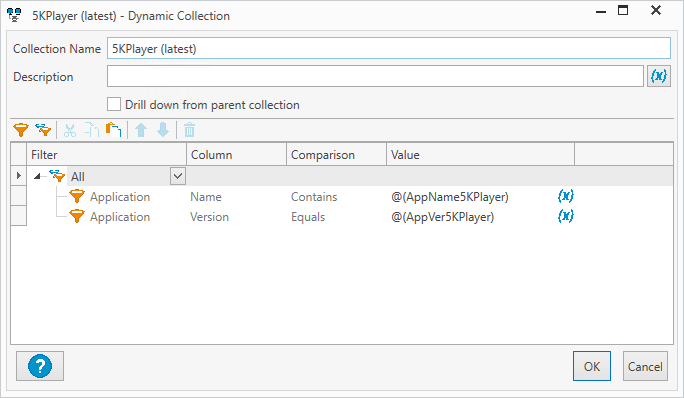
Click OK when finished to save and close the collection.

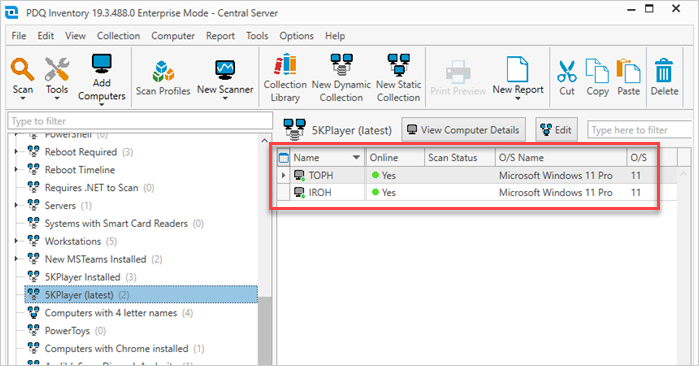
If I select the collection to verify the results, I see that I’ve only got two computers with the latest version of 5KPlayer installed.
The best part is that since we utilized variables, it doesn’t matter how many collections we create — we can simply modify the variable values and all the collections remain updated and current.
Convert dynamic collections into reports
Now that we’ve got our variables and dynamic collections created, let’s wrap up by creating a report. Creating reports becomes effortless if you already have a collection created. Here’s how to create a report based on a collection in PDQ Inventory.
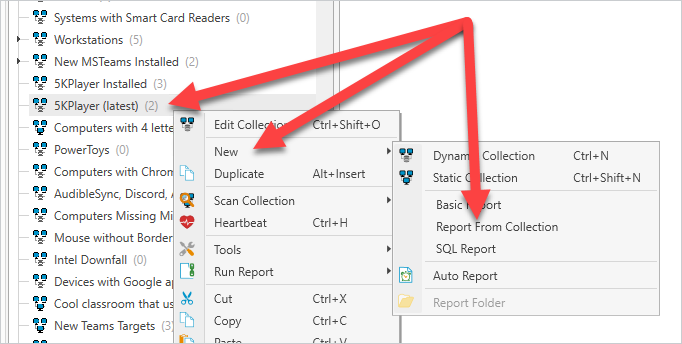
Right-click on the 5KPlayer (latest) collection we created, then click New > Report From Collection.
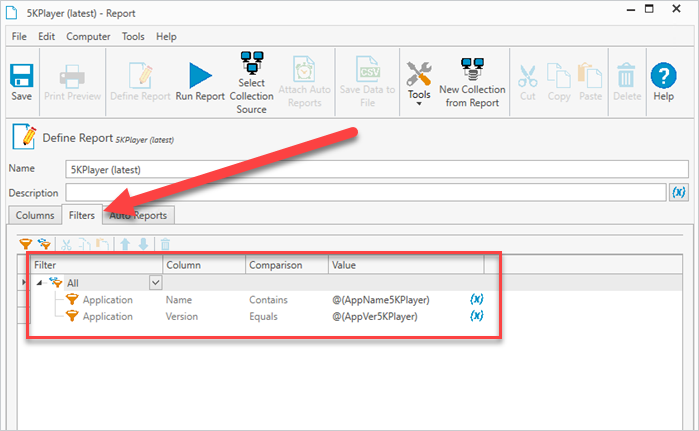
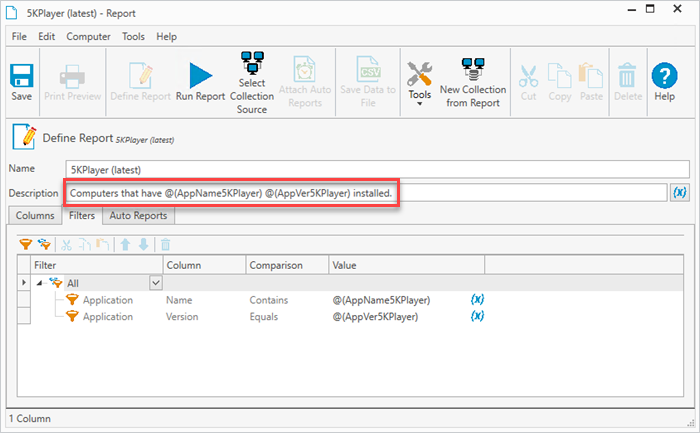
Click on the filters tab and ensure the filters carried over from the collection.
Since we’re feeling ambitious, let’s add a description to the report and utilize our variables. In the Description field, add Computers that have @(AppName5KPlayer) @(AppVer5KPlayer) installed.
Finally, let’s click the Run Report button to see what the final product looks like.
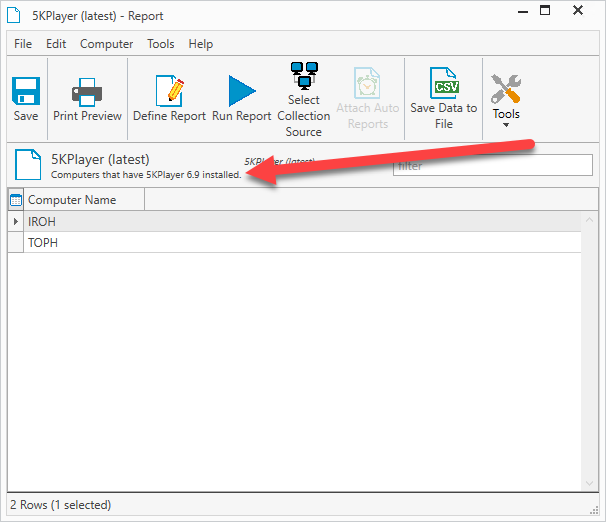


Check it out. Our report is finished, the results are accurate, and the description is impressive enough to warrant a raise! I’m just kidding about the raise. But your boss may reward you with a fist bump — which is nice.