SmartDeploy, the extremely powerful desktop management system with class-leading imaging functionality, recently joined the PDQ family. And just like peanut butter and jelly, macaroni and cheese, or biscuits and gravy, SmartDeploy and PDQ Deploy & Inventory are a match made in heaven. Side note: I may have an eating problem.
For example: Did you know you can distribute the SmartDeploy client with PDQ Deploy and track the installations with PDQ Inventory? In this guide, we’ll show you how! Make sure you have SmartDeploy, PDQ Deploy, and PDQ Inventory installed, and we’ll get started.
Generating the SmartDeploy client
The first thing we need to do is create the SmartDeploy client. Thankfully, SmartDeploy and PDQ share the same philosophy that simplicity is of the utmost importance. We can generate the client directly from the SmartDeploy console.
1. In the SmartDeploy console, select the Activities workspace, and click Add Devices.
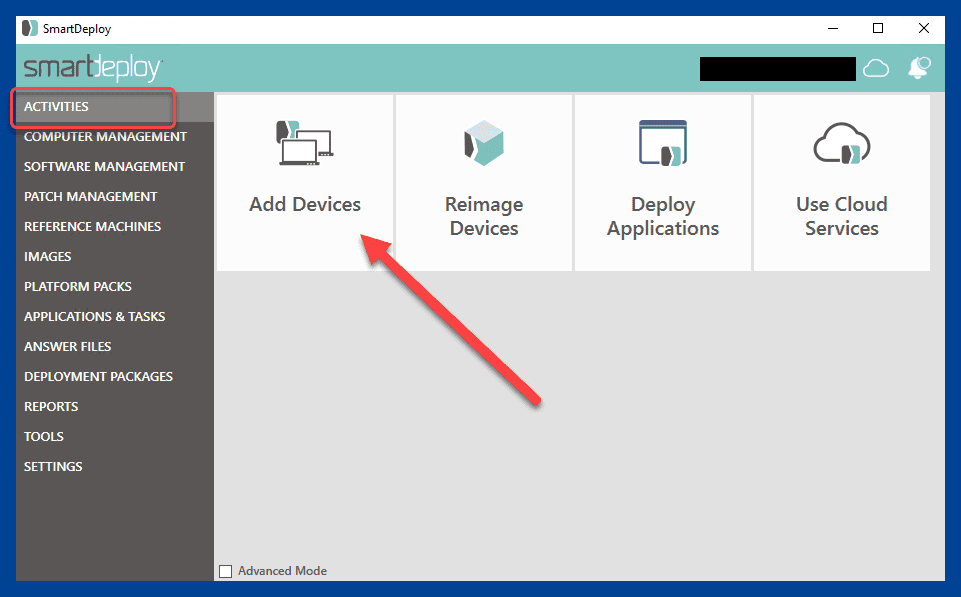
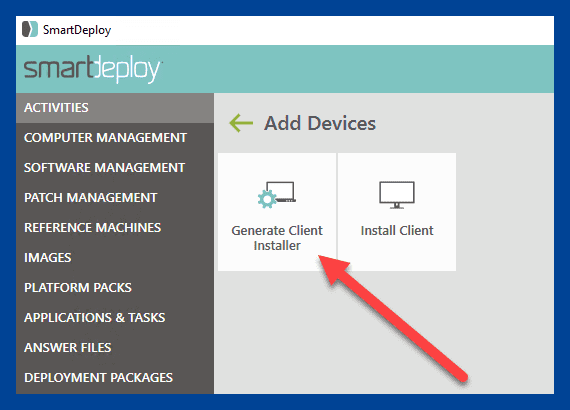
2. Click Generate Client Installer.
3. Confirm the information in your SmartDeploy API Service URL field is correct.
4. Choose your installer architecture.
5. Optional: Select Cloud Only Connection to force clients to use the cloud to connect to your console, regardless of whether they’re on the same local network or connected via VPN.
6. Enter a location to save the file.
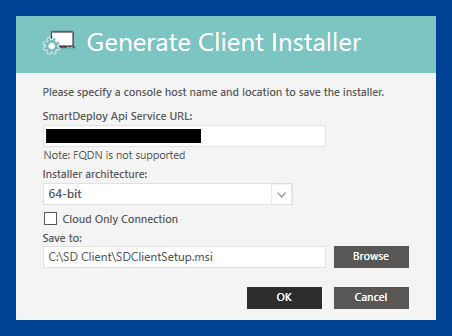
7. Click OK to create the client installer.
Creating a SmartDeploy client collection in PDQ Inventory
Now that we’ve got our client installer, we need to create a couple of dynamic collections in PDQ Inventory. Dynamic collections make it easy to identify which computers have the client installed and which do not.
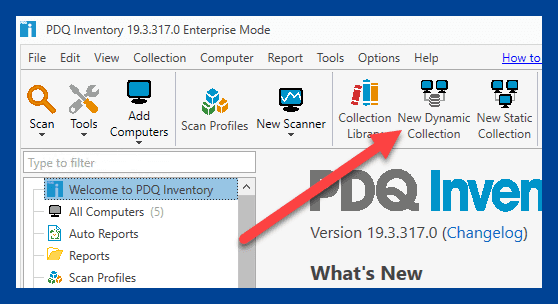
1. In PDQ Inventory, click New Dynamic Collection.
2. Enter SmartDeploy Client Installed as the collection name.
3. Use the following filters:
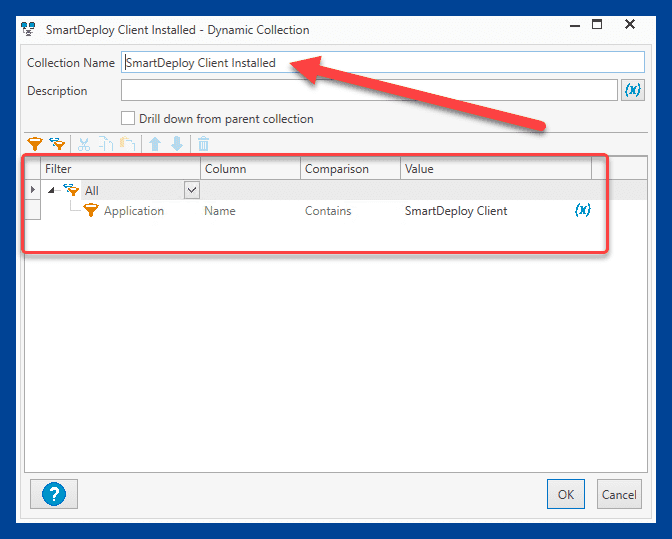
4. Click OK to save the collection.
This collection will contain all the computers that have the SmartDeploy client installed.
Next, we’ll create a collection containing all the computers that do not have the SmartDeploy client installed.
1. Right-click on the SmartDeploy Client Installed collection, and click Duplicate.
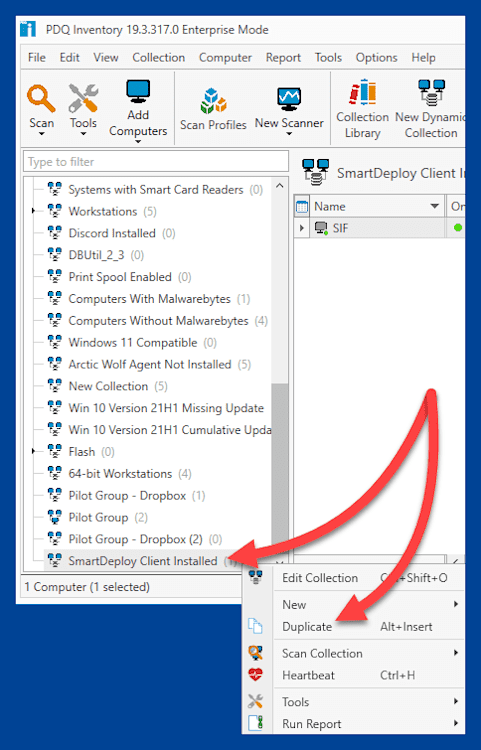
2. Double-click on the duplicated collection to modify it.
3. Rename the collection to SmartDeploy Client Not Installed.
4. Change the filter to the following:
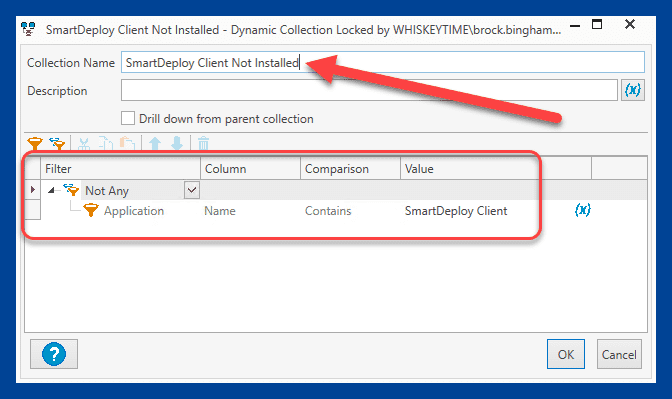
5. Click OK to save and close the collection.
With the collections created, we can target them with the deployment later in the guide.
Creating a SmartDeploy client package in PDQ Deploy
Now that we have our collections, we’re ready to make our SmartDeploy client package.
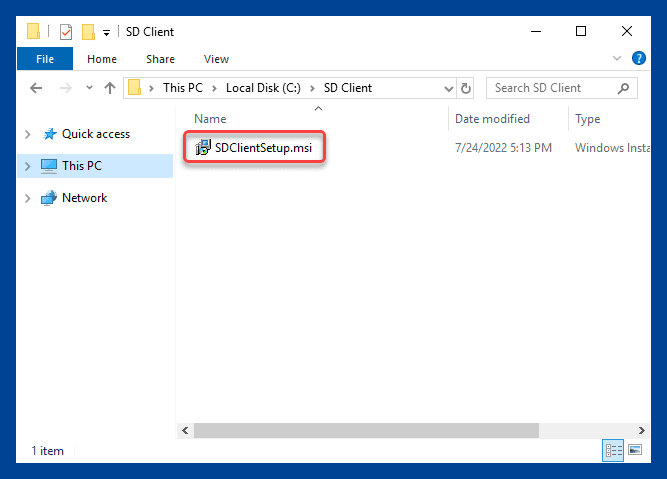
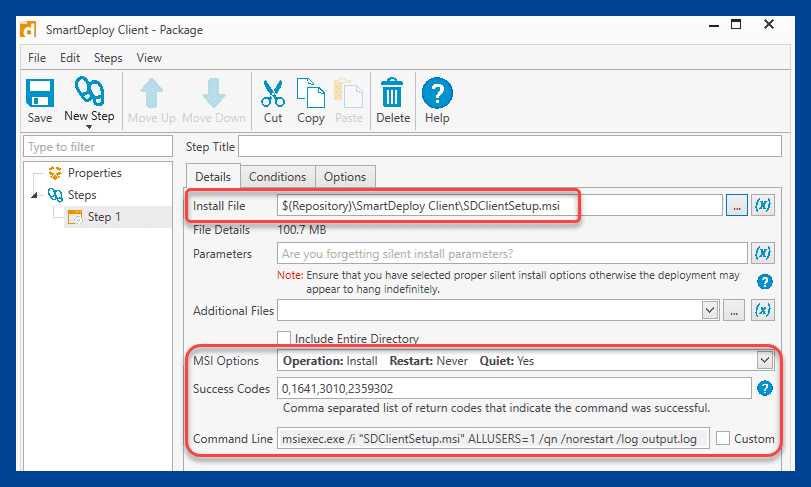
The SmartDeploy client installer is an MSI file. MSI files are great because PDQ Deploy automatically adds the necessary silent parameters to the package, which means one less thing for us to worry about.
To create the package in PDQ Deploy:
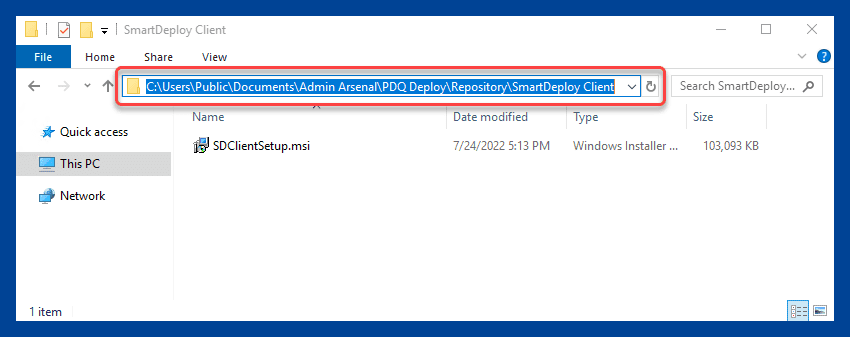
1. Copy and paste the SmartDeploy client into your PDQ Deploy repository. By default, the repository is located at “C:\Users\Public\Documents\Admin Arsenal\PDQ Deploy\Repository”.
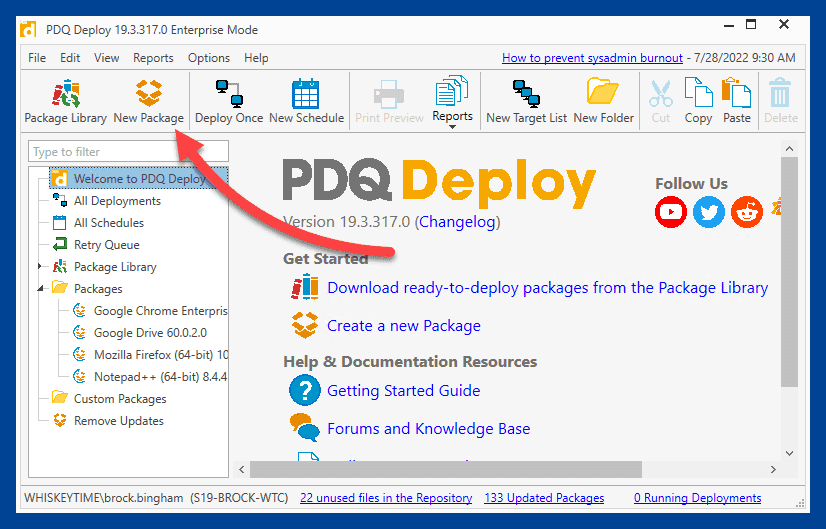
2. In PDQ Deploy, click New Package.
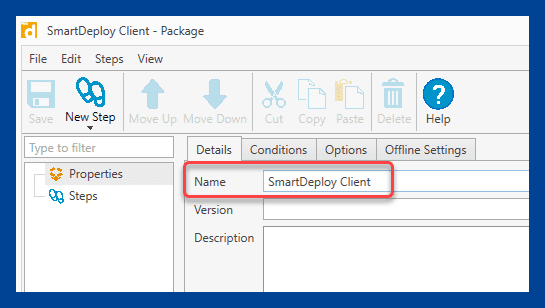
3. Name the package SmartDeploy Client.
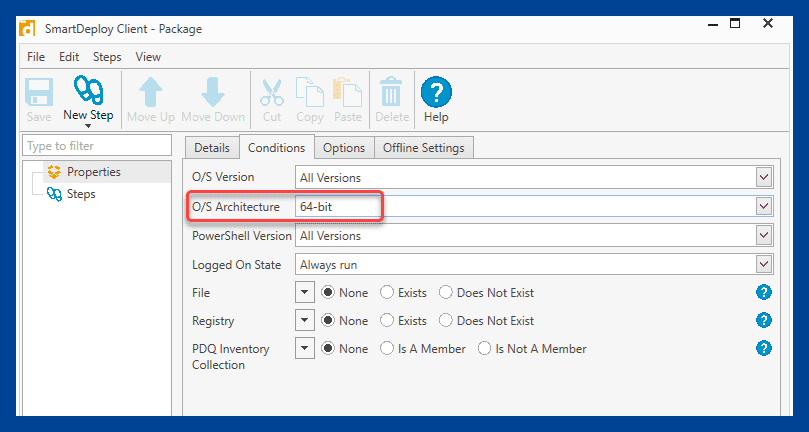
4. Click the Conditions tab.
5. Select the architecture that matches the client installer. I downloaded the 64-bit installer, so I set the architecture condition to 64-bit.
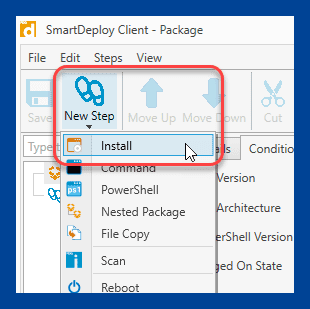
6. Click New Step > Install.
7. Enter the path to the SmartDeploy client installer in the Install File field. Once the file has been added, the MSI options automatically populate.
8. Click Save, then close the package window.
Deploying the SmartDeploy client with PDQ Deploy
With our package created, we’re now ready to deploy it. We’ll use the collections we made in PDQ Inventory to ensure we target only the computers that currently don’t have the client installed.
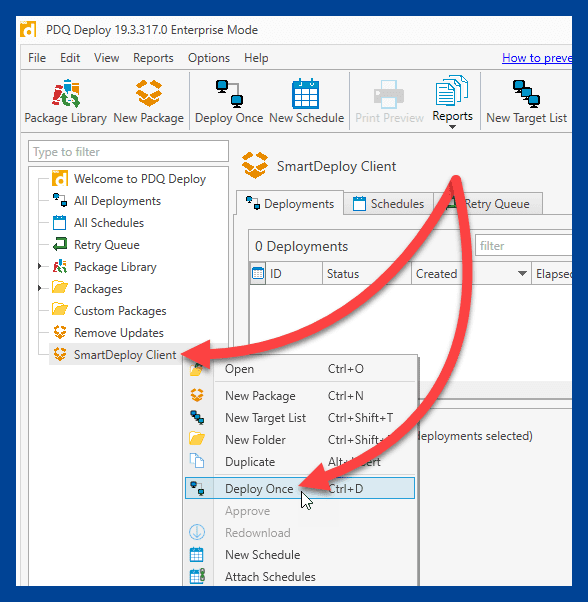
1. In PDQ Deploy, right-click on the SmartDeploy Client package, and click Deploy Once.
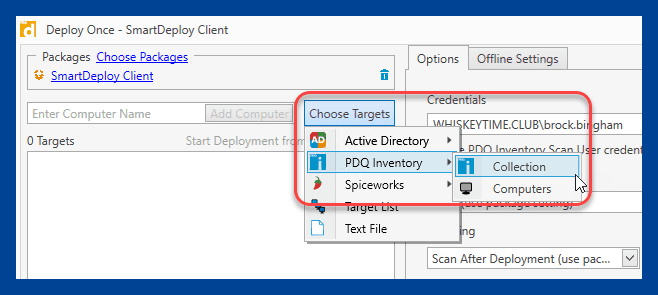
2. In the Deploy Once window, click Choose Targets > PDQ Inventory > Collection.
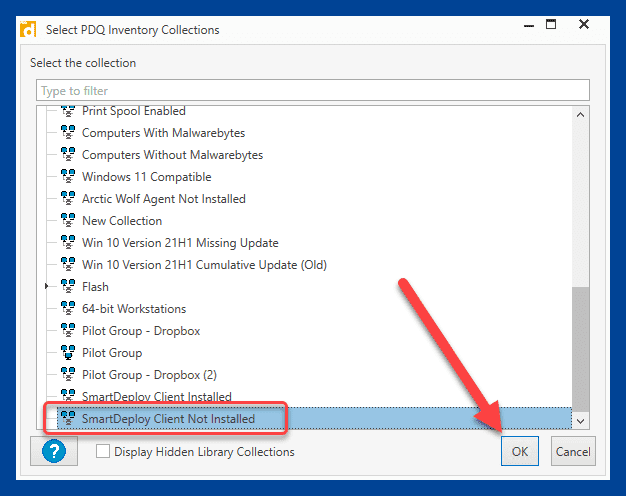
3. Select the SmartDeploy Client Not Installed collection, and click OK.
4. Review the list of targets, and click Deploy Now.
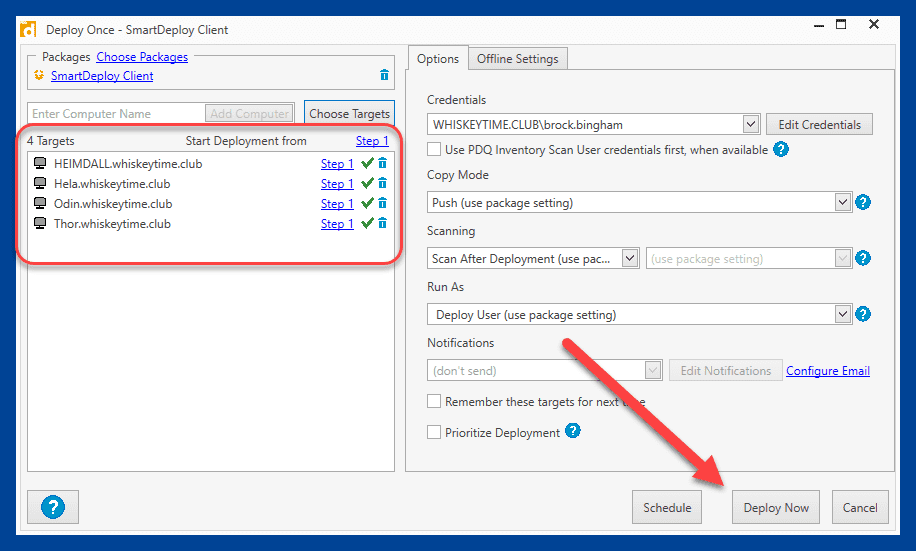
After clicking Deploy Now, you’ll be able to review the status of the deployment, including when it finishes and if any errors are encountered.
Additional settings
We’ve used some pretty basic settings for our package and collections in this guide. However, there are some additional settings you should be aware of.
For example, if your PDQ Inventory instance contains servers, you may want to exclude them by filtering only for workstations in your collections.
If you manage both 32-bit and 64-bit devices, create both versions of the client installer. Then, modify the package to contain two install steps: one with a 32-bit condition and one with a 64-bit condition.
Again, this was a basic setup and deployment to get you started, but you may want to get more specific with your package and collections to meet the needs of your organization.
Deploying the SmartDeploy client the smart way
SmartDeploy and PDQ Deploy & Inventory make a great team. From imaging and deployments to system management and reporting, you’ve got everything you need to keep your devices happy and healthy.
If you haven’t taken the plunge yet, there’s no better time than right now. You can take PDQ Deploy and Inventory for a test drive for 14 days, and you can try out SmartDeploy for yourself for 15 days, absolutely free.

