

TL;DR: Remote Server Administration Tools (RSAT) let IT pros manage Windows Server roles from a Windows workstation. This guide shows how to install RSAT on Windows 11, Windows 10 version 1809 or later, and older systems that still require a standalone Microsoft download. On Windows 10 (1809+) and Windows 11, RSAT is built into the OS and can be installed through optional features or with PowerShell commands.
Remote Server Administration Tools (RSAT) let IT pros manage Windows Server roles remotely without logging in to each server. RSAT installation differs by Windows version. This guide explains how to install RSAT on Windows 11, Windows 10, and older systems like Windows 8.1.
What are RSAT tools?
Remote Server Administration Tools (RSAT) are Microsoft management tools that let administrators manage Windows Server roles and features from a Windows client workstation. Instead of signing in to each server, administrators can manage services like Active Directory, DNS, and Group Policy remotely. If you’re more of a scripter, you can rely on the Windows Terminal command line and Windows PowerShell cmdlets in the RSAT toolbox.
RSAT tools are available only on supported Professional, Enterprise, and Education editions of Windows, not Windows Home.
How do I install RSAT on Windows 11?
To install RSAT on Windows 11, open Settings, go to Optional features, search for RSAT, select the tools you need, and click Install. Depending on your Windows 11 version, Optional features may appear under Apps or System.
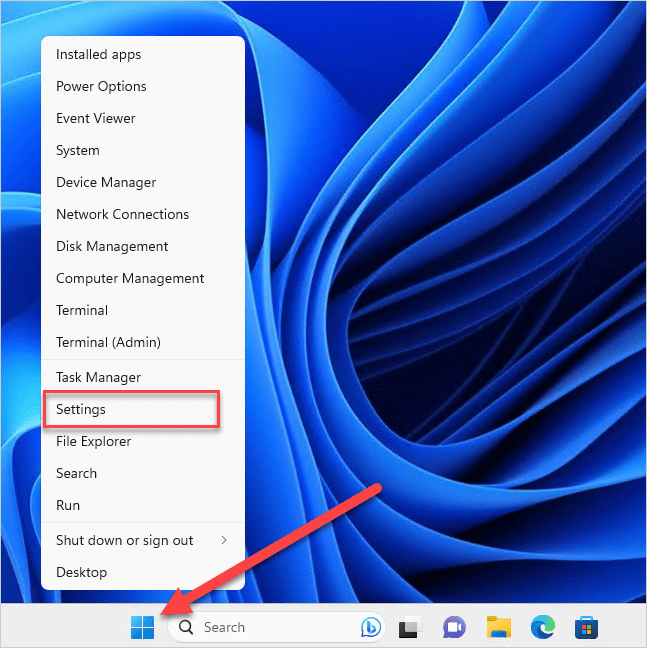
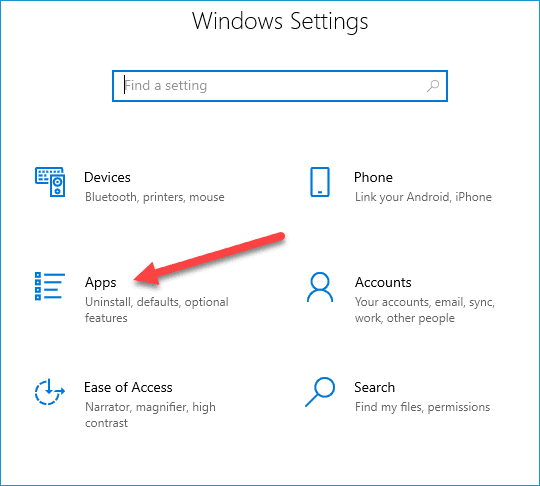
Right-click on the Start icon, then click Settings.
In the Settings menu, click Apps, then click Optional features.
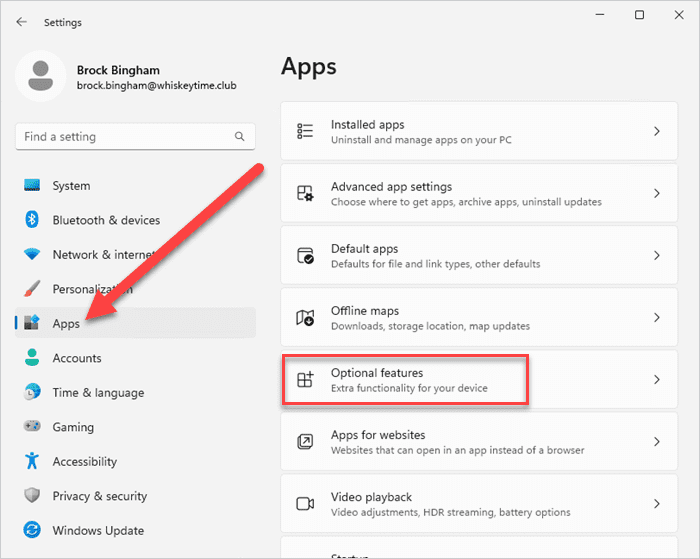
In Windows 11 24H2, click System > Optional features instead.
On the Optional features page, click View features.
Type RSAT into the search field.

Select the RSAT features you want to install, then click Next.
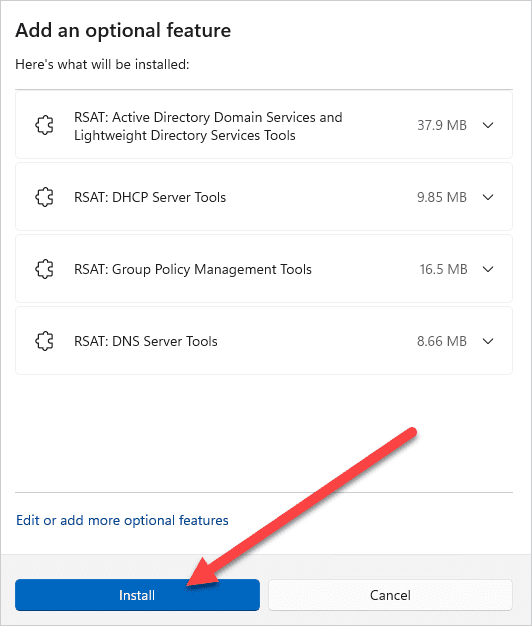
Review the feature installation overview, then click Install.
Monitor your RSAT install on the Optional features page.


To find the RSAT features once installed, enter tools into the Windows search field, then click on Windows Tools.

How do I install RSAT on Windows 10 version 1809 or later?
On Windows 10 version 1809 or later, RSAT is included as a Feature on Demand and can be installed from Optional Features. You do not need to download a separate RSAT installer for these Windows 10 versions. However, you still have to enable them.
Here’s how to install RSAT tools on Windows 10 version 1809 or later.
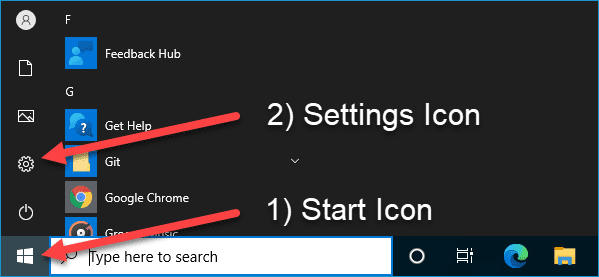
Click the Start icon to open the Start menu.
Click the Settings icon to open the Settings menu.
Click Apps.
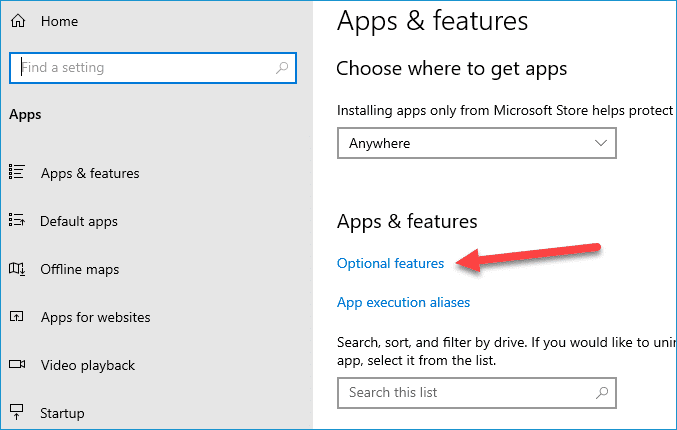
Click Optional features.
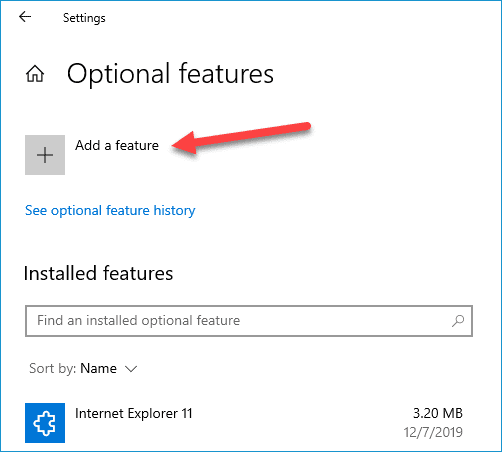
Click Add a feature.
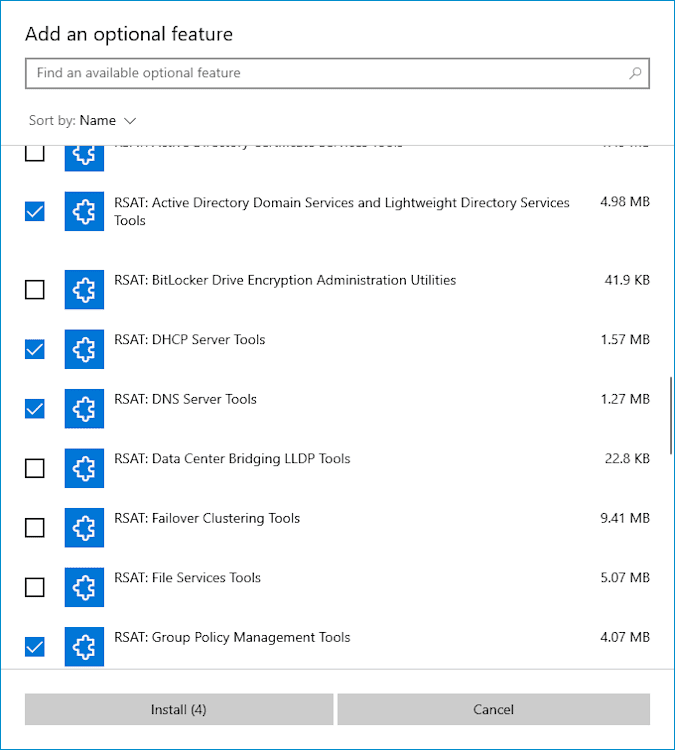
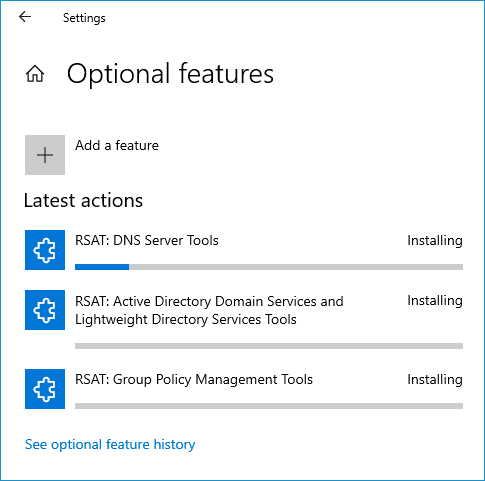
Scroll down the list of optional features until you find the RSAT features. Select whichever RSAT features you want to add, then click Install.
You will see the status of each RSAT feature that's being installed.


Once the tools have finished installing, you can access them through the Start menu in the Windows Administrative Tools folder.

How do I install RSAT using PowerShell?
You can install RSAT with PowerShell by running Windows PowerShell as an administrator and using the Get-WindowsCapability and Add-WindowsCapability cmdlets.
A quick note before we get started: To access RSAT via PowerShell, you need to run PowerShell as an administrator. To do that on Windows 10 or Windows 11, type powershell in the Windows search bar, right-click on the Windows PowerShell result, and click Run as administrator.

1. List all RSAT features and the installed state using PowerShell
First, we’ll use PowerShell to identify which RSAT features are currently installed. Here’s the script.
Get-WindowsCapability -Name RSAT* -Online | Select-Object -Property DisplayName, State
As you can see from this screenshot, this machine already has a few RSAT features installed.
2. Install a specific RSAT tool by name
Add-WindowsCapability -Online -Name "<tool_name>"Replace <tool_name> with the name of the Remote Server Administration Tool you want to install.
Use the exact capability name when installing a specific RSAT tool with PowerShell.
Display name | Name |
|---|---|
Active Directory Domain Services and Lightweight Directory Services Tools | Rsat.ActiveDirectory.DS-LDS.Tools~~~~0.0.1.0 |
BitLocker Drive Encryption Administration Utilities | Rsat.BitLocker.Recovery.Tools~~~~0.0.1.0 |
Active Directory Certificate Services | Rsat.CertificateServices.Tools~~~~0.0.1.0 |
DHCP Server Tools | Rsat.DHCP.Tools~~~~0.0.1.0 |
DNS Server Tools | Rsat.Dns.Tools~~~~0.0.1.0 |
Failover Clustering Tools | Rsat.FailoverCluster.Management.Tools~~~~0.0.1.0 |
File Services Tools | Rsat.FileServices.Tools~~~~0.0.1.0 |
Group Policy Management Tools | Rsat.GroupPolicy.Management.Tools~~~~0.0.1.0 |
IP Address Management (IPAM) Client | Rsat.IPAM.Client.Tools~~~~0.0.1.0 |
Data Center Bridging LLDP Tools | Rsat.LLDP.Tools~~~~0.0.1.0 |
Network Controller Management Tools | Rsat.NetworkController.Tools~~~~0.0.1.0 |
Network Load Balancing Tools | Rsat.NetworkLoadBalancing.Tools~~~~0.0.1.0 |
Remote Access Management Tools | Rsat.RemoteAccess.Management.Tools~~~~0.0.1.0 |
Remote Desktop Services Tools | Rsat.RemoteDesktop.Services.Tools~~~~0.0.1.0 |
Server Manager | Rsat.ServerManager.Tools~~~~0.0.1.0 |
Shielded VM Tools | Rsat.Shielded.VM.Tools~~~~0.0.1.0 |
Storage Migration Service Management Tools | Rsat.StorageMigrationService.Management.Tools~~~~0.0.1.0 |
Storage Replica Module for Windows PowerShell | Rsat.StorageReplica.Tools~~~~0.0.1.0 |
System Insights Module for Windows PowerShell | Rsat.SystemInsights.Management.Tools~~~~0.0.1.0 |
Volume Activation Tools | Rsat.VolumeActivation.Tools~~~~0.0.1.0 |
Windows Server Update Services Tools | Rsat.WSUS.Tools~~~~0.0.1.0 |
For example, to install Remote Desktop Service Tools, run this command:
Add-WindowsCapability -Online -Name "Rsat.RemoteDesktop.Services.Tools~~~~0.0.1.0"3. Install all RSAT features with one PowerShell command
If you don't have the patience to install RSAT features one at a time, I don’t blame you. Instead, we can use this script to install all the available RSAT features in one go.
Get-WindowsCapability -Name RSAT* -Online | Add-WindowsCapability -OnlineIf you have the Optional features window open after running the command, you can monitor each feature as it's installed.


Run PowerShell scripts on remote devices
Execute PowerShell scripts on managed devices from anywhere with PDQ Connect.
How do I install RSAT on Windows 8.1 or older Windows versions?
On Windows 8.1 and older Windows 10 versions earlier than 1809, RSAT must be installed from a standalone Microsoft download instead of Optional Features.
To install RSAT on these older systems, download the RSAT package that matches your OS version, run the installer, and restart if prompted. RSAT features are enabled by default after installation.
If you want to turn off certain features, you can select individual tools to disable by going into Control Panel > Programs > Turn Windows features on or off. In the Windows Features dialog box, expand Remote Server Administration Tools, and then expand either Role Administration Tools or Feature Administration Tools. Clear the checkboxes for any tools that you want to turn off.
As a side note, if you’re still running Windows 8.1 (a slight upgrade from one of the worst Windows operating systems), just know that I’m silently judging you from across the internet.
What should I do if RSAT won’t install?
If RSAT won’t install, confirm that the device can access Windows Features on Demand content through Windows Update or your organization’s managed update source. RSAT installs as a Windows capability on Windows 10 version 1809 and later and Windows 11, so blocked update sources can prevent Optional Features and PowerShell installs from completing.
Try these fixes:
Confirm the device is running Windows Pro, Enterprise, or Education.
Check that the device has internet access or access to your organization’s Features on Demand source.
Run PowerShell as an administrator.
Use
Get-WindowsCapability -Name RSAT* -Onlineto confirm whether the tools are already installed.Check whether WSUS, Configuration Manager, or Group Policy is blocking Features on Demand downloads.
Restart the device after installation if RSAT tools do not appear immediately.
Remote Server Administration Tools help admins manage Windows Server roles from their workstations, reducing the need to sign in directly to servers for routine administration.
Basically, they're a great way to avoid getting out of your comfy office chair to manage server roles. But they’re also great at alleviating server usage congestion. If you've got a coworker who never fails to log in to the server just before taking a three-hour lunch break (thus locking you out of the server), RSAT may be the solution you're looking for.
That, or maybe try switching their keyboard to the DVORAK layout when they aren't looking. That should keep them busy for a little while so you can get logged in before they do.
If you manage a remote or hybrid fleet, then try out PDQ Connect for Windows and macOS devices. Connect helps you manage those hard-to-reach remote devices as if they’re right in front of you.


