Once upon a time, I was asked how to go about bulk importing product keys into PDQ Inventory during a webcast.
Easy peasy, I thought, as I babbled on for a bit until I realized that I could write a blog instead.
So voila! Blog!
Preparation (and deep breaths)
First and foremost, this functionality already exists natively for Custom Fields. If that's what you're looking for, you should check out the Custom Fields Import Wizard.
If it meets your needs (and you're okay with putting your product key info into the Custom Fields), then it's going to be a fairly straightforward solution. In fact, you could even check out this link for more info (my fancy PowerShell blog).
For the purpose of this blog, I'm going to assume that you want to use Product Keys (and not Custom Fields).
Where do we start
We may or may not be using some fairly contrived examples for this blog (spoiler alert: we are), so please please please modify them to fit your various needs.
In prep for that, let's identify what we need:
• PowerShell (yay!)
• SQLite (thrilling!)
• A CSV file full of Product Key info (fascinating!)
• Beverage of choice (yum!)
Contrived example CSV file:
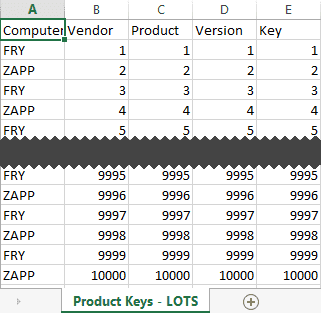
In this particular CSV file, I am using all the fields that are available to use on PDQ Inventory's Product Keys page (Vendor, Product, Version, and Key).
As a bonus, seeing as how I am spectacularly creative with my names, the values are all sequential numbers, alternating between values for the computers FRY and ZAPP.
What about the Import Button?
What about the Import button, you ask? For individual machines, we can use the Import button to import a list of product keys for a single computer.

This option, however, will not distinguish between different computers within the same CSV file. It will ignore any computer names and import the entire CSV file into the Product Keys of the computer you're currently looking at (FRY in this case).
If I attempted to import our CSV file above directly into FRY, here is what the result would look like:
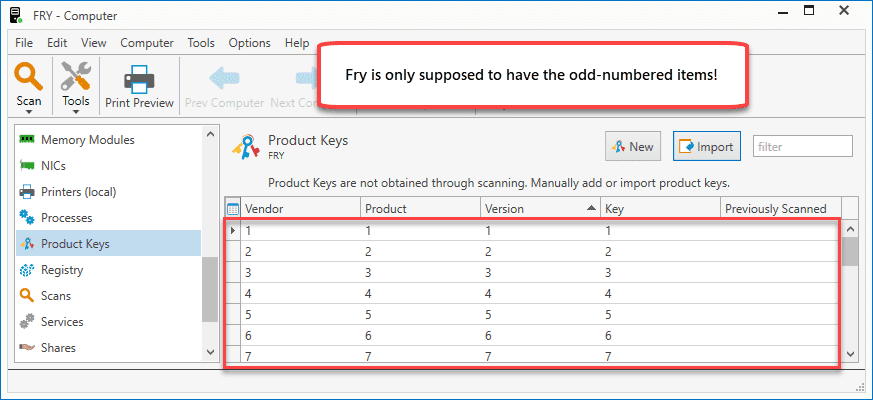
All gasping and surprise aside, that's not what we want at all! At least, I know that I don't want ZAPP's product key info in my record for FRY.
Now, you could split out each machine (and their keys) to their own CSV file. With that, you'd be able to import each of them one-by-one by clicking the Import button of each computer's Product Keys page.
That doesn't sound like a very good use of time. In fact, it sounds downright boring and awful, and I hate myself for even suggesting the very idea!
Instead, we're going to roll up our sleeves and have some fun adding the data directly into the database. Weeee!
A few (more) notes before we begin
Since we are going to be directly modifying the database, I highly recommend making a backup of our existing database on the off chance that we corrupt it. Directions can be found here.
Additionally, in order to avoid a locked database, I will also strongly suggest closing PDQ Deploy and PDQ Inventory and stopping their respective services.
It's easy with PowerShell, so fire away! (The Verbose part is optional, but I enjoy the extra info that's displayed.)
Stop-Service -Name pdq* -Verbose

Importing Product Keys with SQLite and PowerShell
I know that there are a bunch of different ways to handle this. For the purpose of this blog, I'm just going to show a quick way that works for me.
We are going to batch all of our queries into a single transaction and pump it into our database. If you're interested in why we want to consolidate to a single transaction, check this link out.
Batching SQLite queries into a single transaction
In this example, we're going to do the following:
1. Import a CSV (Import-CSV) file ($ComputerList)
2. Create an empty array ($HoneyBunchesOfQueries)
3. Loop through our list of computers and build individual queries and add them to our array (the foreach section)
4. Sandwich the array values inside of a SQLite transaction ($Transaction)
5. Run that transaction against our database ($DBPath)
Deep breaths! Off we go!
$ComputerList = Import-Csv -Path 'C:\temp\Product Keys - LOTS.csv'
$DBPath = "C:\programdata\Admin Arsenal\PDQ Inventory\Database.db"
$HoneyBunchesOfQueries = New-Object System.Collections.ArrayList

# Go through each record in CSV and add each generated query to $HoneyBunchesOfQueries
foreach ($Computer in $ComputerList) {

  $HoneyBunchesOfQueries.Add("
    INSERT INTO ProductKeys (ComputerId, Vendor, Product, Version, Key)
    SELECT Computerid, '$($Computer.Vendor)',
 '$($Computer.Product)', '$($Computer.Version)', '$($Computer.Key)'
      FROM Computers
      WHERE Name LIKE '$($Computer.ComputerName)';")

  }

  # Build a single transaction with $HoneyBunchesOfQueries sandwiched in the middle
  $Transaction = "
  BEGIN TRANSACTION;

  $HoneyBunchesOfQueries

  COMMIT;
  "

  $Transaction | sqlite3.exe $DBPath
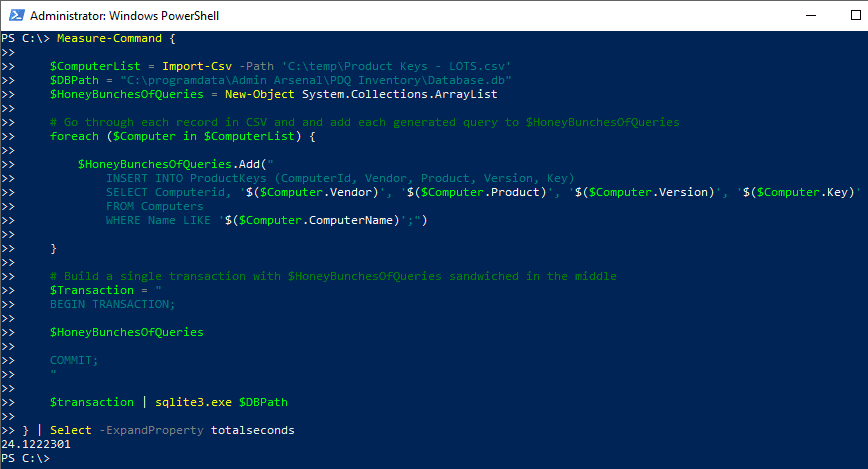
(The following screenshot includes some additional code for measuring the performance of our code.)
Verifying our results
If all went well, FRY should have a bunch of odd-number entries between 1 and 10000 (ZAPP has the even-numbered entries).
We can verify our results by opening PDQ Inventory.
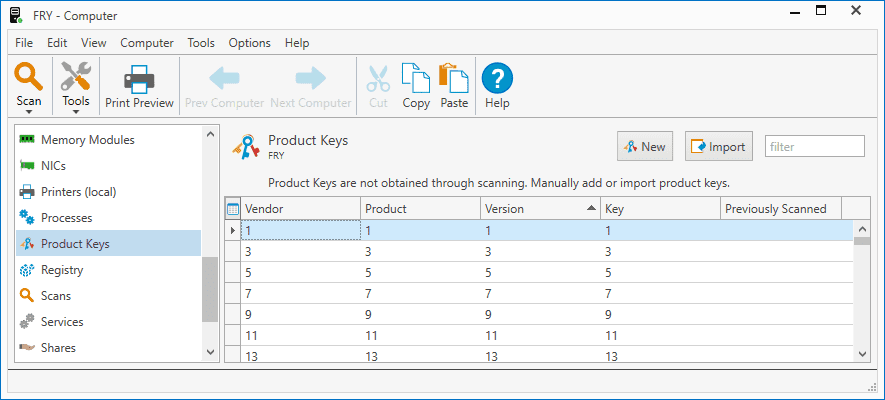
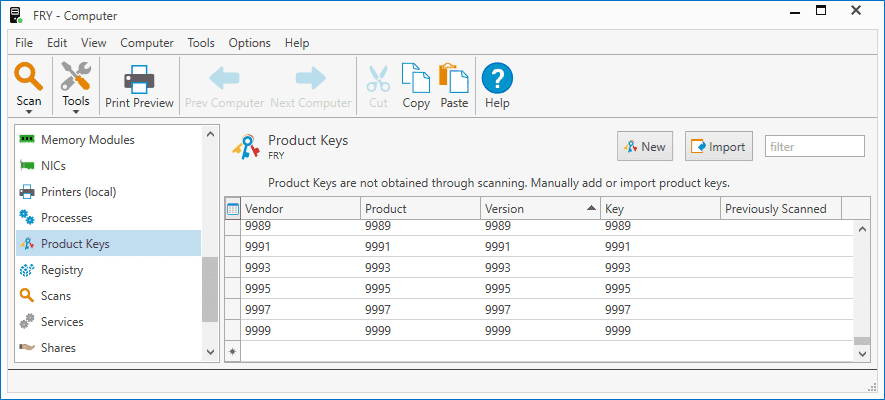
Scrolling through the window shown above, we are able to see all the results that we expected!
It looks like it worked fantastically! Let's take a sip of our beverage and call it a day!
Wrapping up
If you find yourself needing to import a bunch of product key info into your PDQ Inventory database, I hope that you stumble upon this blog and that it is helpful to you.
Cheers and Happy PowerShelling to you!

