Unlike the ten thousand daily steps my doctor tries (unsuccessfully) to get me to take every day, the deployment steps in PDQ Deploy are actually important. With a keen understanding of the deployment steps, sysadmins can deploy applications, kick off scans, and push commands to thousands of devices across a network. Sure, walking may have its health benefits, but walking’s not going to help me deploy Microsoft Teams from my office in Scranton, Pennsylvania, to the Nashua branch in New Hampshire.
Stepping up your deployment game
PDQ Deploy is synonymous with application deployments. It’s no surprise that the vast majority of users primarily utilize PDQ Deploy to quickly and easily deploy applications and updates to devices. However, there is so much more you can do with PDQ Deploy if you take advantage of the different deployment steps. So, lace up your sneakers and strap on your Fitbit because we’re going to explore the different deployment steps available in PDQ Deploy.
The 10 deployment steps in PDQ Deploy
There are ten different deployment steps in PDQ Deploy:
Install
Command
PowerShell
Nested Package
File Copy
Scan
Reboot
Sleep
Message
Logoff
You can view these steps in PDQ Deploy by creating or opening a custom package and clicking on the steps button.
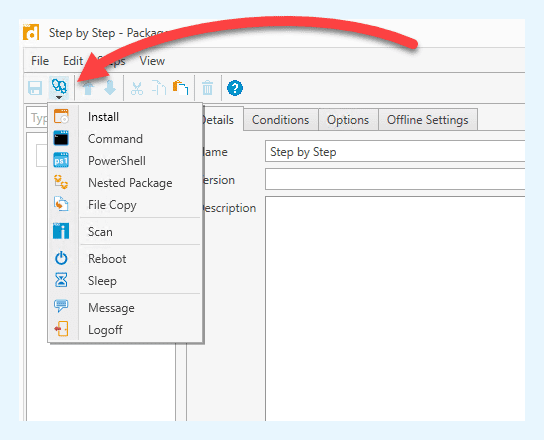
Let’s go through each one and discover what they do.
Install step
The install step is the most versatile deployment step in PDQ Deploy. Whether you’re deploying an application, a script, or a registry file, the install step has you covered. But what makes it so special? Just check out all the things it can deploy:
MSI files: MSI files are installation files that utilize the Windows Installer service. MSI files are great because they’re standardized. All MSI files share the same installation parameters. Because these options are standardized, the install step autopopulates the necessary parameters for silent deployment.
EXE files: EXE files can also be installation files. However, unlike MSI files, EXE files are not standardized. For EXE deployments, you’ll need to provide the necessary parameters for silent deployments.
MSU files: MSU files are Windows Update package files. These files are commonly used to distribute Windows updates and are standardized, just like MSI files.
BAT files: Batch files are script files commonly used to execute commands. Sysadmins have used batch files for years, but we’re trying our best to convince our fellow sysadmins to convert to PowerShell.
PS1 files: PowerShell scripts are similar to batch files, just better. I kid — kind of. Regardless of your preference, the install step quickly gets your batch files and PowerShell scripts deployed.
VBS files: If you have a time machine and want to run your Visual Basic scripts from the early 2000s, the install step has you covered. But seriously, why aren’t you using PowerShell?
REG files: Registry files make changes to the registry. While you can utilize the install step to distribute registry files, we recommend you consider using Group Policy for these types of modifications if the option is available.
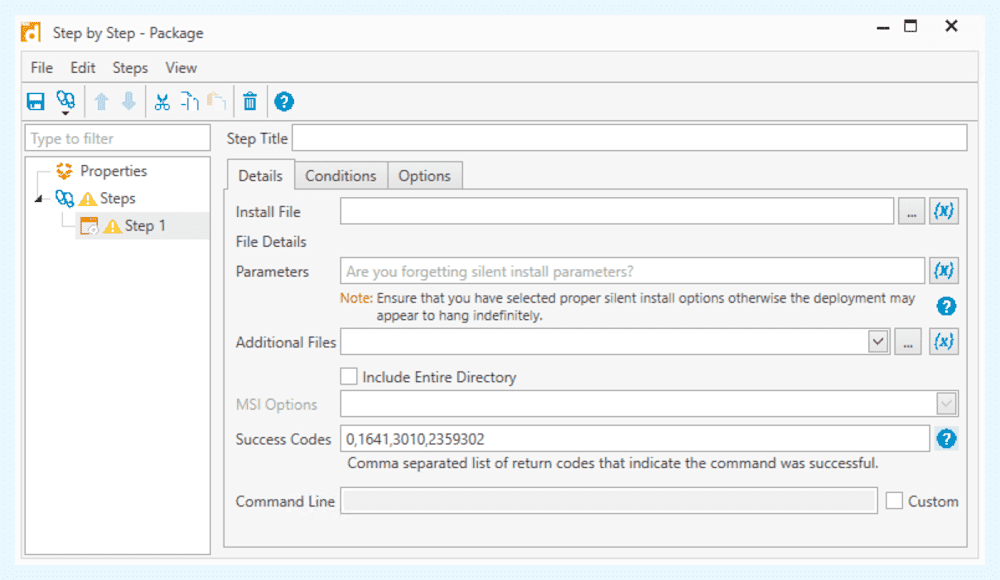
Using the install step is very straightforward. First, enter your installation file or script into the Install File field. When deploying an EXE file, manually add the silent install options to the Parameters field. If you have additional files to include, add them to the Additional Files field, or select Include Entire Directory to include everything in the install file directory. Lastly, enter your success codes in the Success Codes field if additional codes are required. Remember, the silent parameters are automatically added if you’re using MSI or MSU files.
Command step
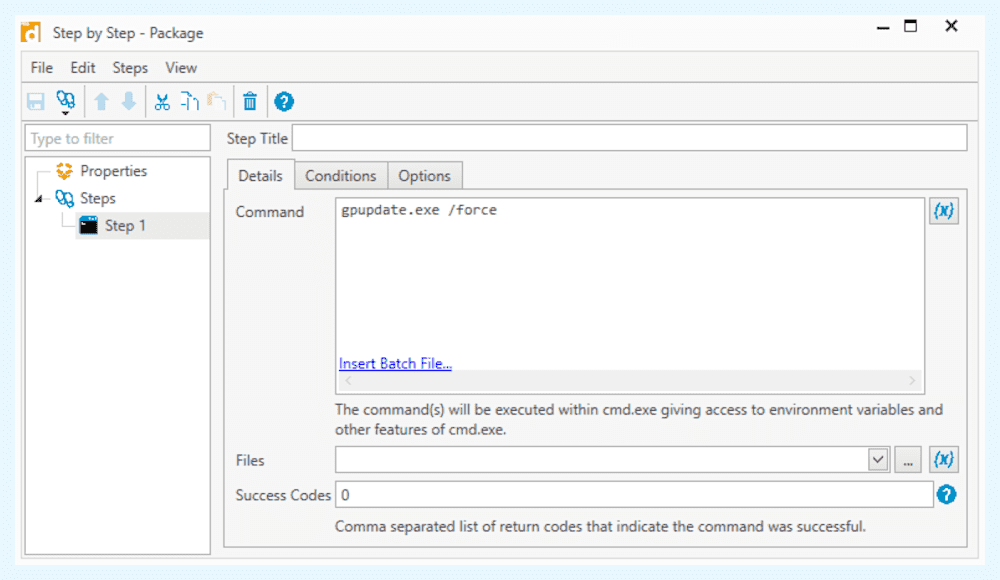
The command step is an excellent option for deploying commands and batch files. Unlike the install step, the command step gives you a command window where you can input your commands. This option is great if you need to deploy a couple of commands like gpupdate and taskkill.
PowerShell step
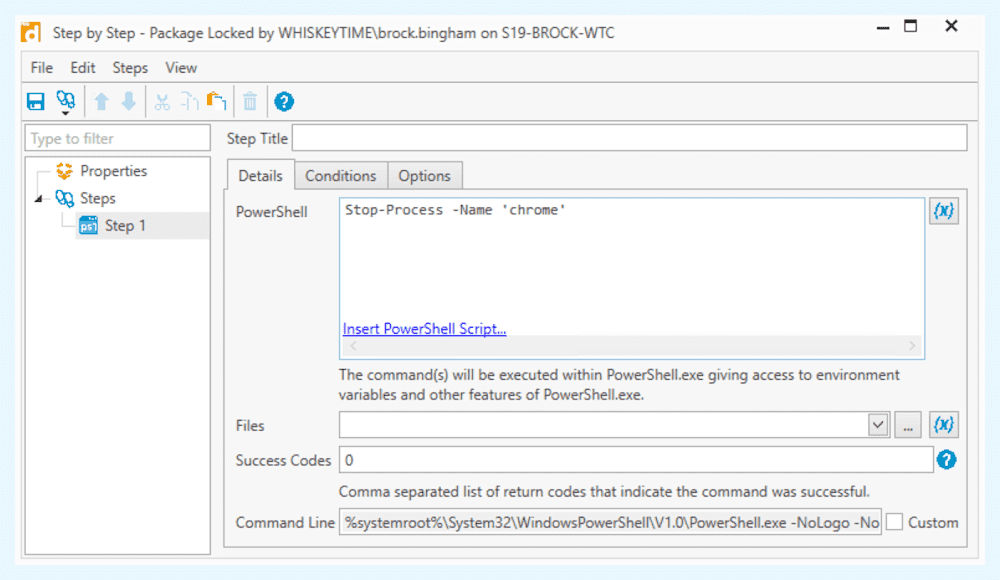
The PowerShell step is similar to the command step in that it includes a console window where you can add and modify PowerShell cmdlets. You can also link directly to a PS1 file, which we recommend if it’s a frequently used script.
Nested Package step
Have you ever thought to yourself, “Geez, it sure would be swell if I could deploy several packages with just one deployment?” Well, I have got good news for you. The nested package step is designed to do precisely that.
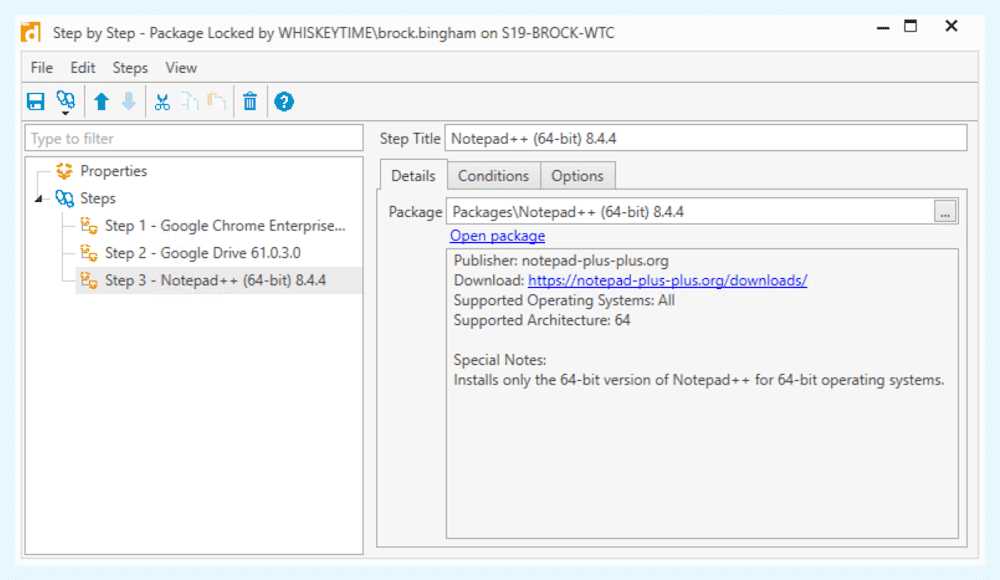
The nested package step allows you to embed multiple packages into one package. This option is great for users who frequently need to deploy a common group of apps to devices. It is especially convenient when deploying groups of apps to newly imaged machines.
To build a nested package, add a nested package step for each additional package you wish to include. In this example, I have three nested packages. Google Chrome, Google Drive, and Notepad++.
File Copy step
Copying files seems like a very basic computer process, and for the most part, it is. However, things can get complicated when you consider permissions, remote sources and destinations, and existing files. The copy step in PDQ Deploy is designed to help you overcome some of those hurdles, especially if you need to copy files to devices across your network.
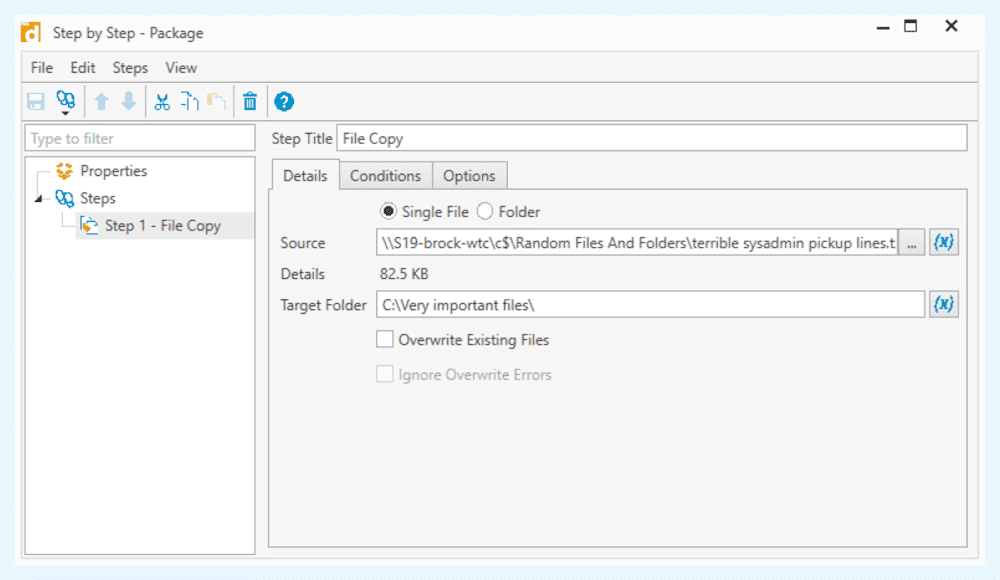
For the file copy step, you’ll need to provide a source and a target folder. We recommend using UNC paths, particularly if you use a pull method instead of a push. Consider housing the source file locally on the PDQ console. Lastly, make sure file permissions are correctly configured.
With the ability to overwrite existing files, ignore overwrite errors, copy entire folders and subfolders, and use file patterns to narrow down results, the file copy step has all the options necessary to make file copies quick and easy.
Scan step
The scan step in PDQ Deploy allows you to kick off a scan against the targeted devices using PDQ Inventory. Having up-to-date information is crucial; scanning before or after other steps can ensure your data is as accurate as possible.
The scan step allows you to choose which scan profile to run against the deployment targets. If you wish to modify the deployment targets based on the scan results and current collection members, you’ll need to add a collection condition to the steps following the scan steps.
Here’s an example:
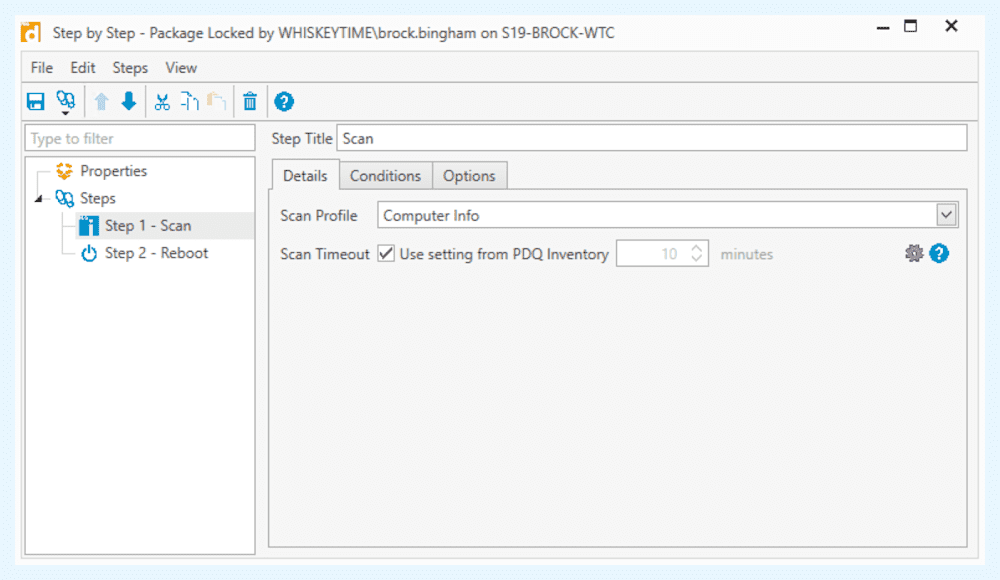
This package contains two steps: a scan step, which runs the Computer Info scan profile, followed by a reboot step. The reboot step has a condition that targets must be a member of the Uptime greater than 7 days collection.
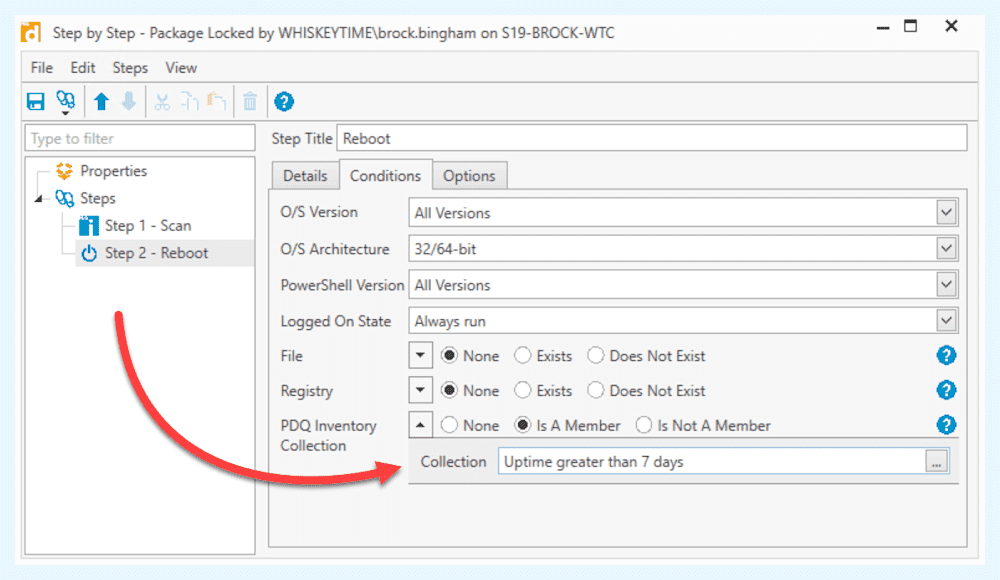
Once the scan runs, the Uptime greater than 7 days collection updates with more accurate information and membership. The condition attached to the reboot step ensures the step only targets current members of the collection.
Reboot step
The reboot step, you probably guessed it, sends a reboot command to the target device. This step is fairly self-explanatory, but let’s cover some of the settings available with the reboot step.
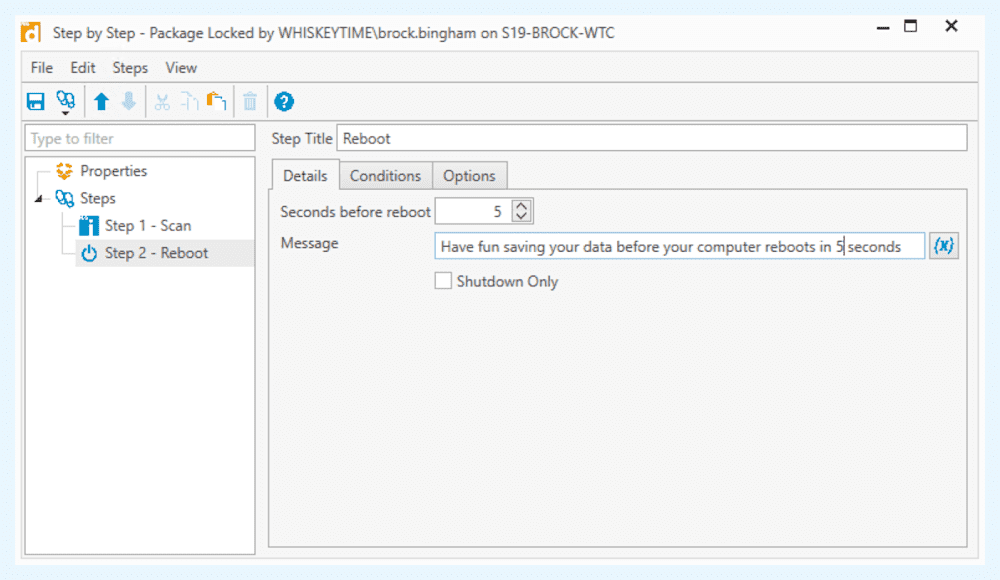
The reboot step has three settings besides the standard step options and conditions. Seconds before reboot lets you configure how long the computer waits before rebooting. The message field allows you to input a message that displays on the target device’s screen. And the Shutdown Only option shuts down the machine instead of rebooting it. It’s super simple but powerful nonetheless.
Sleep step
The sleep step adds a pause to your deployments. If you notice that a deployment step needs extra time to complete, a sleep step can help provide a nice pause before the next step kicks off.
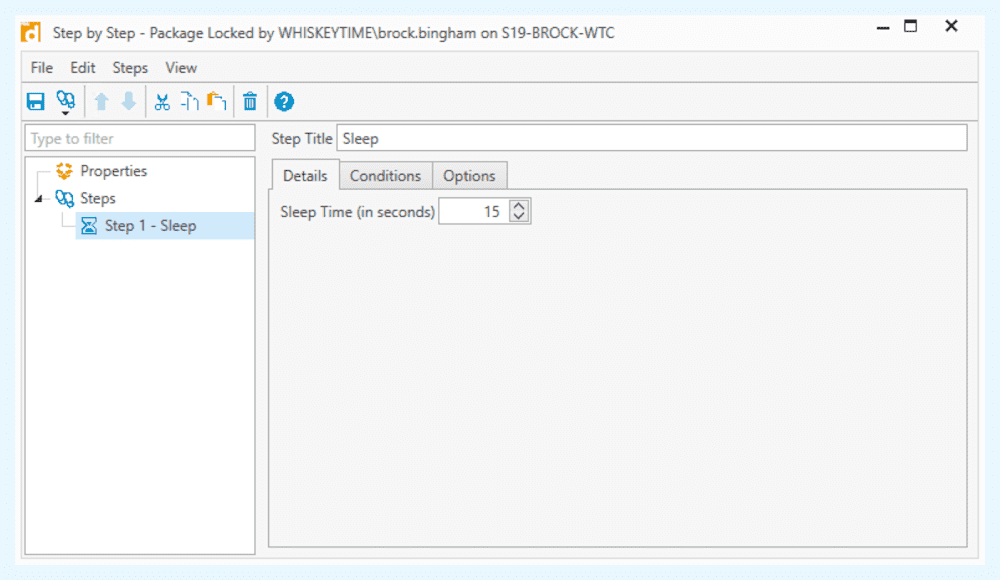
The only option unique to the sleep step is that it lets you configure the sleep time in seconds. The default sleep setting is 15 seconds, which is usually enough time, but configure this setting to meet the needs of your deployment.
Message step
The message step displays a message on the screens of targeted devices. This step is a great way to tell your users that you love them — or to delicately remind them to turn off their computers at night.
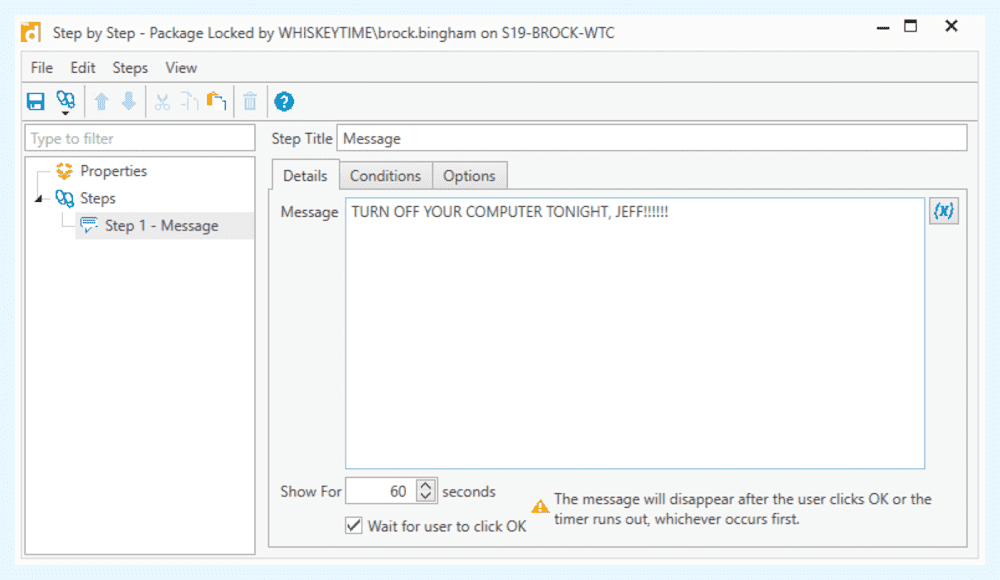
There are two available settings with the message step. The Show For setting determines how long the message displays before automatically closing. The Wait for user to click OK setting actually pauses the deployment until the user clicks OK on the message or until the message timer runs out, whichever occurs first. Without this setting checked, the deployment proceeds to the next step immediately.
Logoff step
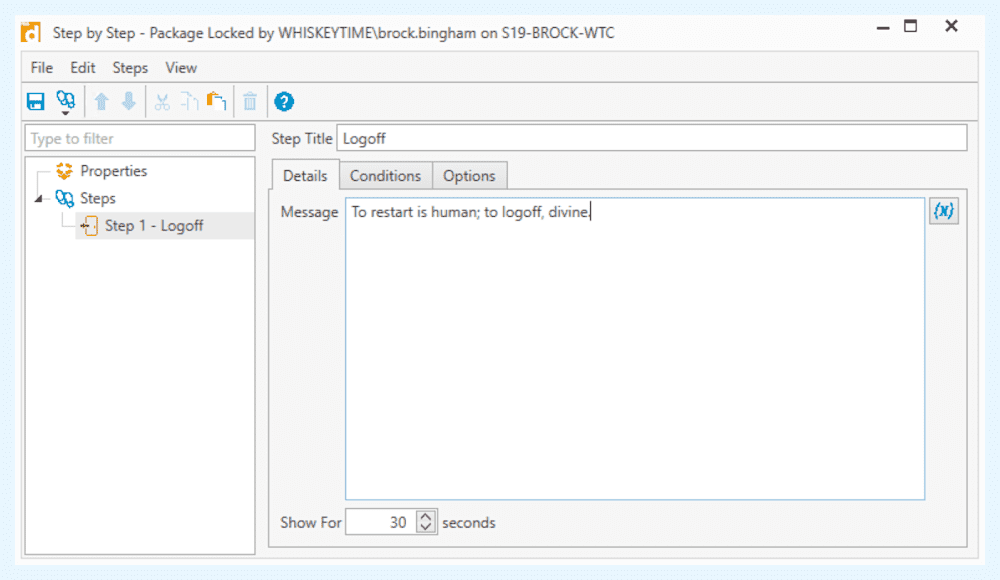
Last but certainly not least is the logoff step. Much like the reboot step, the logoff step is quite self-explanatory. Need to log off a user? Use the logoff step.
Like the reboot step, you can send a message to the device before the logoff command executes. You can also configure how long to display the message before the system logs off.
Step up your deployment game
Take your deployments to the next level by getting familiar with all the different deployment steps PDQ Deploy has on tap. The PowerShell step, in particular, is extremely capable and provides a great way to manage devices. Also, remember that each deployment step can be configured with unique conditions and options to ensure each step targets the correct devices.
Speaking of steps, if you’re not using PDQ Deploy and Inventory, you’re taking too many steps. Try out PDQ Deploy and Inventory for yourself with a 14-day free trial. Your users and your feet will thank you.

