I recently did a blog post about the various PowerShell profiles. It was super thrilling. But, it left me wondering about the order in which the profiles are going to load.
I realized that was the one thing that I didn’t cover, verifying the PowerShell profile load order and changing the order to which they are applied!
PowerShell profile load order
When using PowerShell profiles, it can be very beneficial to know the order that profiles are loaded; otherwise, you could end up with code that overwrites code from another profile. I have broken this down into the shorter (tl;dr) and the longer (more fun) versions.
TL;DR version
Here is the order the various profiles are run (first to last):
AllUsersAllHosts
AllUsersCurrentHost
CurrentUserAllHosts
CurrentUserCurrentHost
This means the AllUsersAllHosts profile is loaded first and the CurrentUserCurrentHost profile is loaded last. Just remember the current host refers to whatever application you’re using to interact with PowerShell — PowerShell console, PowerShell ISE, Visual Studio Code, etc.
Longer, more fun version
To find out the order in which the various PowerShell profiles run, I decided to set up a silly little test. Ya know… for science and stuff. I broke this test up into several steps.
1. Get list of profiles
To see the list of available profiles for a given host (PowerShell ISE, in this case), I ran the following.
$profile | Select-Object *
Look at all those profiles.
2. Copy list to hash table
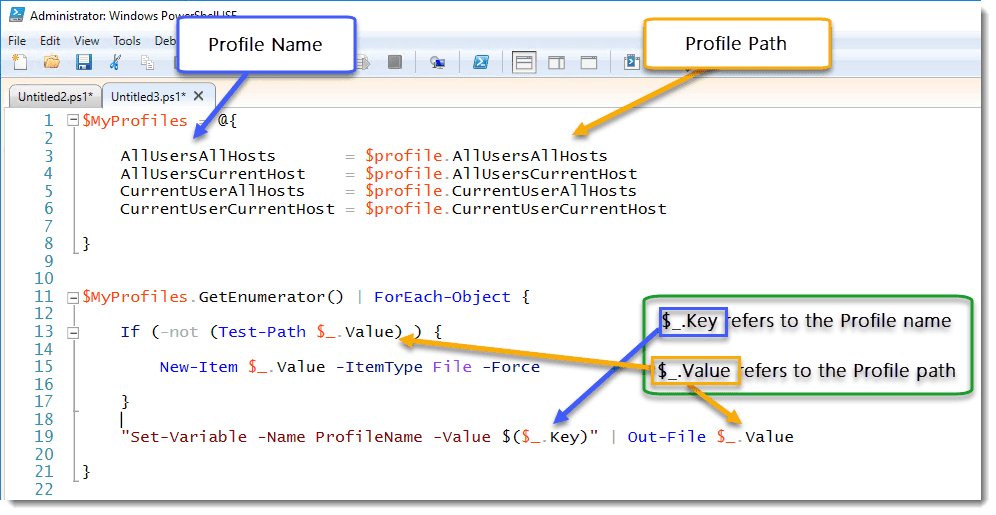
Next, I copied these profiles into a hash table. Hash tables are helpful for keeping structured data.
$MyProfiles = @{

   AllUsersAllHosts = $profile.AllUsersAllHosts
   AllUsersCurrentHost = $profile.AllUsersCurrentHost
   CurrentUserAllHosts = $profile.CurrentUserAllHosts
   CurrentUserCurrentHost = $profile.CurrentUserCurrentHost

}
3. Loop through hash table of profiles
Finally, I looped through the hash table of profiles. In doing so, I:
Verified the specified profile exists (or create it)
Added a variable to each profile called
$ProfileNameSet
$ProfileNamevalue to the name of the profile
This should show us the most recently run profile since the value of $ProfileName will match the name of the profile (one of the following values):
AllUsersAllHosts
AllUsersCurrentHost
CurrentUserAllHosts
CurrentUserCurrentHost
(See Test-Path, Out-File, ForEach-Object)
$MyProfiles = @{

   AllUsersAllHosts       = $profile.AllUsersAllHosts
   AllUsersCurrentHost    = $profile.AllUsersCurrentHost
   CurrentUserAllHosts    = $profile.CurrentUserAllHosts
   CurrentUserCurrentHost = $profile.CurrentUserCurrentHost

}


$MyProfiles.GetEnumerator() | ForEach-Object {

   If (-not (Test-Path $_.Value) ) {

      New-Item $_.Value -ItemType File -Force

   }

   "Set-Variable -Name ProfileName -Value $($_.Key)" | Out-File $_.Value

}
4. Test and verify
Now I need to run my script and test that the files were actually created and have my variable $ProfileName in them.
Running our script gave me the following results.
It looks like the files were all properly created.
Now I need to verify that each of the profiles contains the correct info. To do that, I’m going to use the Get-Content cmdlet.
Get-Content $profile.AllUsersAllHosts
Get-Content $profile.AllUsersCurrentHost
Get-Content $profile.CurrentUserAllHosts
Get-Content $profile.CurrentUserCurrentHost
We can see each file has the appropriate line that defines the variable, our $ProfileName variable. NOTE: when using Set-Variable to create a variable, you don’t add the $ to the name of the variable.
Everything looks good!
Testing profile order
With all of our profiles created, all that is left is to close and reopen our PowerShell ISE window so that it can load all of our profiles. (In the case of PowerShell ISE, you could just open up a new PowerShell Tab, but why? Restarting the ISE is just as lovely.)
With this, the value of $ProfileName should tell us which profile was loaded last.
It looks like CurrentUserCurrentHost is the winner! Meaning, it is the profile that’s loaded last and has the potential to override the other profiles.
Moving backward, we can test the remaining order. We’ll have to remove profiles and restart PowerShell as we go along. I did them all in order so that it’s easy to see. Plus, I made it one combined screenshot.
Based off these results, we can deduce that the profiles are loaded in the following order (from first to last):
AllUsersAllHosts
AllUsersCurrentHost
CurrentUserAllHosts
CurrentUserCurrentHost
That was fun! Now I can tell all my friends that I know the profile load order in PowerShell.
Wrapping up
When using multiple profiles, it’s important to know the order that profiles are applied. Otherwise, you may end up overwriting data from another profile with a profile that’s loaded later in the process. Granted, if you don’t use profiles at all… then this blog wasn’t necessarily geared for you. However, I’m glad you stuck with me to the end! Happy PowerShelling!


