

If you're looking for information on CSV files, you've come to the right place. Whether you're a novice and don't know what CSV stands for or you're a veteran sysadmin looking for a refresher course, this guide has you covered. If, on the other hand, you were looking for you're nearest CVS pharmacy, you may want to double-check the spelling of your Google search. Regardless of how you got here, join us as we take a deep dive into the tabular world of CSV files.
What Is a CSV file
A CSV file is a plain text file containing tabular data that is separated by a delimiter. The term CSV, which stands for comma-separated values, is derived from the file extension .CSV. Each row in a CSV file is a new record, and each record contains fields that are separated by a designated delimiter. CSV files are commonly used to import and export data in and out of applications.
CSV file structure
If you've ever used a spreadsheet application, such as Microsoft Excel or Google Sheets, then you'll be familiar with tabular data. Tabular data just means that data is structured into a table format, consisting of rows and columns. Like this:

Here we have an Excel file of famous Tony's. Why? Because it was the first name that I thought of. Don't judge me.
As you can see, we have four rows of data across three columns. Each row represents a record, and each column represents a field. Formatting data into a table like this makes the information easy to understand and digest for both people and computers. For instance, you can quickly glance at this data and see that Tony Hawk is a skateboarder while Tony Stark is Iron Man. Even without column headers, you can quickly understand how to data is associated, but more on that in a minute.
Now let's compare this to a CSV file containing the same data.

As you'll notice, the data is still structured into rows and columns; we just don't have the tabled graphical interface anymore because were using a text editor rather than Excel to open the file. Instead, you'll see that each row is separated by a line break, and each column is separated by a comma. This layout is the most common format for CSV files. However, CSV files aren't fully standardized, and there are a few structuring components that are worth mentioning.
First, depending on the intended use of the CSV file, you may want to include a header line. A header line is essentially like labeling columns in a spreadsheet. When including a header line, it should always be added as the first line of a CSV file, and it should follow the same format as the rest of the CSV file. Here's what my Tony CSV file looks like with a header line added.

Next, as the name suggests, the most common delimiter used in CSV files is the comma, but that doesn't mean you have to use commas. In fact, just about any character can be used as a delimiter, but we'll cover that more in the next section.
Another thing to watch out for is removing unnecessary blank spaces surrounding your delimiters. I ran into a couple of issues with my CSV files caused by having blank spaces next to my delimiters.
Lastly, ensure each line or record contains the same amount of delimiters. If one line contains more or fewer delimiters than the rest of the file, it will throw off the formatting and most likely mess things up if you are trying to import that data into an application.
CSV delimiters
A delimiter is a character that's been designated to mark the end of one unit of data and the beginning of the next unit of data. As we mentioned, while commas are the most common, almost any character can be designated as a delimiter in a CSV file. Some of the more commonly used characters include semicolons, tabs, and pipes.
One reason why users may decide to use a character other than a comma is if commas are present in the data being separated. Whenever an application that is parsing CSV data comes across the designated delimiter character, it will consider that character a delimiter, whether it was meant to be a delimiter character or not. Here's an example.

In this CSV file of famous quotes, the header line indicates that there are only two columns, name and quote. However, the quotes themselves contain commas which will cause the data to be parsed incorrectly.
Here's what happens when we open this CSV file in Excel.

As you can see, Excel counted each comma as a delimiter and moved each value following a delimiter into its own column. Obviously, this isn't what we want, but there are two ways to get around this. The first option is to use a less common character, or a character you know isn't contained in the data, as the delimiter. The second option is to wrap the data in quotes. Let's take a look at both options.

Here we've changed each delimiter character to a semicolon. However, if we just open this CSV in Excel, look what happens.

Even though we've changed the delimiter, Excel still counts each comma as a delimiter instead of the semicolons. By default, Excel always expects each comma to be a delimiter. To get around this behavior, we need to import the data instead of just opening the file with Excel. Here's how:
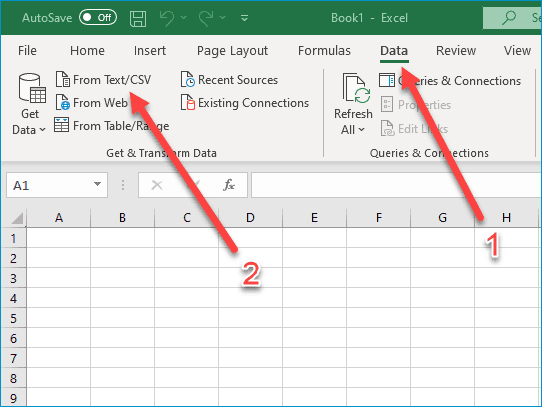
With Excel open, click on the Data menu option.
In the Get & Transform Data ribbon section, click From Text/CSV.
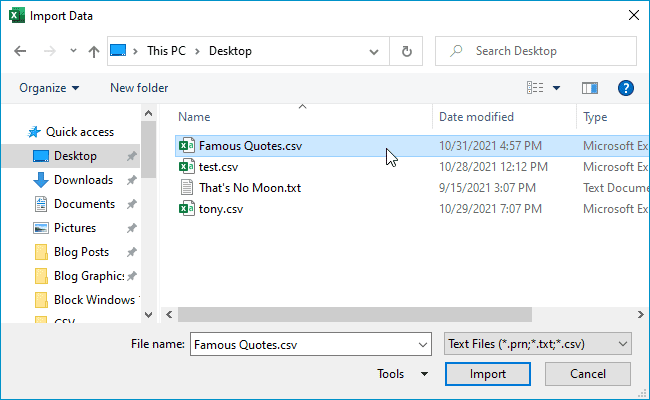
Navigate to the CSV file, select it, and click Import.
The import wizard will open and attempt to automatically detect the delimiter. In my case, it automatically detected the semicolon as the delimiter. If it fails to detect the correct delimiter, you can manually select it.
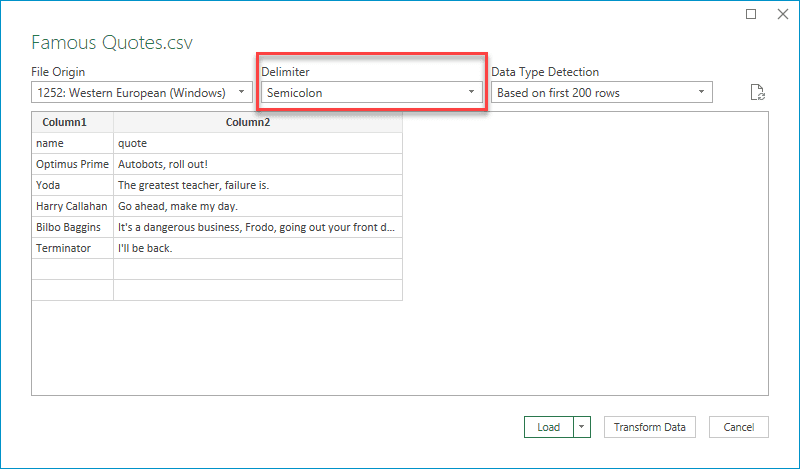
If you need to modify anything else, you can click the Transform Data button to make further changes, such as designating the first row as the header row. Once you've finished making your changes, click Load.
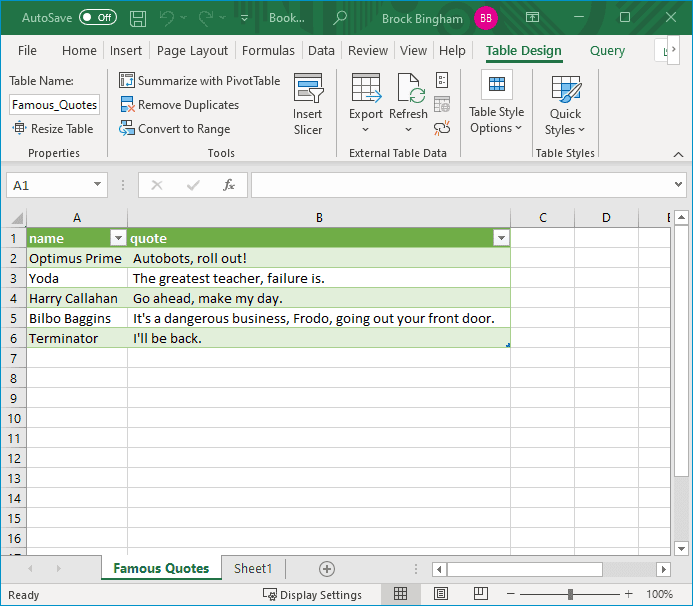
After clicking Load, you'll notice that all of the data has been imported correctly.
The other option to deal with delimiter characters contained in the data is to wrap the data in quotes. I've modified the CSV file again and replaced the semicolons with commas, and wrapped any data containing commas with quotes.
In this format, Excel will immediately recognize the formatting and properly import the data without using the import wizard.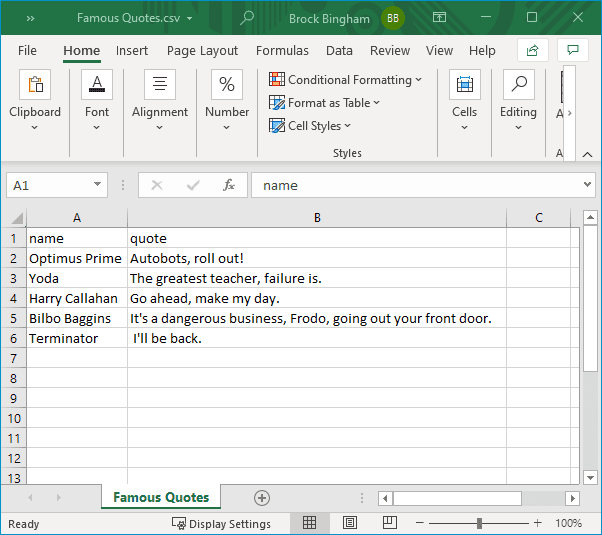


While both options are viable, deciding which format is best for you often depends on the application that will be parsing the information. Does the application automatically detect or let you custom select the delimiter? How does the application handle values wrapped in quotes? Always thoroughly test these types of situations before dealing with production data.
Creating a CSV File
Creating a CSV file is easy, and since CSV files are plain text files, many applications can do it. Here are a few different ways to create a CSV file.
How to create a CSV File With Notepad.exe
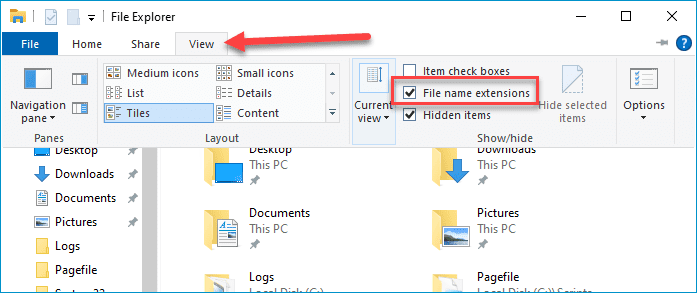
Make sure you have "view file name extensions" turned on by opening up File Explorer, clicking View, then selecting File name extensions.
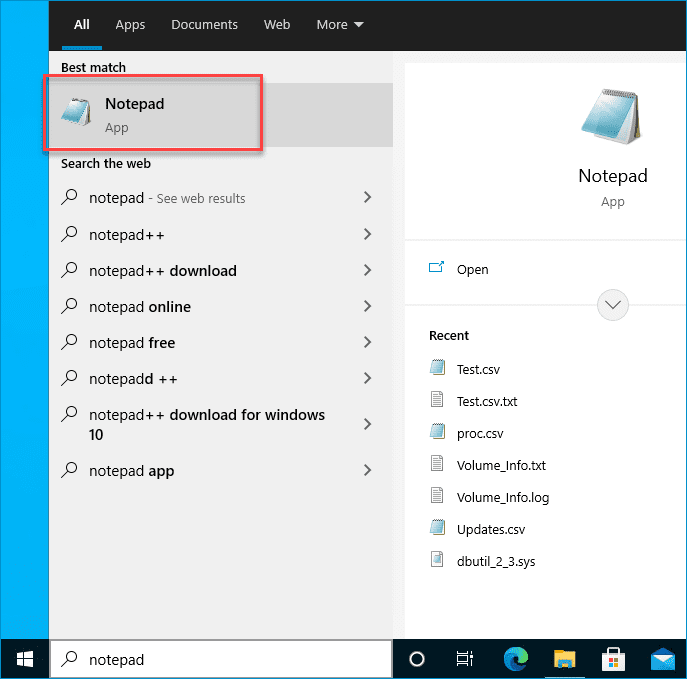
In the search bar, type notepad and click on the Notepad application.
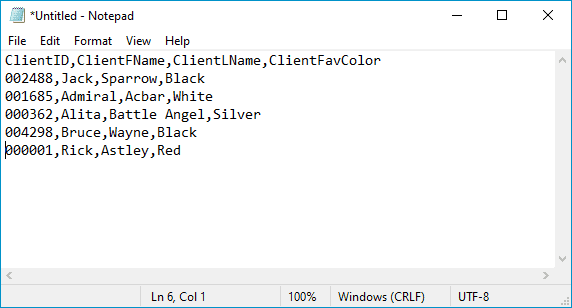
Enter your CSV data.
When you are finished, click File > Save As.
In the Save As window, change the Save as type: to All Files (*.*).
Enter a name for the file followed by .csv.
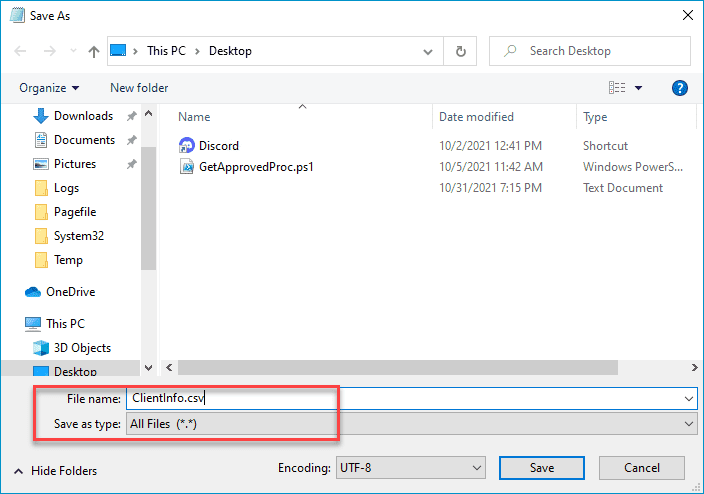
Click Save.


How to create a CSV file with Microsoft Excel
Open a new blank workbook or an existing file containing data in Excel.
Enter the data into the necessary fields.
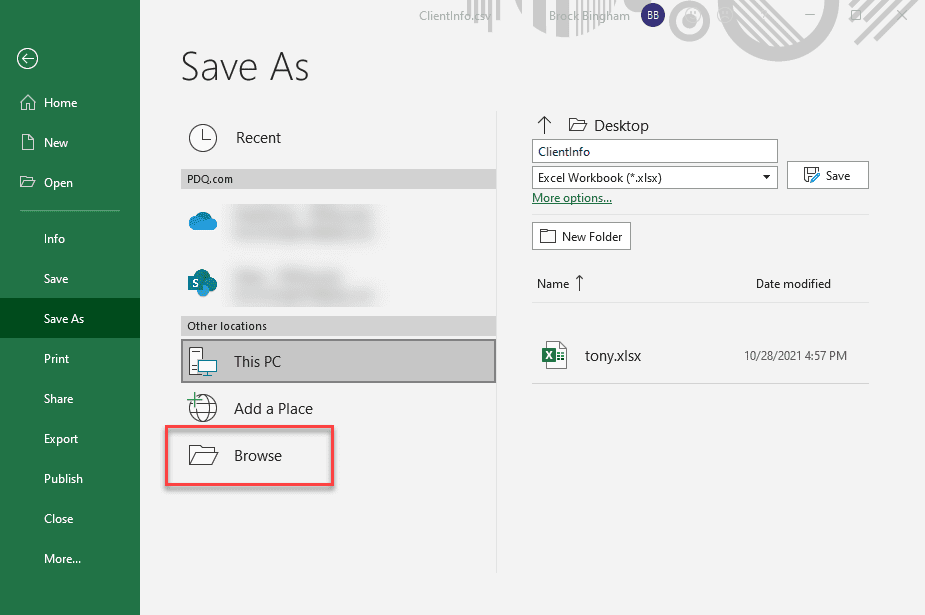
When finished, click File > Save As, then click Browse.
Navigate to the location you want to save the file.
In the Save as type: field, change the drop-down to CSV UTF-8 (Comma delimited) (*.csv).
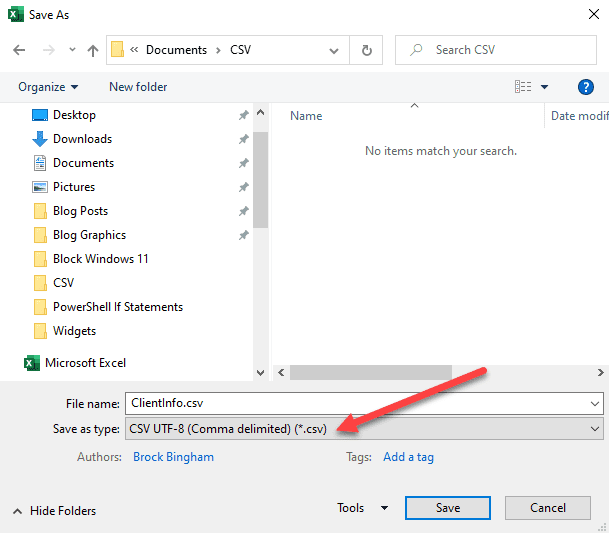
Enter a file name and click Save.


How to create a CSV file with Google Sheets
With a new Google Sheet document open, enter your data into the fields.
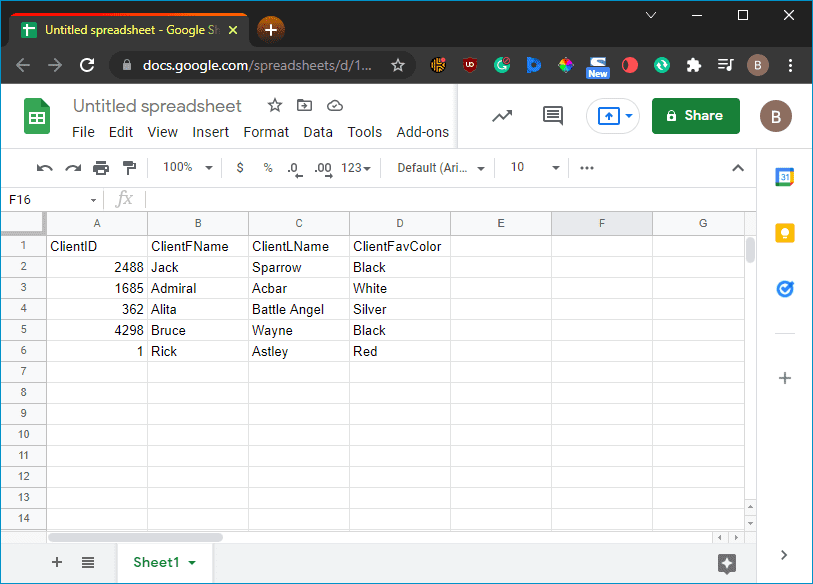
When you've finished inputting your data, click File > Download > Comma-separated values (.csv, current sheet).
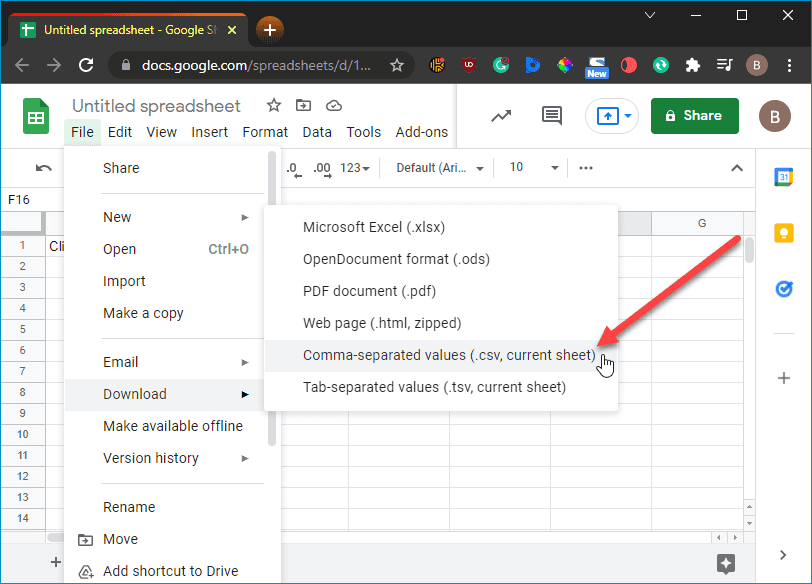
The file will be downloaded to your Downloads folder. If you didn't title the sheet, the file will be called Untitled spreadsheet - Sheet1.csv, which you can then rename. Or, you could be smart, unlike me, and title it before downloading it.


Creating CSV files is pretty easy, though it generally depends on the application you're using to create it.
How to create a CSV file with PowerShell
Creating CSV files manually is one way to get things done. But, if manually inputting a bunch of data doesn't sound like your cup of tea, then you may want to look into generating your CSV files with a shell or scripting language like PowerShell.
Often the data you want to compile into a CSV file already exists somewhere. Maybe you want to extract data from a platform like Active Directory or retrieve a list of services running on a computer. Using PowerShell to retrieve data and export it into a CSV file is extremely useful.
Here's a PowerShell script that will scan multiple computers and export their name, total memory, disk size, and free disk space to a CSV file.
#Create an advanced function that requires and accepts computer names parameters.
[CmdletBinding()]
param(
[Parameter(Mandatory)]
[String[]]$Computers
)

#Designate a variable to store the results of our foreach loop.
$Results = @()

foreach ($Computer in $Computers){

#Retrieve memory amount, total disk space, and free disk space and format in GBs.
    $Memory = (Get-CimInstance Win32_PhysicalMemory -ComputerName $Computer | Measure-Object -Property Capacity -Sum).sum /1gb
    $DiskTotal = "{0:n0}"-f ((Get-CimInstance Win32_LogicalDisk -Filter drivetype=3 -ComputerName $Computer | Measure-Object -Property Size -Sum).sum /1gb)
    $DiskFree = "{0:n0}"-f ((Get-CimInstance Win32_LogicalDisk -Filter drivetype=3 -ComputerName $Computer | Measure-Object -Property FreeSpace -Sum).sum /1gb)

#Create a PSCustomObject containing the retrieved data which will be stored in the $Results variable.
$Output = [PSCustomObject]@{
        ComputerName = $Computer
        "Memory (GB)" = $Memory
        "DiskTotal (GB)" = $DiskTotal
        "DiskFree (GB)"= $DiskFree
    }
    $Results += $Output
}

#Exports the data contained in the $Results variable to a CSV file.
$Results | Export-CSV -Path "C:\CSV\PC_Info.csv" -NoTypeInformation -Force
This script will ask you to provide the computer names you want to run the script against. This is great if you only have a handful of computers you need to enter. If you need to run this script against a lot of computers, you may want to point the script to an existing source, such as a CSV file containing computer names or an OU in Active Directory. Also, make sure you change the path to export your CSV where you want.
Here are the results of running this script against my computers.

And we can open this file in Excel to make it a little easier to read.

Returning data for three computers using PowerShell probably doesn't save much time. However, if you target hundreds or thousands of computers with this script, you'll see how valuable PowerShell can be.
Export useful CSV files using PDQ Inventory
If you're looking to get computer information into a CSV file, look no further than PDQ Inventory. PDQ Inventory is a system management tool that scans and collects hardware and software data from the computers in your network environment. That data is then used to organize and group your systems into collections, making it easy for you to identify which systems have what resources. The best part is once you sync PDQ Inventory with Active Directory, all this happens automagically. Don't believe me? Try it out for yourself with a 14-day free trial.
Once your devices have been scanned, you can use the reports built into PDQ Inventory to export this data into CSV files. Here's how it works.
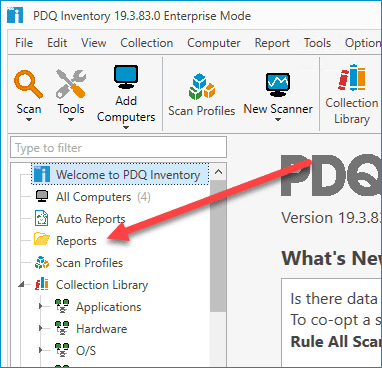
With PDQ Inventory open, click on the Reports menu in the navigation tree.
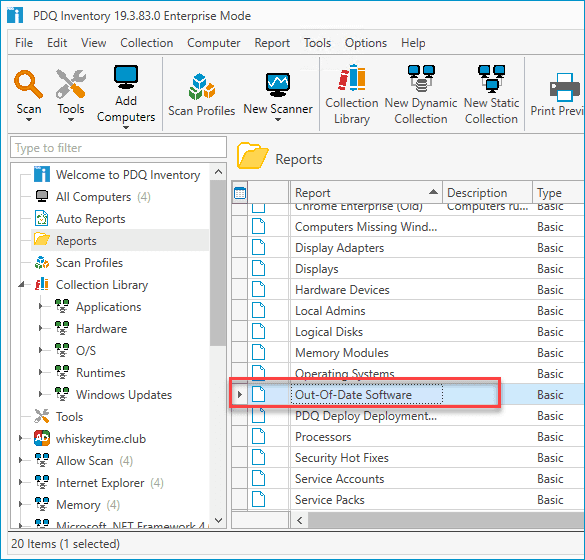
Double-click on any report. I'll use the Out-Of-Date Software report for this example.
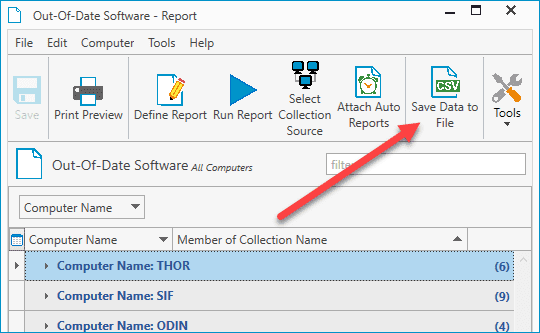
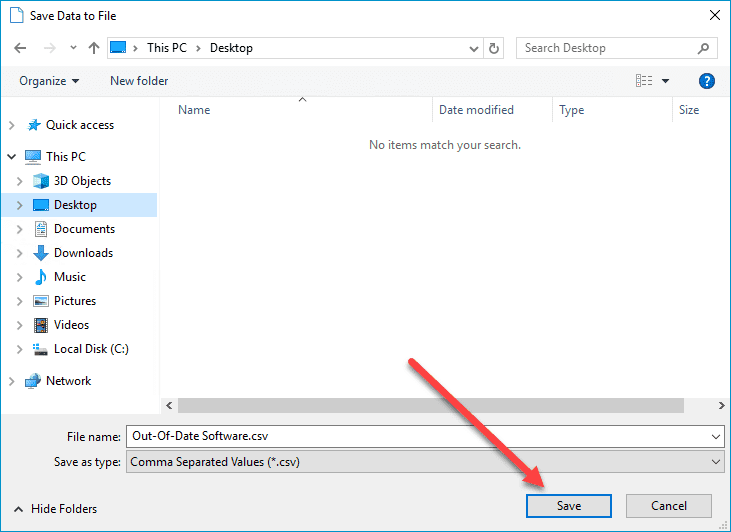
With the report open, click Save Data to File.
Navigate to where you want to save your file and click Save.
With our file saved, let's navigate to it and open it to see how it turned out.
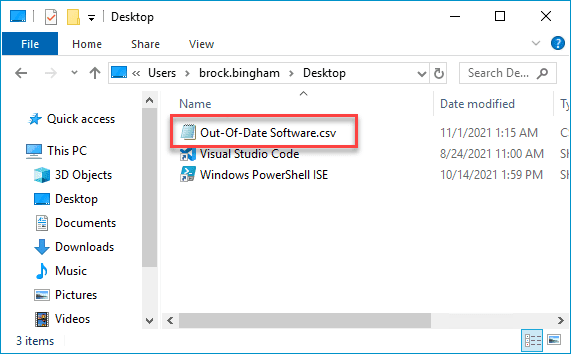
And here's our final result.
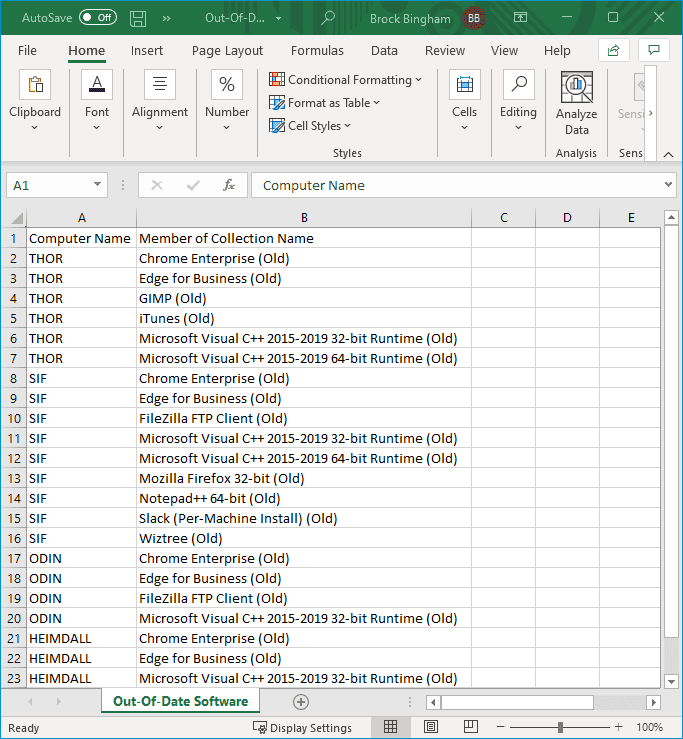


With just a few clicks, we generated a CSV file containing all of our computers with out-of-date software.
Wrapping up
CSV files are great. Because they're plain text files, they're super versatile, their file size never really gets too large, they're easy to make, and tons of modern applications can take advantage of them. In addition, if you're a PowerShell user, there's not much you can't do with a CSV file and a good PowerShell script.


