

OpenSSL, the popular open-source cryptography library, has identified two vulnerabilities affecting its platform. Discover more about this latest security risk, whether it impacts you or your organization, and how to remediate it.
Loading...
Details regarding the OpenSSL vulnerabilities
Identified as CVE-2022-3602 and CVE-2022-3786, the vulnerabilities were initially rated as critical, though they have since been assigned a “high” severity rating due to several mitigating factors.
The vulnerabilities involve X.509 certificates containing an email address that includes specific Unicode characters, which can cause a buffer overrun with certain versions of OpenSSL. Currently, the vulnerabilities leave the platform susceptible to a denial-of-service attack. It’s theorized that the vulnerabilities can lead to remote code execution, though this has yet to be proven.
Who’s impacted by the OpenSSL vulnerabilities
Currently, the vulnerabilities only affect OpenSSL versions 3.0.0 to 3.0.6. OpenSSL 1.1.1 and 1.0.2 are not impacted, as indicated in the security advisory.
What to do if you are running vulnerable versions of OpenSSL
The OpenSSL project released OpenSSL version 3.0.7 on November 1, 2022, which patches this vulnerability. Users and organizations are encouraged to update to the newest release as soon as possible.
How to find affected endpoints with PDQ Inventory
If you’re unsure if this security advisory impacts you, or if you need to identify vulnerable systems, PDQ Inventory can help. One of our very own PowerShell wizards created a PowerShell script that can be used with the PowerShell scanner in PDQ Inventory to identify vulnerable machines.
Here’s the PowerShell script:
$possibleFilePaths = "C:\Program Files\OpenSSL-Win64\bin\openssl.exe", "C:\Program Files\OpenSSL-Win32\bin\openssl.exe", "C:\Program Files (x86)\OpenSSL-Win32\bin\openssl.exe"

foreach ($possibleFilePath in $possibleFilePaths){
    if (Test-Path -Path $possibleFilePath){$filepath = $possibleFilePath}
}

if ($filepath){
    Try {
        $cmd = & $filepath version
        $cmd = $cmd.Split(" ")
        $version = $cmd[1]
        $releaseDate = "$($cmd[2]) $($cmd[3]) $($cmd[4])"
        $status = "Installed"
    }
    Catch {
        $version = $null
        $releaseDate = $null
        $status = "Filepath found, but no version detected. Investigate manually by running the following on the target in Command Prompt: `"$filepath`" version"
    }
} else {

    $version = $null
    $releaseDate = $null
    $status = "Not Installed"
    $filepath = $null
}

$output = [PSCustomObject]@{
    Version = $version
    ReleaseDate = $releaseDate
    Filepath = $filepath
    Status = $status
}

return $output
Here’s how to create the PowerShell scanner in PDQ Inventory:
With PDQ Inventory open, click the New Scanner button, then click PowerShell.
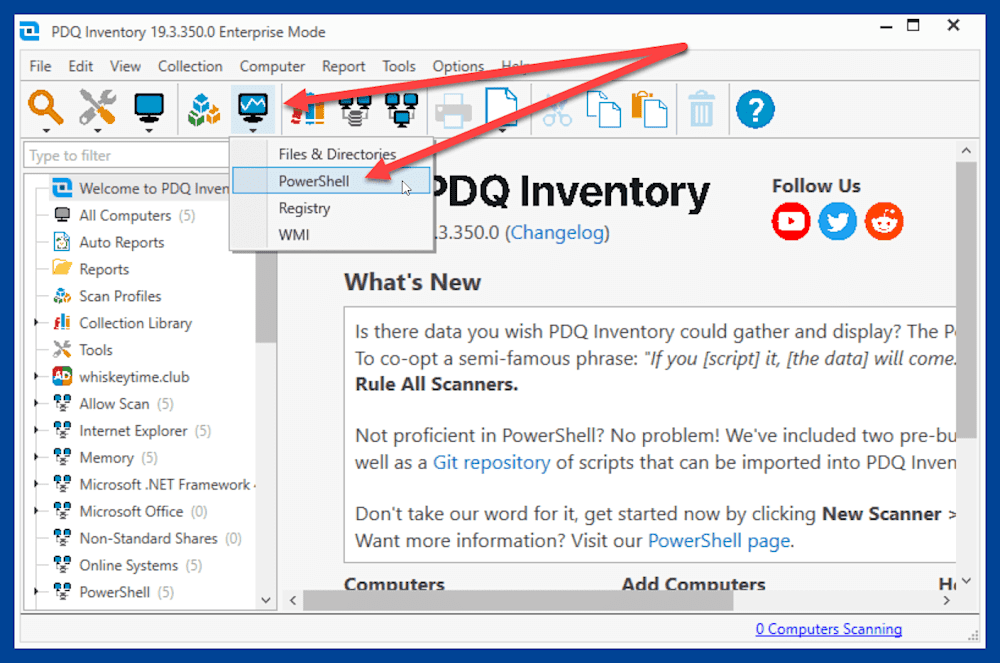
Give the scanner a descriptive name.
Select Script, then paste the PowerShell script into the script window. You can also save the script as a PS1 file and enter the path to the file.
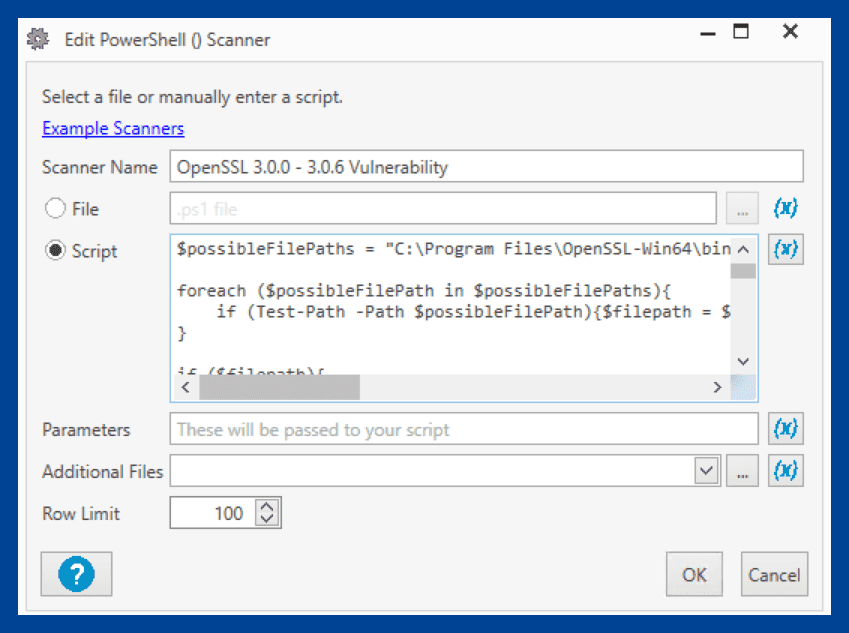
When you’re finished, click OK, which will close the scanner window and open the New Scan Profile window.
At the New Scan Profile window, enter a name for the new scan profile. You can use the same name you used for the scanner.
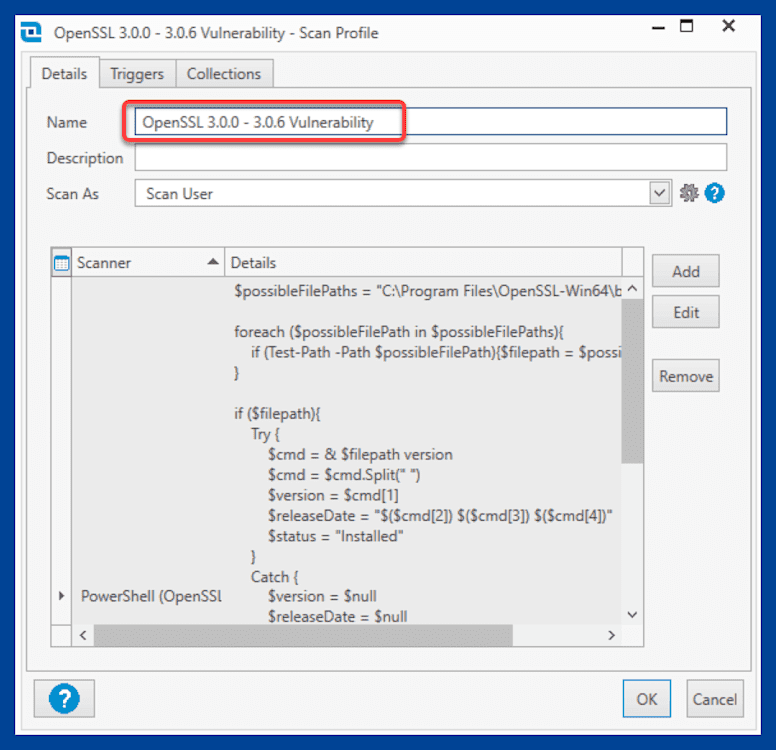
Click OK to save and close the scan profile window.


Here’s how to run the scanner against your computers:
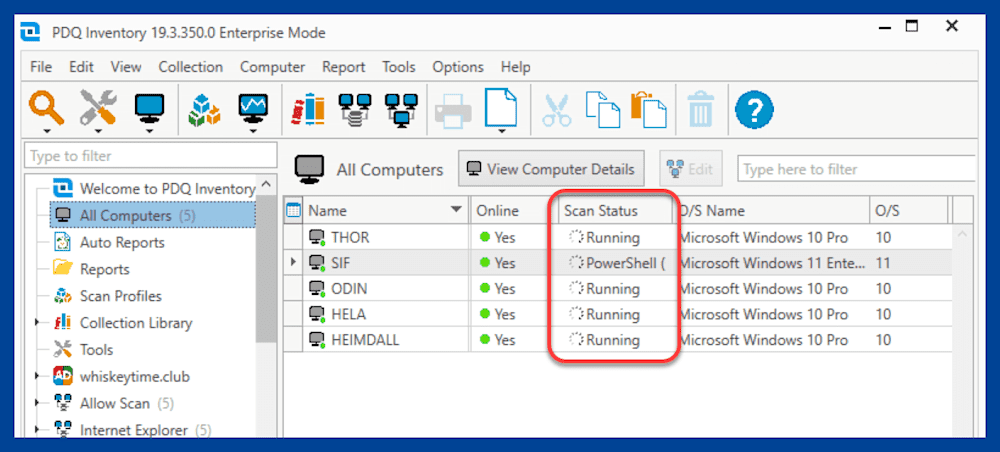
Right-click on All Computers, then click Scan Collection > <OpenSSL_Scanner_Name>.
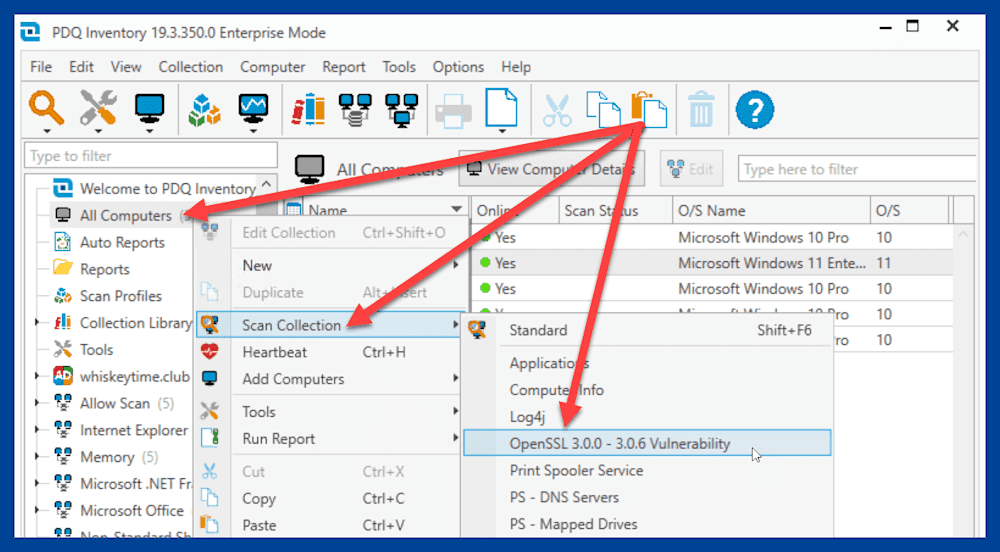
You can monitor the status of the scan in the Scan Status column.
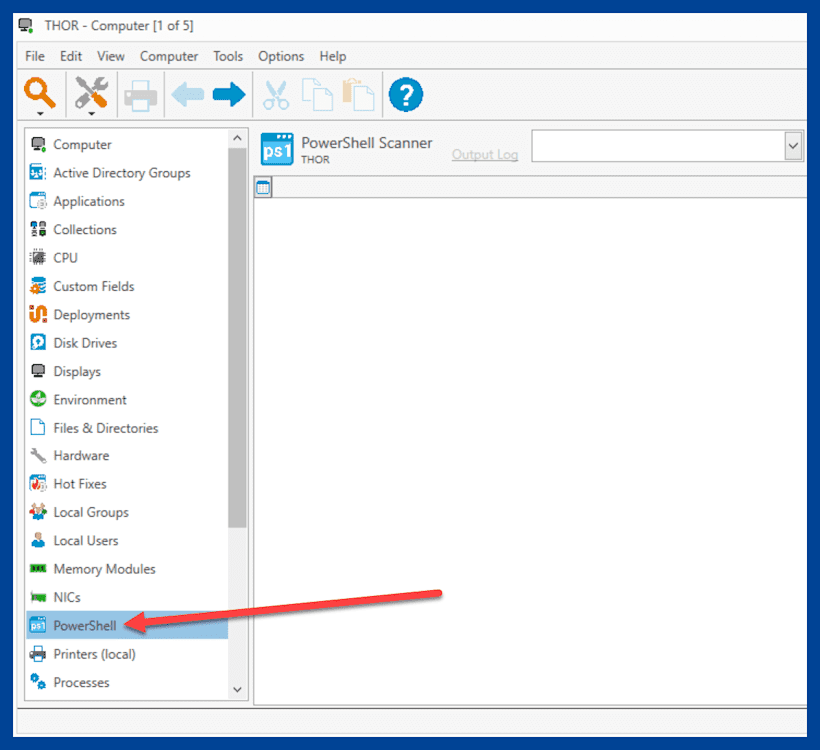
After the scan has finished, double click on any computer to open the computer details window.
In the computer details window, click the PowerShell link.
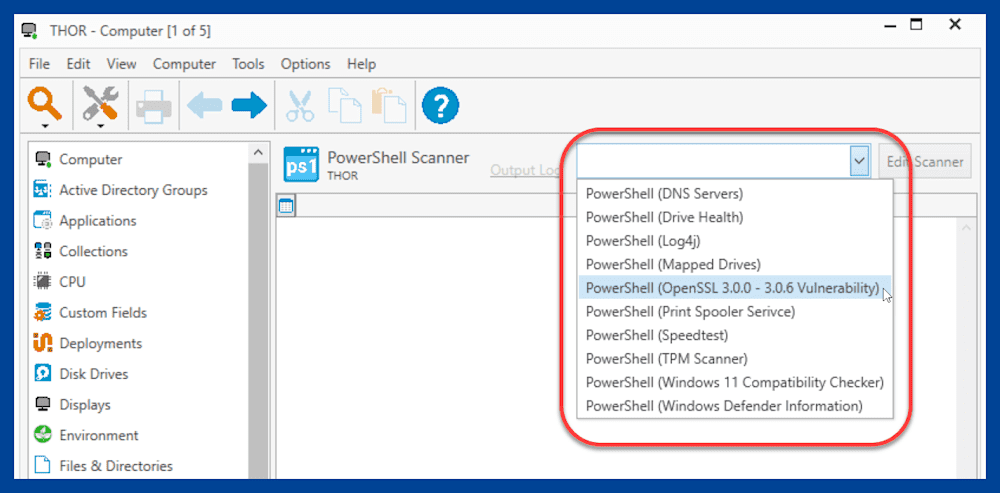
Click the drop-down menu in the PowerShell window, then select the OpenSSL scanner.
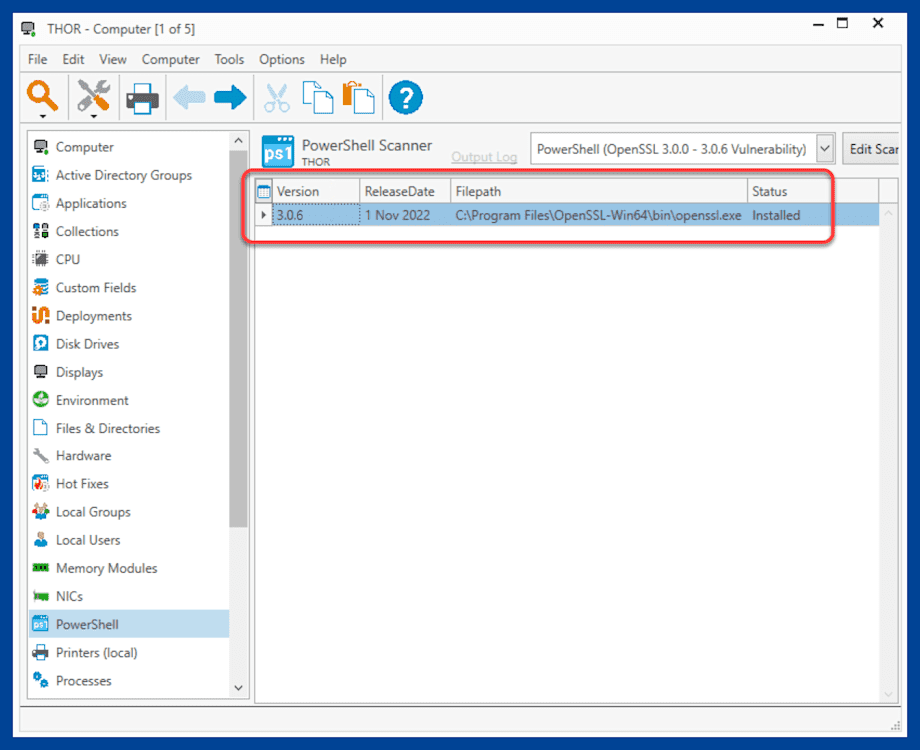
The results of the scan should appear. The scan provides the version number, release date, file path, and installation status. If not installed, the status will indicate Not Installed.


Now that we have the information in PDQ Inventory, we can generate a report to help us identify vulnerable endpoints.
Click the New Report button, then click Basic Report.
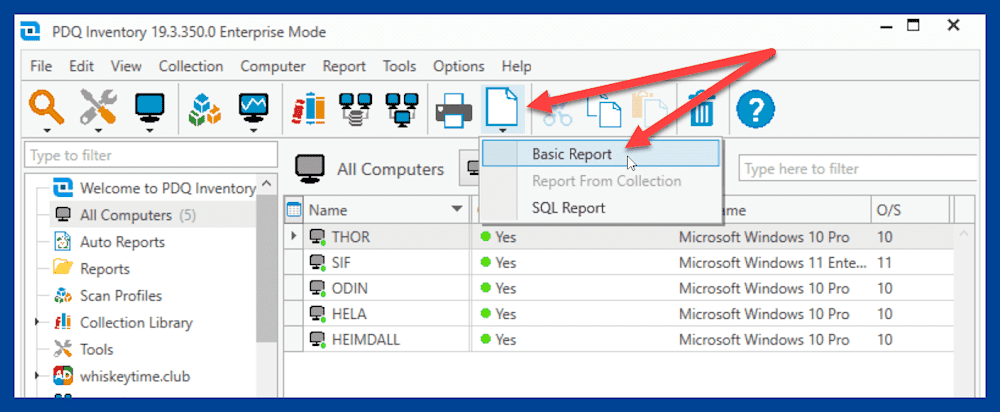
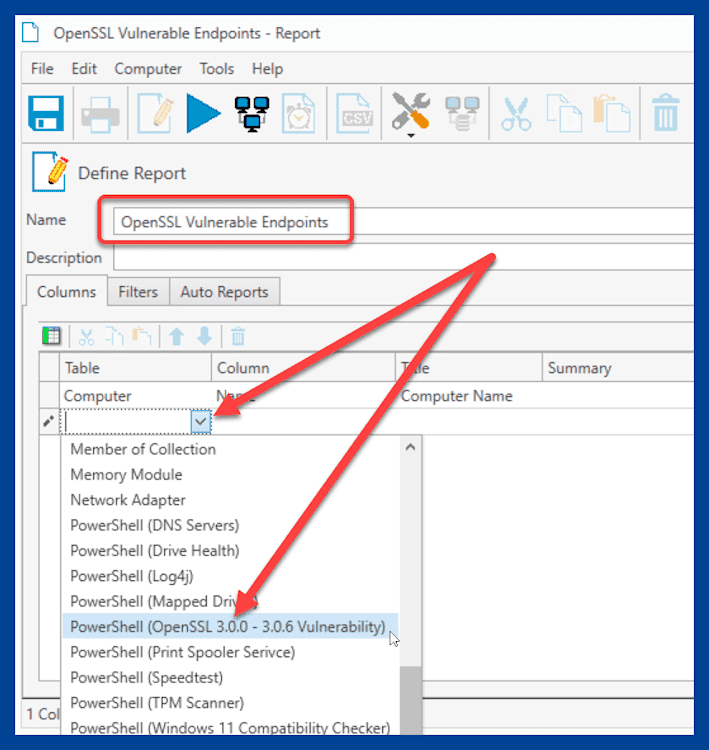
Name the report.
Click into the empty row under the default row, and in the first column, use the drop-down arrow to select the OpenSSL PowerShell scanner.
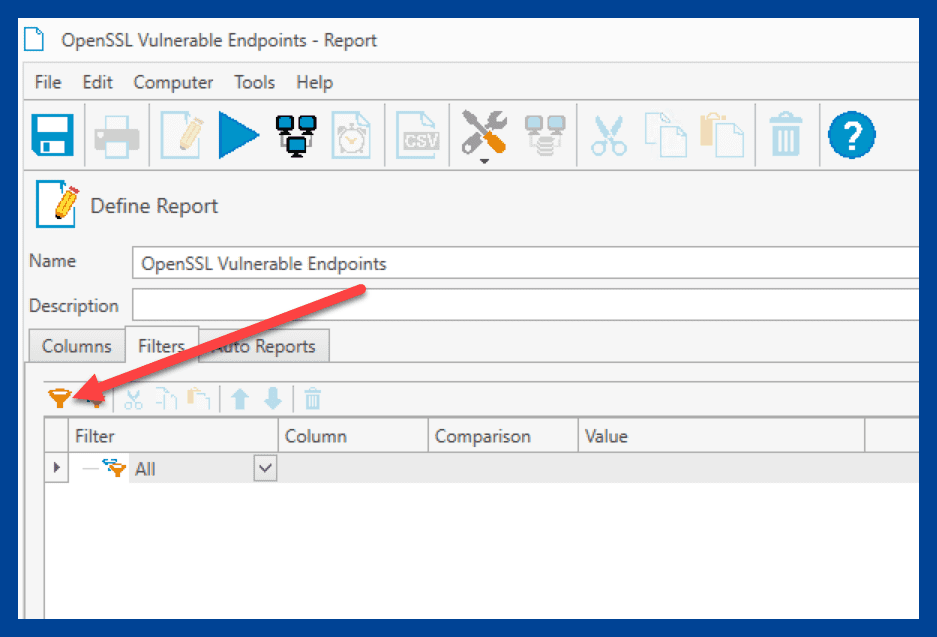
Click the Filters tab.
Click the Add value filter button.
Use these settings for the new filter: <PowerShell_OpenSSL_Scanner_Name> > Version > Version Between > 3.0.0 > 3.0.6
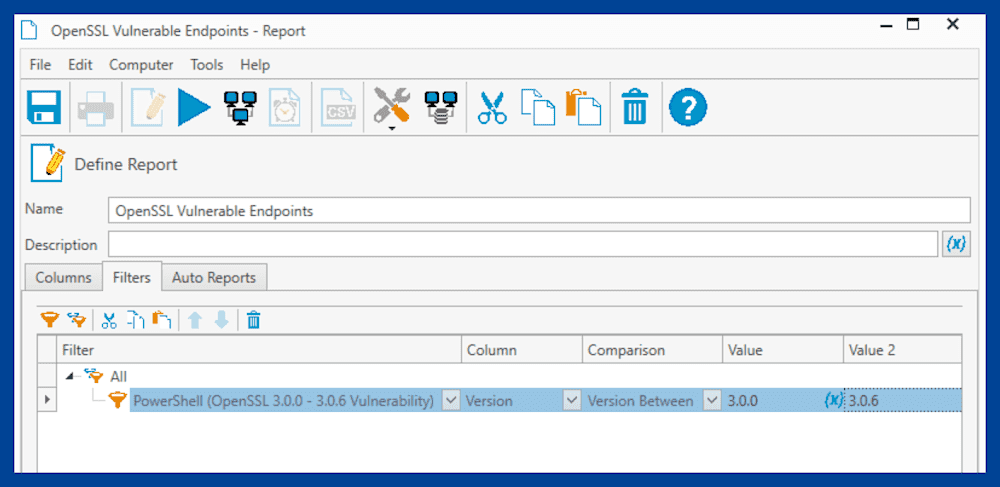
Click Save, then click Run Report.


After clicking the Run Report button, PDQ Inventory will generate your report. Here are the results from my report:

You can use this information to quickly identify which endpoints are vulnerable and need to be updated.
Be cautious, but don’t freak out
There was a lot of panic when this security advisory was first announced. Many assumed these vulnerabilities would be the new Heartbleed 2.0. Thankfully, it’s not as bad as many first speculated. However, as with any vulnerability, ensuring your devices are secure is essential. If you need help keeping your devices up to date, download a free trial of PDQ Deploy and Inventory. With in-depth scanning and automated patching, Deploy and Inventory can help keep computers safe and secure.


