What’s the Big Deal?
*.exe files are synonymous with software installation and are easily the most ubiquitous means of packaging software for distribution. This means that vendors and developers have had time to work out the kinks, settle in on an accepted industry standard, innovate, provide clear documentation, right?
If you consider dozens of disparate, proprietary or open source, and poorly documented methods of packaging their software into a single executable a “standard”, then they’ve got that in spades!
Let’s do a quick bit of fun trivia: Which one of the following switches can be used to indicate a silent install for setup.exe?
/s
/S
/silent
/verysilent
/s /a /s /sms /f1c:\temp\setup.iss
/s /a /s /v"/qb"
Ready?
The answer is: All of the above! Or none of them. Or some of them in weird ways that make you stare at them and think “what have I done to deserve this?”.
If you’re down for a wild, wacky, and exciting learning experience, buckle up! If you just want to dive in and get to work without all the fluff, scroll down to the final example.
Quick Note:
Because the vast majority of installers we all use day-to-day are created with older
versions of these solutions, that’s where we’ll be focusing our attention.
The G(old) Standard - InstallShield
InstallShield is the most well-known and widely used packaging system for .exe installers. It is also one of the oldest and harkens to a simpler time, where all you needed was a few switches to make your life easier - in this case, just 5 (to start with).
/r (record your choices through the install process)
/s (silently install using the info from the .iss answer file)
/sms (force the installer to wait for all processes to finish before exiting - very important)
/f1 (provide an alternative name and/or location for the .iss file - can be used with /r)
/f2 (specify the name or location for the log file).
Making the Standard Work for You
InstallShield uses an "answer file", named setup.iss by default, to store the options you choose within the dialogue boxes for the installer. You create one by running the installer with the /r switch.
Setup.exe /rHere’s how that process works by default:
Run the installer with the /r switch.
Proceed through the dialogue prompts and complete the installation.
This will create a setup.iss file and place it in a very common location that I’m sure we’re all used to checking - C:\Windows.
This file will include all of your responses to the InstallShield dialogs that normally require physical interaction. Things like:
Accepting the EULA
Choosing an installation directory
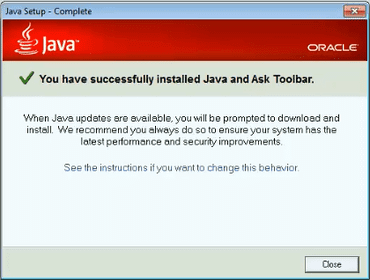
Choosing the “No, I don’t want that Ask toolbar” button before eventually realizing the option actually said “No, install anyway”, and then feeling your eye start twitching again. Don't worry, we can walk you through how uninstall just about anything.

4. Copy setup.iss to the same directory as the executable.
Once you have a setup.iss file you will be able to run the installer with /s and /f1 switches to silently install it. Pay close attention to the use of the lower-case /s here, as well as the lack of a space between /f1 and your path.
\\Server\Software\Setup.exe /s /f1"\\Server\Software\Setup.iss"Fun caveat – InstallShield quietly strips out some non-alphanumeric characters from
file and directory names, so try not to use obscure or crazy things like...hyphens.This will perform an unattended installation as detailed in your setup.iss file if you’re only planning on running it locally and don’t really care about keeping track of the progress or error status. If that’s enough for you, you’re done!
I have a hunch that you might want to know when/if the install fails, access the install logs, and fix it on the fly. To make that possible, we’ll need one more switch - /sms.
By default the installer will start up a separate process to handle the actual installation, and then immediately exit. It ignores normal ways of forcing a process to wait, meaning it will “finish” immediately even if you run it under something like start /wait.
As you may imagine, this makes it less than ideal for scripting purposes. That immediate return of the installer success code would trigger the next step in line, regardless of whether or not the installation is actually complete. Luckily, this is where the /sms switch comes into play, which will force the installer to pause until the installation completes.
Whew, we’re almost done! Now to put it all together into a coherent and flexible package in Deploy.
The new gold standard for silent installs
Let PDQ Deploy & Inventory do the work for you. Try it free for 14 days.
Put it all together
If we put it all together (finally), and assume we didn’t change the .iss name, see the example below of how you would set this up in PDQ Deploy.

Keep in mind that for a stock InstallShield executable, you will want to provide both the /s and the /sms switches to help ensure a smooth deployment.
\\Server\Software\Setup.exe /s /sms /f1"\\Server\Software\Setup.iss"Conclusion
There you have it. This is just 1 way that an EXE can be deployed, as long as it was made with InstallShield, it does not have custom dialogue boxes that fail to follow standards, and the developer builds in proper automation support. And even then…that’s enough doom and gloom for now. We need to save some for the next EXE framework!
In the words of the unintentionally wise and topical Brian Fantana, “60% of the time, it works every time”. Luckily, if you use PDQ Deploy your chances of success increase substantially!


