One of the benefits of being an IT administrator is you’re rarely bored. New problems requiring new solutions crop up all the time. But there are a handful of issues that we deal with on a daily basis. Yes, we all have that one user who forgets their password weekly, sometimes multiple times a week, but that’s easy enough to deal with. The much more frustrating issue is the all too familiar “my computer is running slowly” complaint.
The problem with slowdowns
Unlike a forgotten or mistyped password, a variety of factors can cause computer slowdowns. Maybe the hardware is old and not quite cut out to run modern applications. Perhaps the computer is installing updates in the background while the user is trying to finish a big project. Maybe someone on your network is streaming "Pee-wee's Big Holiday" in 4K HDR and is hogging all the bandwidth. Unfortunately, you really won't know the cause of the slowdown until you dig in and start investigating. However, using PDQ Inventory and the Speedtest CLI, we can create a PowerShell scanner to help us quickly identify if a user's PC is running into a bandwidth issue.
Using Speedtest to diagnose bandwidth issues
Speedtest is an excellent site for measuring the performance of your internet connection. It's also a great way to see if your internet service provider (ISP) actually gives you the speeds you pay for.
Using Speedtest is super easy. Just head to the site and click GO. You’ll immediately see the site start measuring your internet speeds.
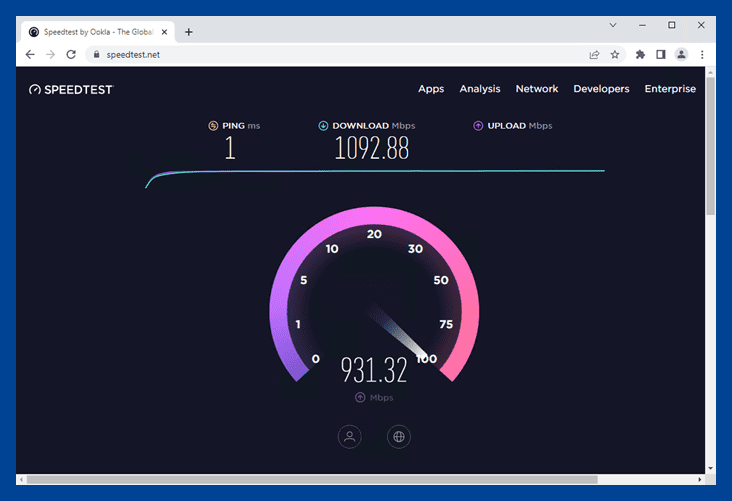
When the test finishes, you’ll get your results, which include your ping to the server, your download speed, and your upload speed. As you can see from the image above, my internet speed brings all the geeks to the yard.
While this super handy site is great at what it does, there is a downside. This test needs to be run locally, so we have to get up off of our custom-molded office chairs and utilize our legs, which is obviously a last resort. While we could remote into the computer and run the test, we’re still limited if we need to run it against a fleet of computers. To help overcome these challenges, Speedtest developed a CLI that we can combine with PDQ Inventory to run against a whole herd of computers!
The Speedtest PowerShell script
The first thing you’ll need to do is download the Speedtest PowerShell script.
The script is fairly long, so we won’t cover the details in-depth, but there are a few things worth mentioning.
Firstly, thanks to the PDQ staff and community members who contributed to this script. Next, while the Speedtest CLI download page says that the CLI works on both x86 and x64 operating systems, that is not correct. The CLI only works with 64-bit operating systems. Lastly, and this is a big one, be aware that this script automatically downloads and extracts the executable from Speedtest onto the target host, and it automatically accepts the EULA when running the executable. Make sure you are okay with this behavior before running this script.
Additionally, if you’re feeling up to it, you can modify this script to return only the information you’re looking for. It’s pretty customizable, and the README file included in the CLI zip file covers most of the information you need to know.
With that information out of the way, save the PowerShell file to your PDQ console and remember the location because we’ll need to point to it when we create our scan profile in PDQ Inventory.
Creating the Speedtest scanner in PDQ Inventory
With our PowerShell file saved away, we can now create our scanner and scan profile in PDQ Inventory. Here’s how:
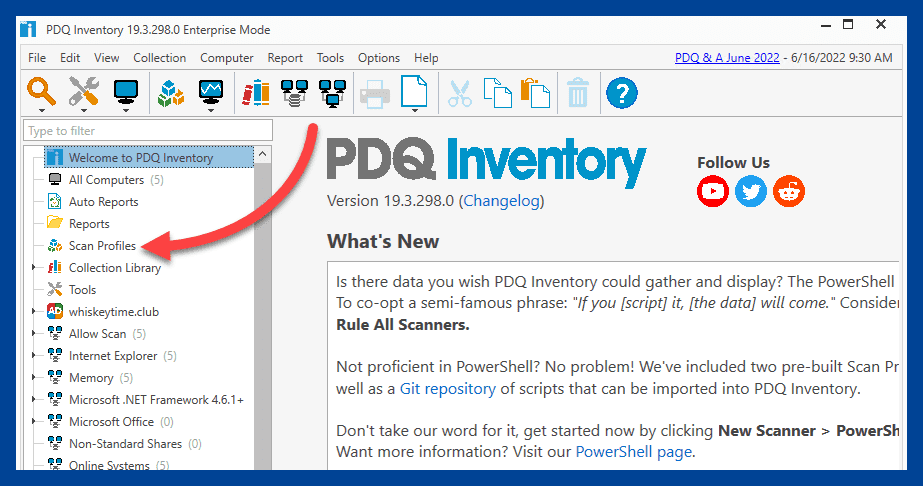
1) With PDQ Inventory open, click the Scan Profiles link from the menu list.
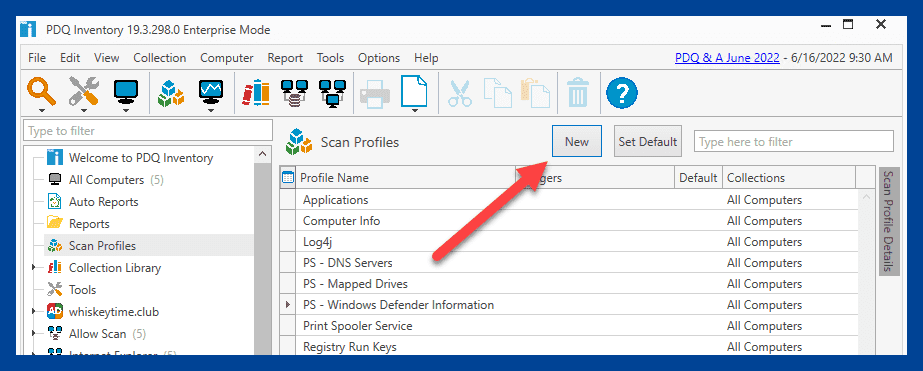
2) Click New.
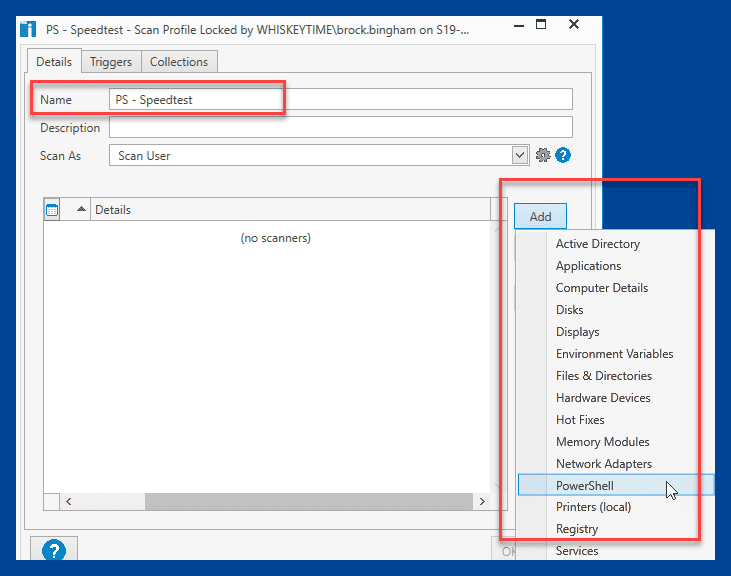
3) Name the scan profile PS - Speedtest and enter a description if you’re feeling ambitious.
4) Click Add > PowerShell.
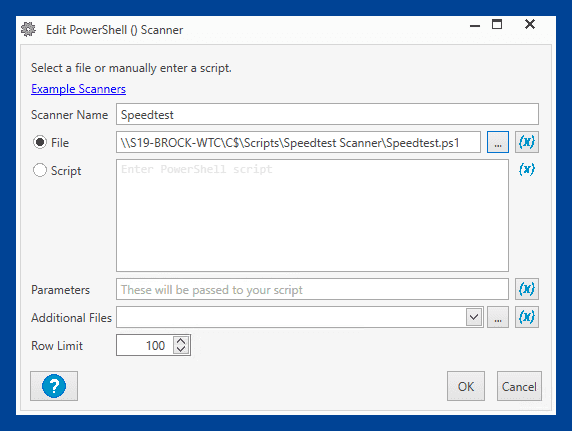
5) Enter Speedtest for the scanner name.
6) Click the ellipsis button next to the File field.
7) Navigate to the Speedtest PowerShell file you saved to your PDQ console, select it, and click Open.
8) Click OK on the PowerShell Scanner window.
9) Click OK to save, and close the Scanner Profile Window.
Scanning targets with the Speedtest scanner
With our Speedtest scanner created, we’re ready to run it against some targets. Since this CLI client only works on 64-bit devices, we’ll first create a dynamic collection containing only 64-bit workstations and run the scanner against this new collection.
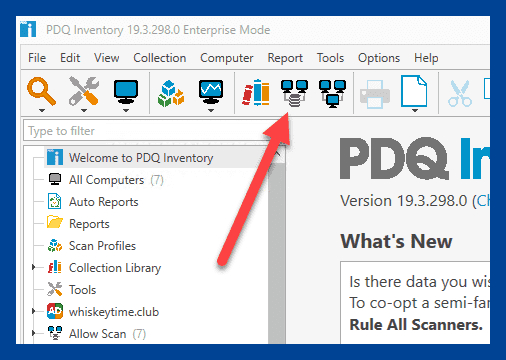
1) In PDQ Inventory, click the New Dynamic Collection button.
2) Name the collection 64-bit Workstations.
3) Configure your collection to match the filters in the image below:
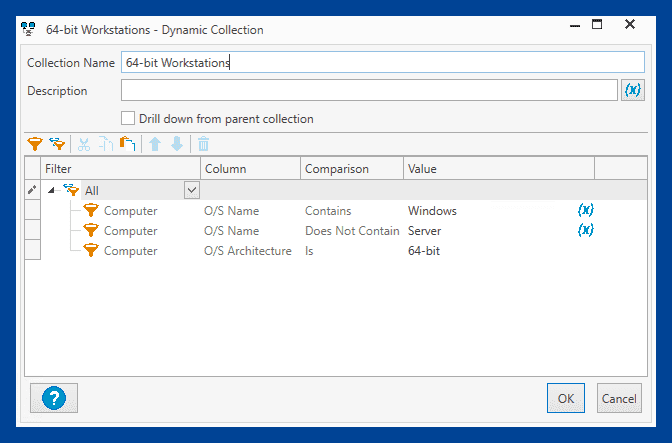
4) Click OK to save the collection.
Now that we have the collection created, we can run the scanner against the computers in the collection. To do so, right-click on the 64-bit Workstations collection and click Scan Collection > PS – Speedtest.
Double-click on a computer once the scan finishes running to open the computer details window. Click on the PowerShell list option, then click the drop-down arrow and select the PowerShell (Speedtest) scan results.
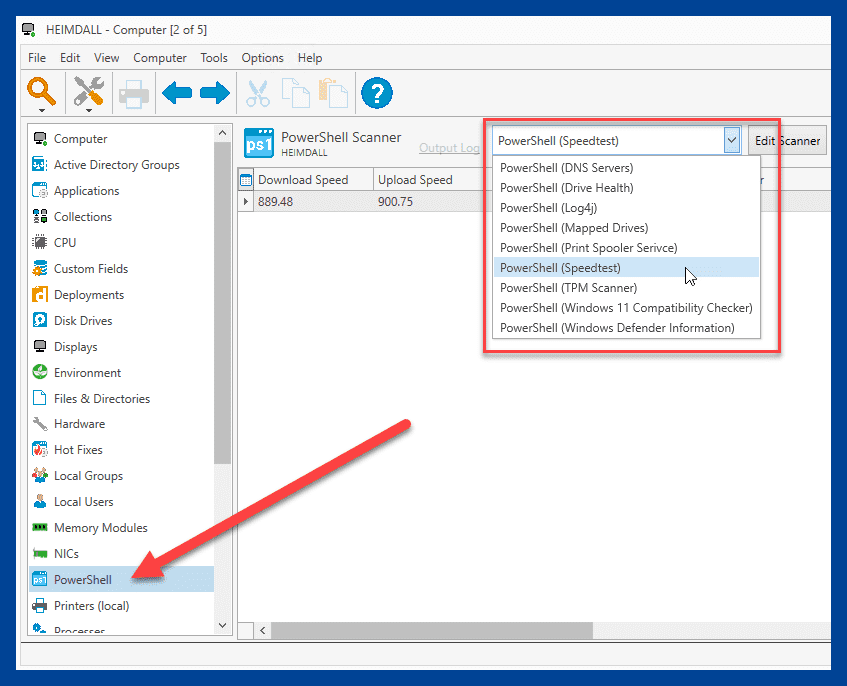
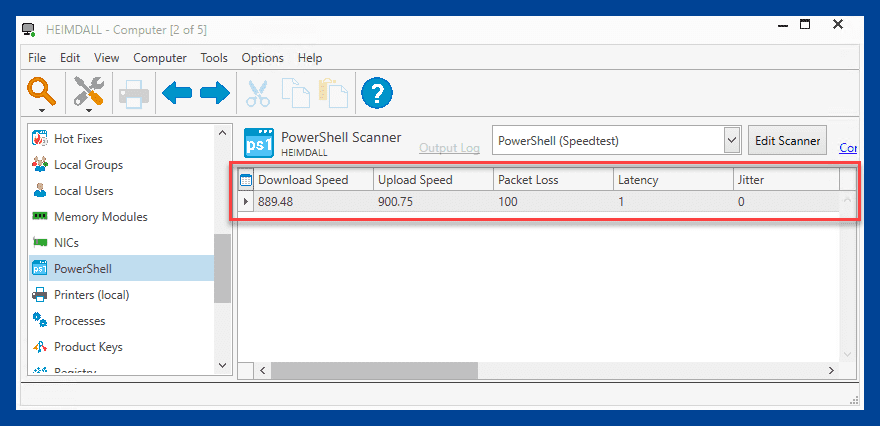
This scanner will return loads of great data, including download speed, upload speed, latency, packet loss, target server, and more, which can be altered by modifying the PowerShell script.
Doing more with less effort
PDQ Inventory is designed to help keep you in your nice comfy office chair. Sure, going for a walk can be nice, but scanning hundreds or thousands of computers in seconds and collecting massive amounts of valuable data is even nicer.
If you’re not already using PDQ Inventory, download a free trial today before you sprain an ankle walking to all those devices you manage. Your sore muscles will thank you.

