

TL;DR: PowerShell updates depend on which version you’re running and how many devices you manage. PowerShell 7.x is the actively developed version and should be kept up to date. You can update it manually with the MSI installer, automatically through Microsoft Update, or quickly using winget on a single machine. For larger environments, tools like PDQ Connect or PDQ Deploy & Inventory can automate PowerShell updates across many devices using dynamic groups, packages, and scheduled deployments.
PowerShell can be updated manually, through Microsoft Update, with winget, or through automated tools like PDQ. The right method depends on your environment and how many devices you manage. Below are the most reliable ways to update PowerShell on Windows systems.
Windows PowerShell 5.1 vs. PowerShell 7.x
PowerShell exists in two major versions: Windows PowerShell 5.1 and PowerShell 7.x. Only PowerShell 7.x receives active updates, so it’s the version you should keep updated.
Windows PowerShell version 5.1
Windows PowerShell is the original version of PowerShell. Windows PowerShell, built on .NET Framework and using the Windows Management Framework (WMF), is included with Windows and Windows Server operating systems, making it the most common version of PowerShell. However, it’s no longer being actively developed, meaning it won’t receive new features going forward.
The final version of Windows PowerShell is version 5.1, which is included with Windows 10 and higher, and Windows Server 2016 and higher.
Since Windows PowerShell is not being actively developed, we won’t focus on it.
PowerShell version 7.x
PowerShell, formally known as PowerShell Core, is open source, multiplatform, and built on .NET, formerly known as .NET Core. PowerShell is in active development and receives a steady stream of updates.
While Microsoft continues to confound users with their convoluted naming gymnastics, hopefully this information clears up some of the confusion around the differences between Windows PowerShell and PowerShell.
How do you manually update PowerShell?
You can manually update PowerShell by downloading the latest MSI installer and running it locally, which is the preferred method for Windows Server.
The hardest part about this whole process is finding the right installer. But that’s what I’m here for.
Once you’ve downloaded the MSI package, you’re ready to install it.
Launch the PowerShell 7.x installer.
Click Next.
Set your install directory. I recommend sticking with the default destination unless you have a specific need to change it. Click Next.
Select your optional actions. I recommend selecting all the options, but don’t let me tell you how to live your life. Click Next.

Select whether or not you want PowerShell to automatically update via Microsoft Update or WSUS. We’ll dive more into these update methods in the next section. Click Next.
Click Install. If you receive a User Account Control (UAC) prompt, click Yes.

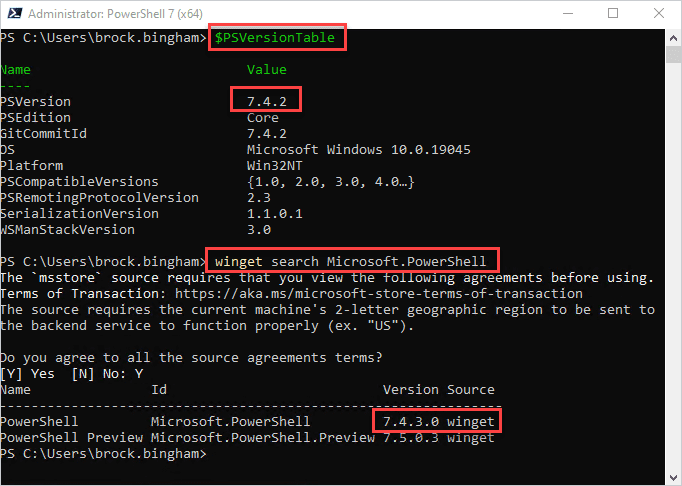
When the installation finishes, we can launch a PowerShell window and run $PSVersionTable to return the PowerShell version number and ensure the update was successful. On my test computer, I went from version 7.4.2 to version 7.4.3.

This method really feels geared towards stubborn people like me who enjoy reminiscing about the good old days. And while I’m reminiscing, let me toss out an obligatory “get off my lawn!” Now I feel at peace.
How do you update PowerShell with Microsoft Update?
Microsoft Update can automatically deliver PowerShell 7.2 and higher, as long as the setting to receive updates for other Microsoft products is enabled.
Here’s how to update PowerShell with Windows updates.
Right-click on the Windows Start button, then click Settings.
On Windows 10, click Update & Security. On Windows 11, click Windows Update.
Click Advanced options.
Enable Receive updates for other Microsoft products.
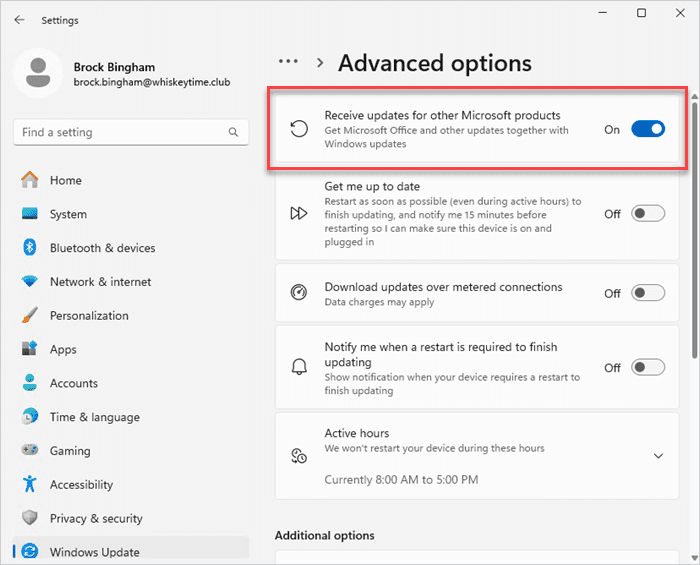

Here’s what the update process looks like in the Windows Update settings page. Note that this was updating PowerShell 7.4.1 to version 7.4.2.

This option is turned on by default when you enable the automatic updates options during the PowerShell MSI installation. See step 5 of the previous section, “How to manually update PowerShell” for more details.
Microsoft Update works well and is a very hands-off approach, but you are at the mercy of Microsoft’s release schedule. You may not receive a new PowerShell update until it’s been available for a couple of weeks.
How do you update PowerShell with winget?
You can update PowerShell using winget by running a simple install command that pulls the latest version from the Windows Package Manager repository.
Winget, the client interface of the Windows Package Manager, is a powerful command-line tool built into Windows OS that can install and update PowerShell. If you are updating PowerShell for yourself and you haven’t already automated the process, winget is probably the fastest and easiest way to do it. And if you know anything about me, you know that fastest and easiest are two of my favorite words. And no, it’s not because I’m lazy — alright, it’s because I’m lazy.
Here’s how to use winget to update PowerShell.
Launch a PowerShell or Command Prompt window.
Enter this command:
winget search Microsoft.PowerShellThe command should return the latest version of PowerShell. If you're prompted to accept a terms-of-use agreement enter Y.
If a newer version of PowerShell is available, enter the command:
winget install --id Microsoft.PowerShell --source wingetWinget should identify the newer version and install it.

How do you automate PowerShell updates with PDQ Connect?
PDQ Connect can automatically deploy the latest PowerShell version to remote and on-prem devices using dynamic groups and scheduled automations. This is a great solution if you manage devices and need to keep PowerShell up to date on dozens, hundreds, or even thousands of endpoints. For my sysadmin peeps out there, this is the way (said in a very Mandalorian tone).
Before we dive into the tutorial, let me show you how I have my groups in Connect configured. I have four PowerShell groups:
PowerShell Installed
PowerShell Latest
PowerShell Not Installed
PowerShell Old

Since these are dynamic groups, devices are automatically assigned to them if they match the filters. These custom groups make it easy to identify which devices need PowerShell installed and which need PowerShell updated. While I recommend using all of these groups, the only one that I highly recommend to help you follow this guide is the PowerShell Old group. Here are the filters you’ll need:
Software | Name | Contains | PowerShell
Software | Versions | is less than | $(AppVerPowerShell7)

(Note: You can ignore the first ATLA filter. That’s just to keep my test environment organized. Also, the last filter uses a variable that represents the latest version number of PowerShell, which at the time of this writing is 7.4.3.)
Check out our PDQ Connect getting started series if you want to learn more about custom groups and variables.
Steps to automate PowerShell updates with PDQ Connect
Now that you know how my groups are configured, let’s look at how to install PowerShell with PDQ Connect.
Launch PDQ Connect.
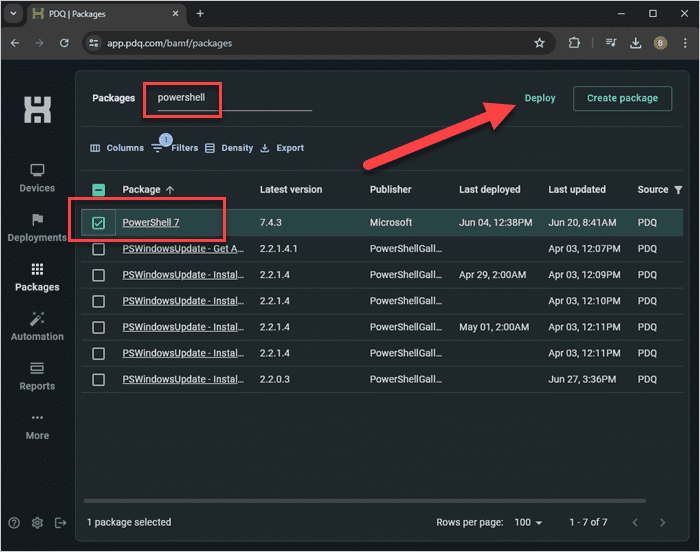
Click the Packages tab.
In the search field, type PowerShell to filter the results.
Select the PowerShell 7 package. This package is built and maintained by PDQ, meaning we automatically update it for you when a new version is released.
Click Deploy.
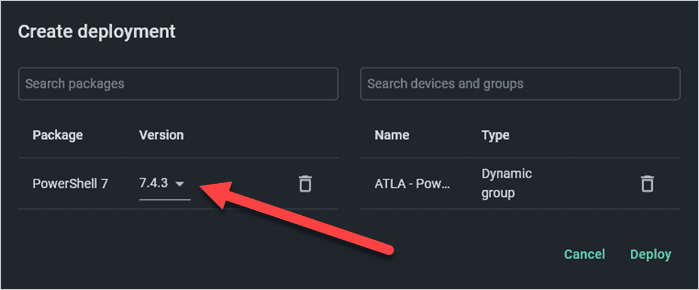
Enter the names of the devices or the device groups you want to install PowerShell on, then click Deploy. Notice that you can choose a specific update of the package to deploy if you want.


In the example above, I deployed the package to my custom group called PowerShell Not Installed. Notice that I now have three devices with the latest PowerShell version installed and one device running an older version of PowerShell.

Now it’s time to configure our automation, which will ensure that devices running an old version of PowerShell get updated.
Click the Automation tab.
Click Create automation.
Enter PowerShell for the name of the automation.
Select the PowerShell 7 package and ensure the Latest version is selected.

Select the Automatic or the Recurring automation trigger. I’m using the Recurring trigger for this example but use whichever better suits your needs.
Automatic: This trigger deploys the latest version of PowerShell to the target devices/groups as soon as a new version of the PowerShell package is available. It also immediately deploys the package to devices when they join a targeted group.
Recurring: This trigger deploys the latest version of PowerShell according to a schedule you configure.
If you choose Recurring, configure your deployment schedule. I’ve set up my automation to run every Friday at 4 p.m.
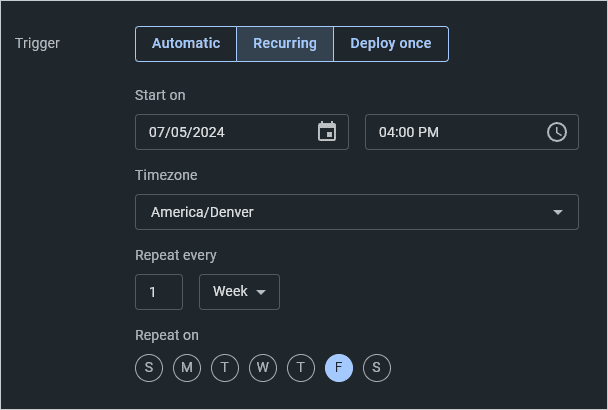
Lastly, in the Deploy to field, add your PowerShell Old group as the target.
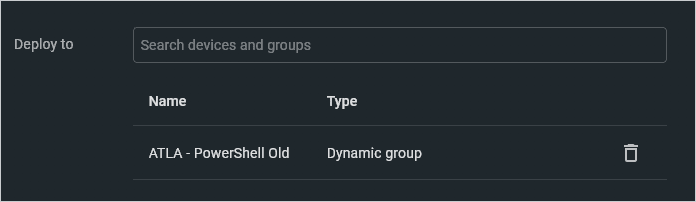


With the automation configured, PDQ Connect takes care of the rest and keeps your devices running PowerShell updated automatically.
If you haven’t tried PDQ Connect yet, take it for a spin with a free trial and see how easy Windows and macOS endpoint management can be. Since Connect is an cloud-based solution, it can manage both on-prem and remote devices with ease.
How do you automate PowerShell updates with PDQ Deploy & Inventory?
PDQ Deploy & Inventory can automate PowerShell updates on on-prem Windows devices using Auto Download packages and scheduled deployments. Because Inventory includes tons of prebuilt dynamic collections (including PowerShell collections), we don’t have to worry about creating those ourselves.
Here’s how to update PowerShell with PDQ Deploy & Inventory.
In PDQ Deploy, click Package Library.
In the filter field, type PowerShell.
Select the PowerShell 7 package, then click Download Selected (As Auto Download).

Click the New Schedule button.
Name your schedule PowerShell.
Click the Triggers tab.
Select the automation triggers you want to use. I’ll use the Weekly trigger to match the previous example.
Configure your schedule.

Click the Targets tab.
Click Choose Targets > PDQ Inventory > Collection.
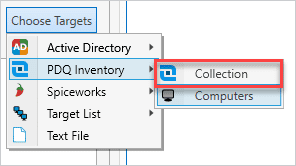
Expand Collection Library > Runtimes > PowerShell > PowerShell 7, then select the PowerShell 7 (Old) collection. Click OK.
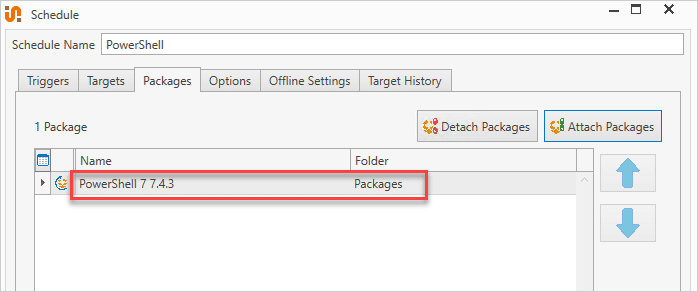
Click the Packages tab.
If the PowerShell package isn’t listed, click Attach Packages and select it.
Select the Options tab, then make sure Stop deploying to targets once they succeed is selected.

Click OK to save the schedule.


Packages from the Package Library are maintained by PDQ. When a new version of PowerShell is available, PDQ updates the package so you don’t have to. It’s kind of like magic, but instead of a person with a top hat, it’s a bunch of PDQ sysadmins wearing cool PDQ shirts keeping things updated behind the scenes.
PDQ Deploy & Inventory is an agentless solution that specializes in on-prem device management. Try it for free and learn what true automation looks like.
So many options, so little time
Keeping PowerShell updated is important because it ensures you’ve got access to the latest features and keeps you safe from potential vulnerabilities.
While I recommend automating tedious tasks like this, I can’t blame you if doing things the old-fashioned way gives you that nostalgic kick you’re craving. Take your method of choice and run with it.


