

TL;DR: PowerShell ISE is on its way out, and VS Code is the better long-term option for scripting. This guide walks you through installing VS Code and the PowerShell extension, enabling ISE Mode, tweaking key settings, and adding extensions like Error Lens, custom themes, and (yes) desktop pets.
Whether you’re a PowerShell rookie or a PowerShell pro, having the right tools for the job is essential. And if you’re still using the PowerShell Integrated Scripting Environment (ISE), you may miss out on crucial PowerShell features sooner than you think. But don’t worry; it’s not too late to change. With this guide, we’ll show you how to ditch your outdated scripting environments and transition to VS Code, now with 100% more pets!
What is VS Code?
Visual Studio (VS) Code is a free multiplatform source-code editor, not to be confused with Visual Studio, which is a full-featured development environment. Released in 2015 by Microsoft, VS Code is available for Windows, macOS, and Linux.
VS Code has quickly become the source-code editor of choice for most developers, as shown in the 2024 Stack Overflow Developer Survey. While there are many reasons why sysadmins and developers are moving to VS Code, its massive feature set and consistent updates are some of its main draws.
VS Code features include the following:
Multiplatform support
IntelliSense
Support for almost every major programming and scripting language
Interactive debugger
Extensive customization
Git integration
Community-driven extensions marketplace
This list is just a small selection of notable features available in VS Code in addition to the standard features you would expect from a script editor. However, VS Code regularly receives feature updates, and Microsoft and the community regularly add new extensions, meaning the feature list continues to grow.
Why should I switch from PowerShell ISE to VS Code?
Nobody likes change, me included. I only embrace change while kicking, screaming, and throwing stuff. However, if you’re still using PowerShell ISE, you may be forced to make a change as Microsoft seems to be sunsetting it.
Don’t get me wrong; Microsoft hasn’t officially announced an end-of-life date for PowerShell ISE, and it still comes included with most versions of Windows. However, Microsoft has stopped active feature development for the product. And as it stands now, PowerShell ISE doesn’t support newer versions of PowerShell, including version 6 and beyond.
If you’re hesitant to make the switch right away, don’t worry — you’ve still got some time. Microsoft stated it will continue to support PowerShell ISE with security updates and critical fixes, but it hasn’t said for how long.
How to install VS Code and the PowerShell extension
Now that I’ve thoroughly convinced you to make the switch, let’s look at how to install VS Code and the PowerShell extension.
Download and install VS Code from the web
As with most applications, you can download a copy of VS Code from the web.
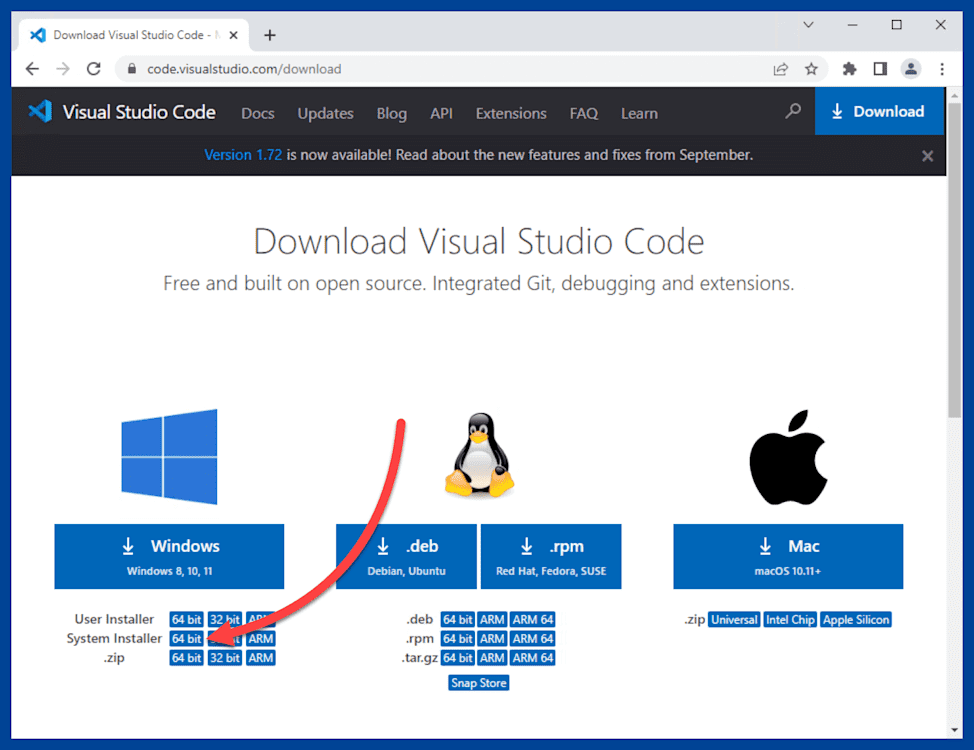
Head over to the VS Code download page.
Select the correct installer for your system. For most Windows users, I recommend using the 64-bit system installer.
Once you click the installer link, the VS Code installer downloads into your Downloads folder. Navigate to your Downloads folder (C:\Users\<username>\Downloads\), and double-click on the installer.
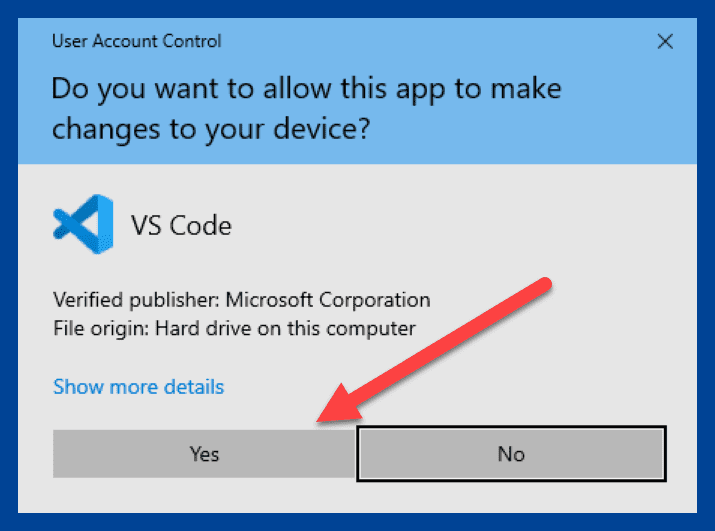
If a UAC prompt appears, click Yes.
Select I accept the agreement, then click Next.

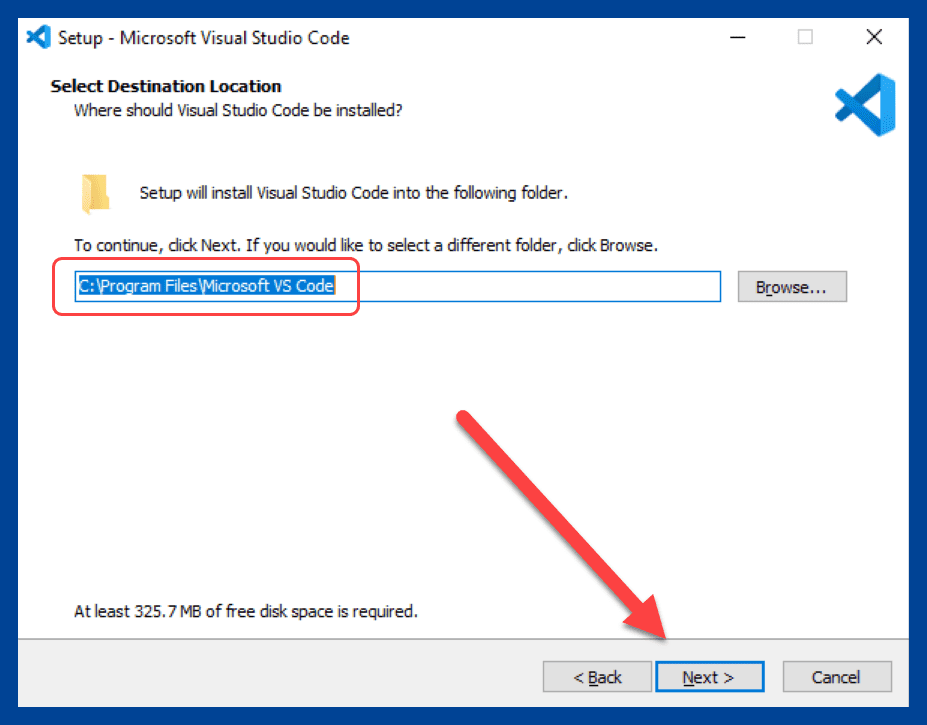
Keep or modify the default install location, then click Next.
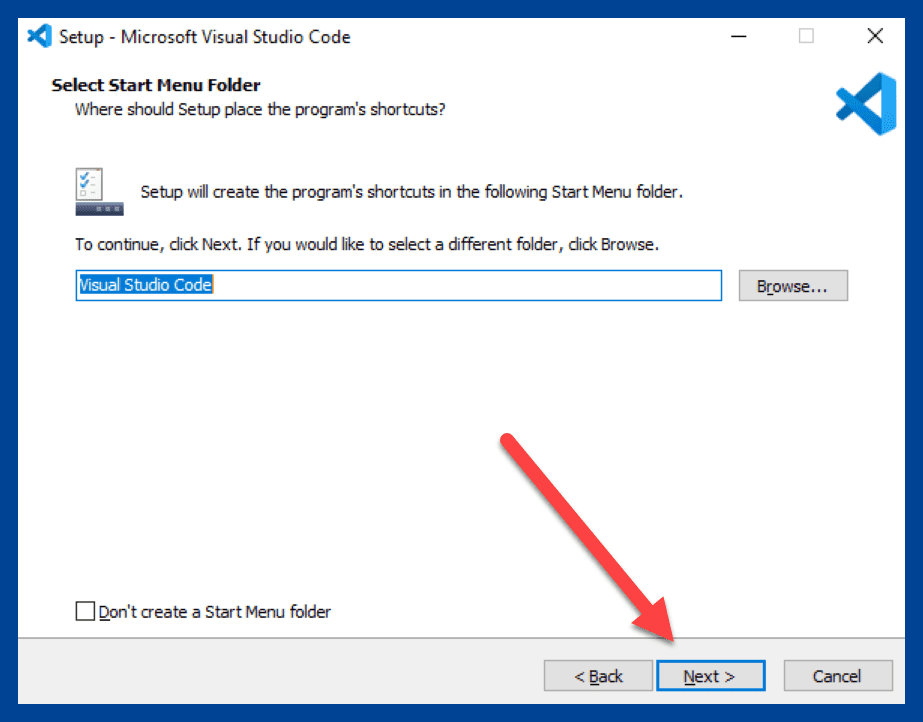
Keep or modify the Start Menu default folder location, then click Next.
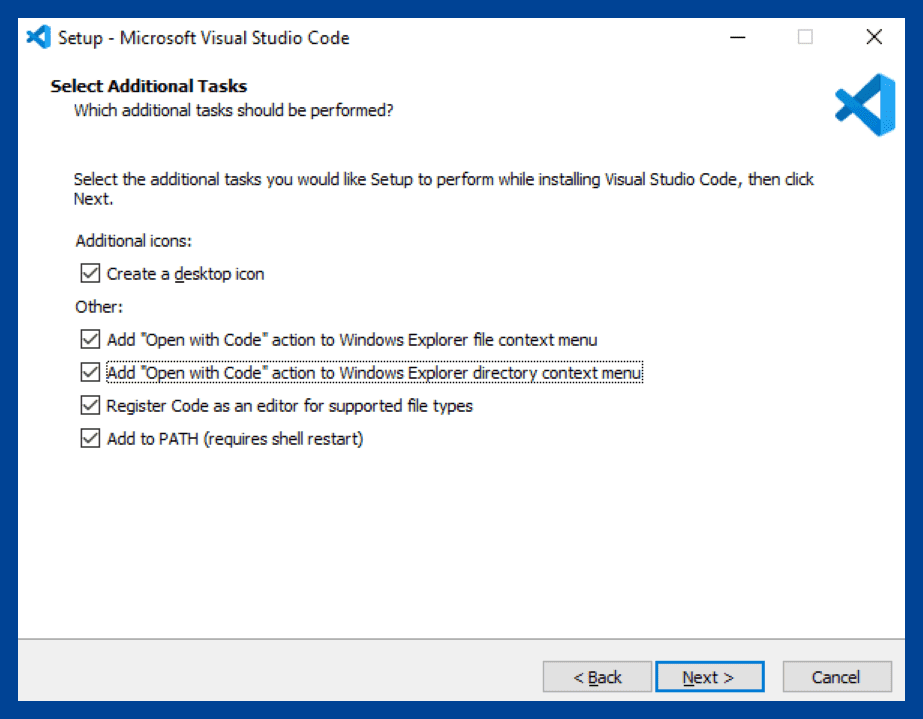
Select any additional tasks you want, then click Next.
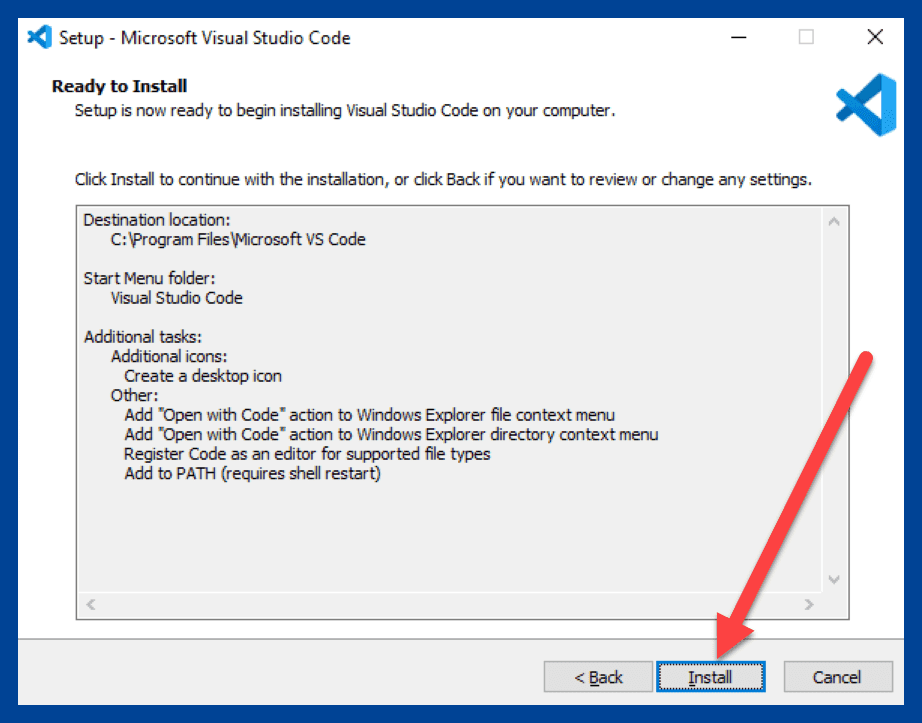
Review the installation summary, then click Install.


Install VS Code with PDQ Deploy
If that seemed like too much effort or you need to install VS Code on multiple computers, there’s an easier way: PDQ Deploy.
PDQ Deploy is an application deployment and patch management solution that makes deploying applications a cinch. The Package Library in PDQ Deploy features hundreds of today’s most popular applications, like Google Chrome, Adobe Reader, and Visual Studio Code.
Here’s how to deploy VS Code with PDQ Deploy:
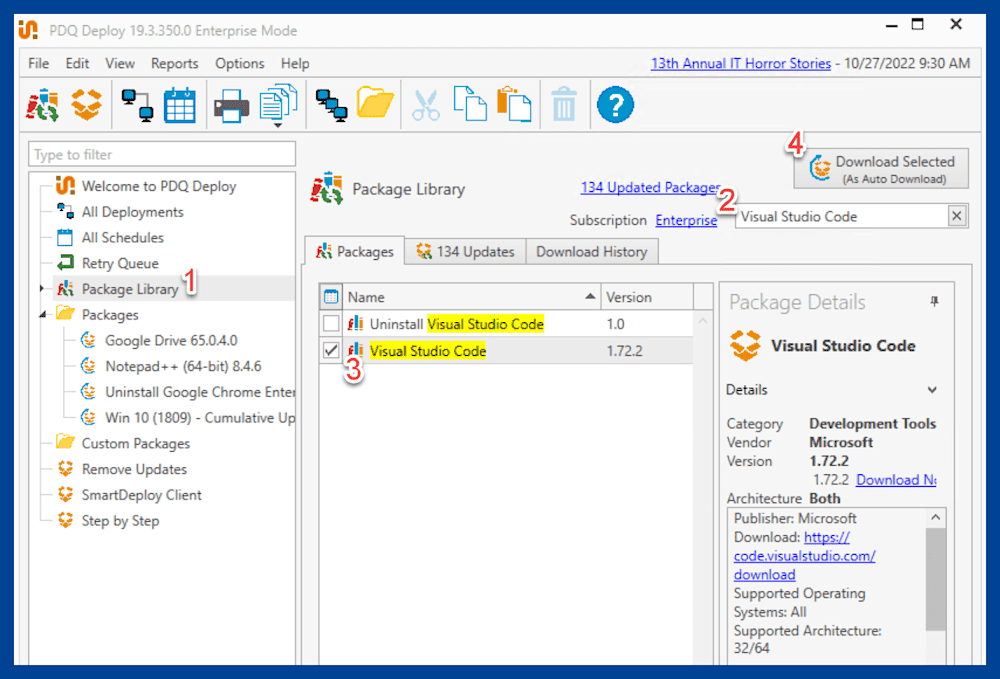
In the PDQ Deploy console, click Package Library.
In the filter field, enter Visual Studio Code.
Select the Visual Studio Code package.
Click Download Selected (As Auto Download).
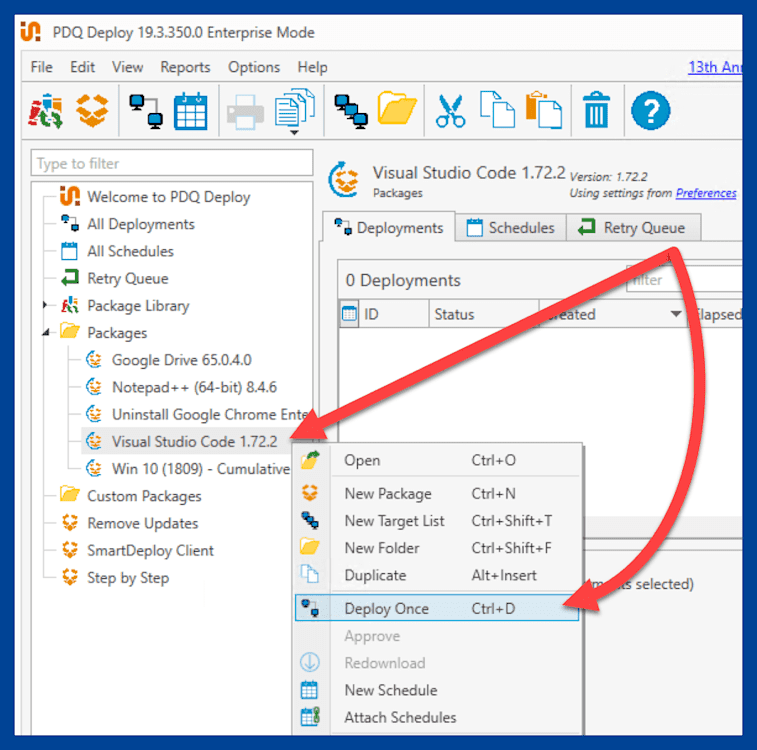
Right-click on the Visual Studio Code package, and click Deploy Once.
Enter the name or IP Address of the target computer, then click Add Computer. You can add as many computers as you need or use PDQ Inventory to target computer collections with precise targeting.
Click Deploy Now once you have added your target computers.
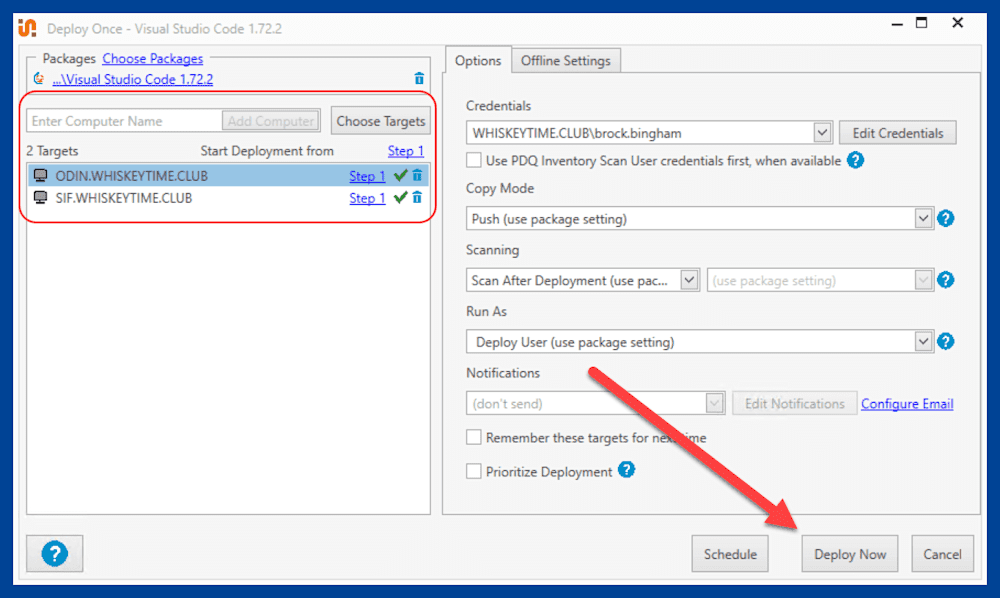


And just like that, PDQ Deploy deploys and installs VS Code on your targeted computers.

What’s that? You don’t have PDQ Deploy? No worries.
Just head over and download a free 14-day trial today.
How to install the PowerShell extension in VS Code
Now that we’ve got Visual Studio Code installed, it’s time to install the PowerShell extension.
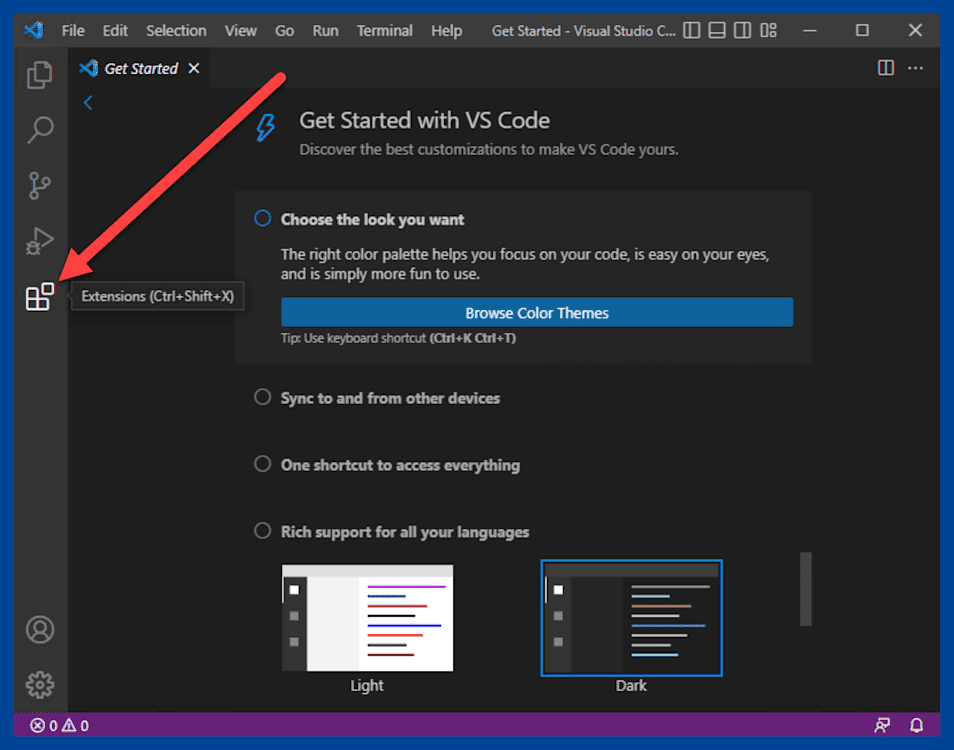
Launch VS Code, and click on the Extensions button.
Enter PowerShell into the search field.
Click the Install button next to the PowerShell extension.
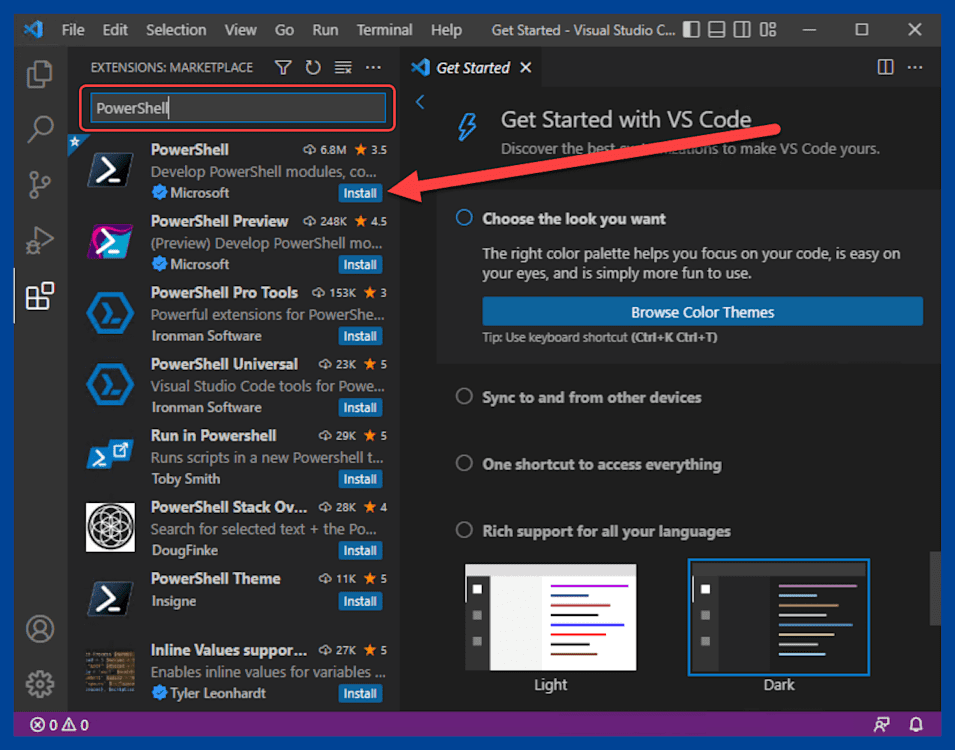


Once the extension finishes installing, you’ll see a PowerShell icon on the left toolbar.

Now, I know what you’re thinking. “It can’t be that easy, right?” Wrong! It is that easy. However, before you dive into your scripts, you can implement a few changes to make your life in VS Code a little bit easier.
Modifying VS Code settings
For all the praise given to VS Code, there’s no denying that it’s a little more complicated than using a standard terminal window or PowerShell ISE. But with great power comes great r̶e̶s̶p̶o̶n̶s̶i̶b̶i̶l̶i̶t̶y̶ complexity. Here are some modifications to simplify your PowerShell experience in VS Code.
Enable ISE Mode in VS Code
ISE Mode is a handy feature to ease the transition from PowerShell ISE to VS Code. ISE Mode is a collection of settings that can be configured to make the experience in VS Code similar (but not identical) to PowerShell ISE.
Here’s how to enable ISE Mode in VS Code:
Launch VS Code, then enter Ctrl+Shift+P on your keyboard to launch the Command Palette in VS Code. Remember this keyboard shortcut because it will become your new best friend in VS Code.
Enter ISE Mode, then click PowerShell: Enable ISE Mode.
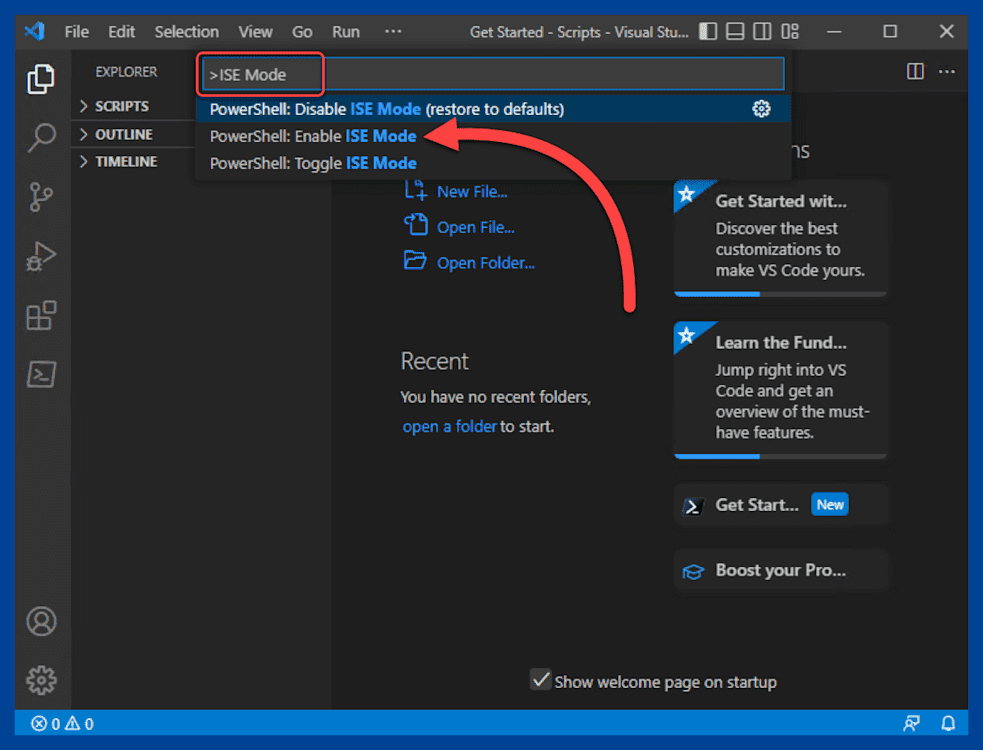
Once you enable ISE Mode, your console should resemble PowerShell ISE.


When enabled, ISE Mode in VS Code configures the following settings:
workbench.activityBar.visible: false
debug.openDebug: “neverOpen”
editor.tabCompletion: “on”
powershell.integratedConsole.focusConsoleOnExecute: false
files.defaultLanguage: “powershell”
workbench.colorTheme: “PowerShell ISE”
editor.wordSeparators: "`~!@#%^&*()-=+[{]}\\|;:'\",.<>/?"
powershell.buttons.showPanelMovementButtons: true
Check out Microsoft’s ISE Mode article to learn more.
Optimize VS Code for PowerShell
If you would rather keep the default VS Code experience but optimize it for PowerShell usage, here are the best settings to configure:
files.defaultLanguage: “powershell” — Configure PowerShell as the default language on all new files opened in VS Code.
editor.tabCompletion: “on” — Hit the tab key on your keyboard to cycle through suggested commands, mirroring PowerShell ISE functionality. By default, this setting is turned off.
You can configure these options in the User Settings user interface or the User Settings JSON file. Here’s how to configure the settings with the user interface:
In VS Code, hit Ctrl+Shift+P to open the Command Palette. You can also open the Command Palette by clicking View > Command Palette.
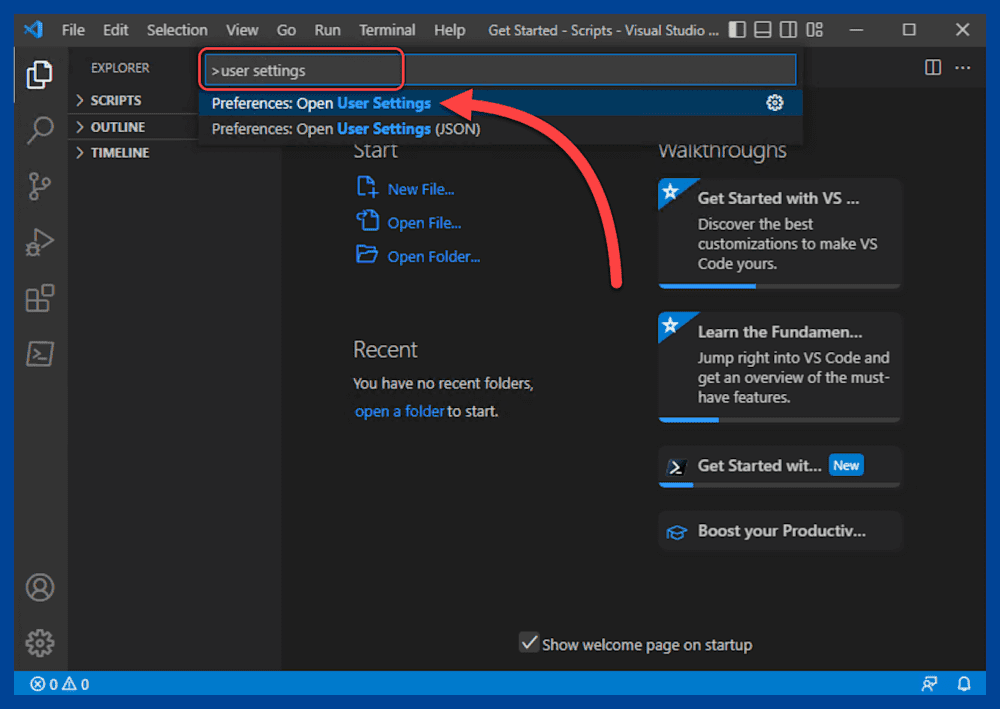
Enter User Settings into the Command Palette.
Click Preferences: Open User Settings.
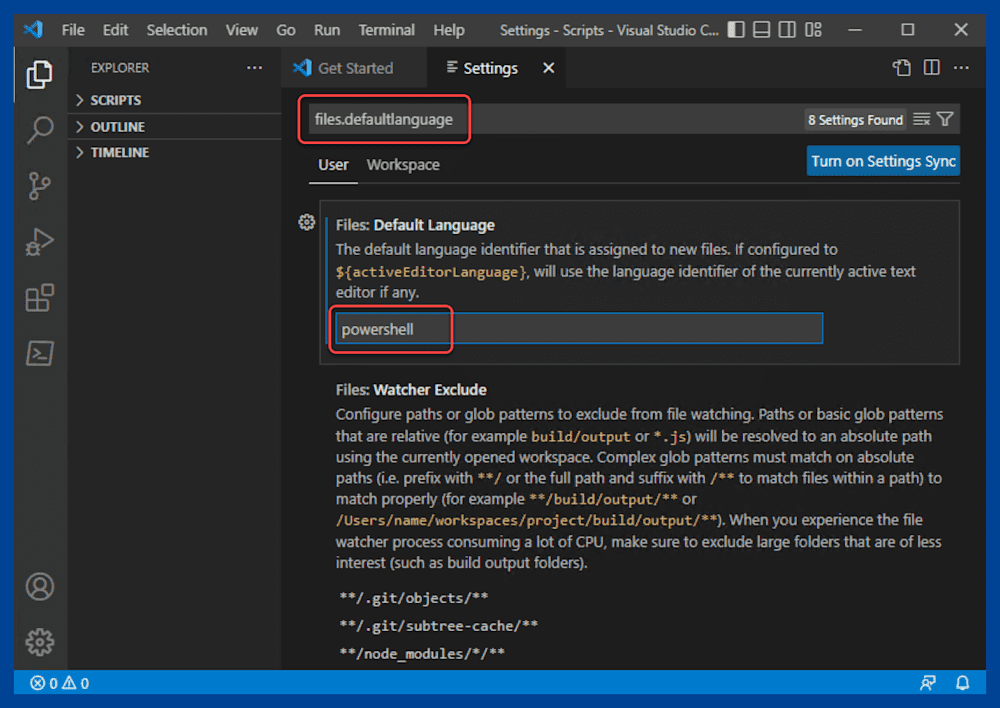
In the Search settings text box, enter the name of the setting to modify. We’ll start with the files.defaultLanguage setting.
Enter powershell for the setting value.
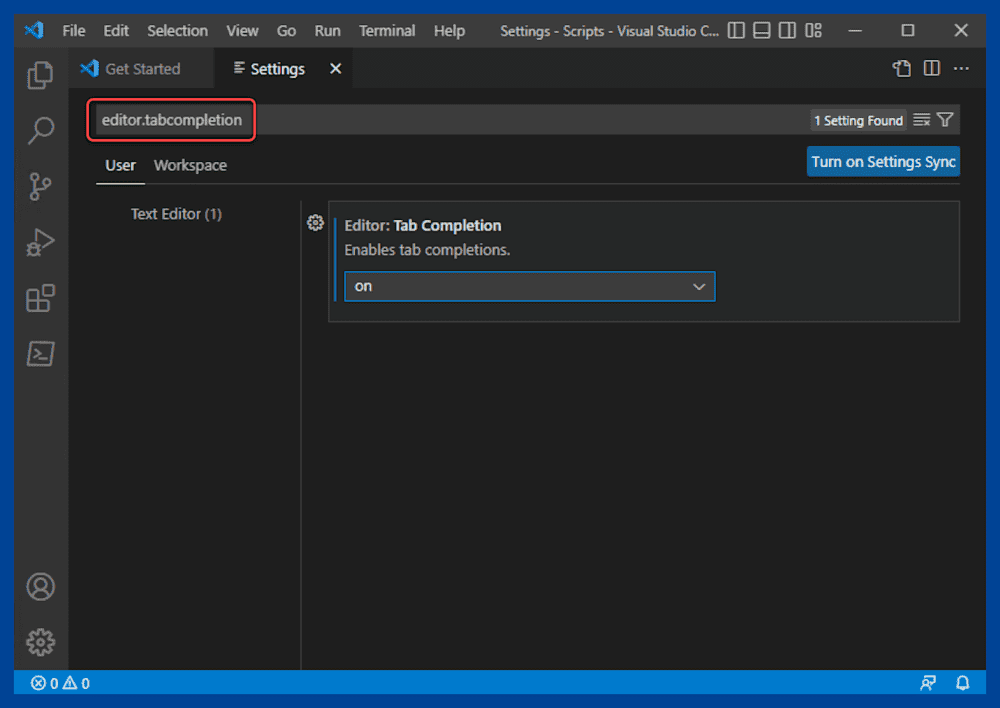
In the search field, enter editor.tabcompletion.
Using the drop-down menu, select on.


Changes made in the settings menu are added to the user’s settings.json file. You can manually edit this file to add, remove, and modify settings. Modifying the JSON file directly can speed up the configuration process. You can copy settings from another JSON file or from a source on the web, then paste them directly to your file.
To access the settings.json file:
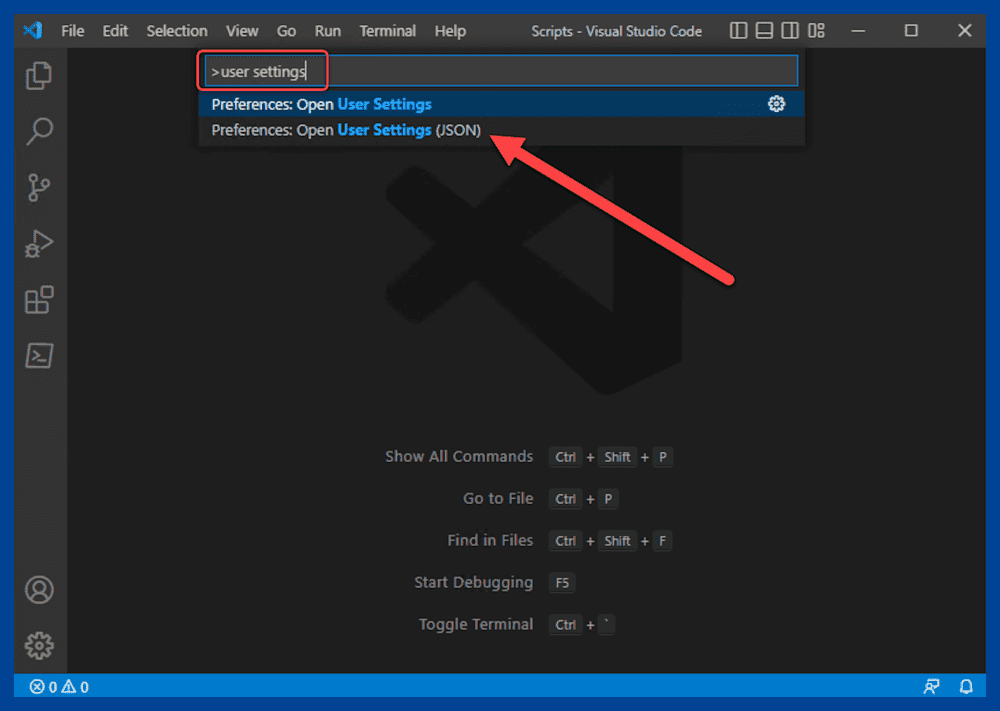
In VS Code, enter Ctrl+Shift+P on your keyboard to launch the Command Palette.
Enter user settings into the Command Palette.
Click Preferences: Open User Settings (JSON).

With the settings file open, you’ll notice the default language and the tab completion settings have already been added and configured.

Changes you make in the settings user interface will be reflected in the JSON file.
You can copy settings directly into the settings.json file, but you must preserve the JSON formatting. Add additional settings between the curly brackets and a comma at the end of each setting string, except for the last setting before the closing curly bracket.
Move the primary side bar to the right side of the screen
The primary side bar in VS Code is located on the left side of the window by default. This configuration may not seem like an issue, but it will cause your code to shift every time you open a tool from the side bar.


This effect can be jarring if you frequently launch tools from the side bar. To resolve this issue, right-click on the side bar, and click Move Primary Side Bar Right.

Here is the result:

Close the minimap

The minimap in VS Code is designed to help navigate exceptionally long scripts and files. However, it can also feel like it clutters up the workspace. To close it, right-click on it, and deselect Minimap.

Taking VS Code to the next level
One of the things that makes VS Code great is the ability to install extensions that add functionality, modify the appearance, and even add things like pets to your workspace. Let’s look at a few extensions worth adding.
Error Lens
Error Lens is an incredible extension in VS Code that highlights errors, warnings, and other language diagnostics in your code, such as unclosed quotes and brackets. With over a million downloads and a 5-star rating, this extension is a must-have for any serious coder.
To install Error Lens, click the Extensions button, enter Error Lens into the search field, then click Install.

Once installed, Error Lens highlights incorrect syntax. Here is an example PowerShell script that is missing a closing parenthesis:

Custom themes
Once you’ve committed to using VS Code, you need to make it official by installing a custom theme. Custom themes are a great way to personalize your workspace. Changing the colors in VS Code to match your mood or style can help VS Code feel like your own personal workspace.
The Marketplace has several great themes, including Dracula Official and One Dark Pro. But my personal favorite is SynthWave ’84. As its name implies, SynthWave ’84 feels straight out of the ’80s and even includes an excellent neon glow effect.

Installing a theme is easy and only takes a couple of minutes. Here’s how to install the SynthWave ’84 theme and enable its neon glow.
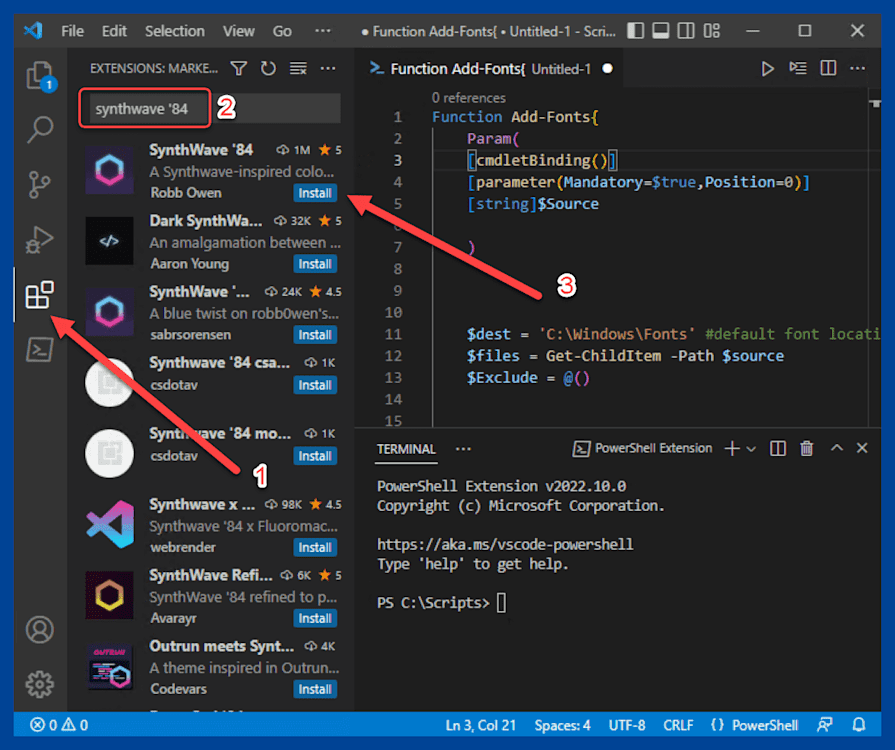
Run VS Code as an administrator, then click on the Extensions button in the side bar.
Enter the name of the theme in the search field. For this example, enter synthwave ’84.
Click the Install button next to the theme.
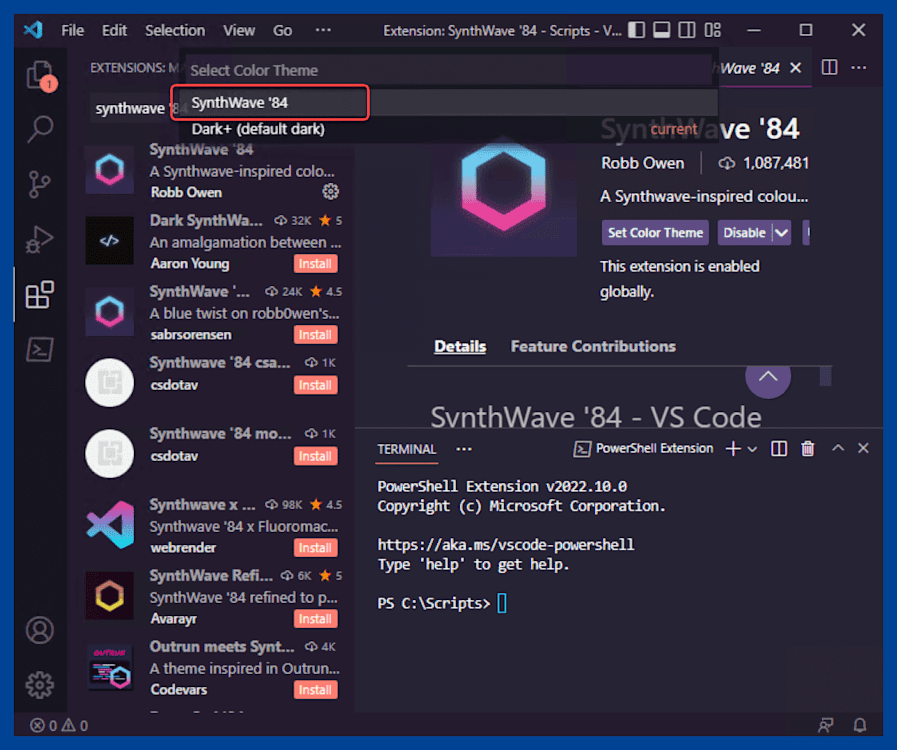
After the theme installs, click SynthWave ’84 in the Command Palette or the Set Color Theme button to set it as the active color theme.
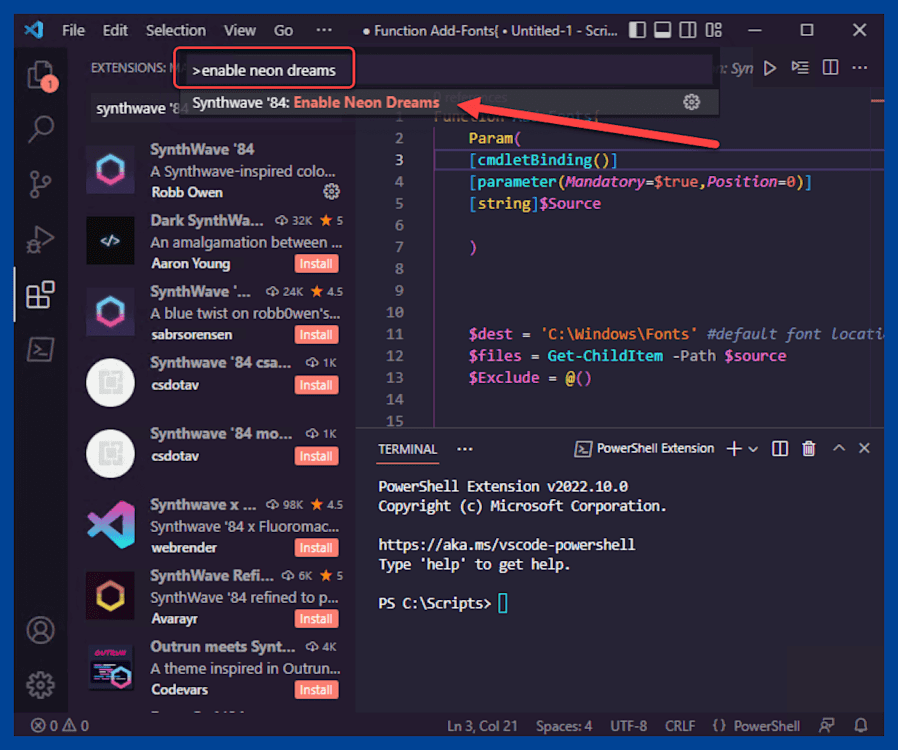
Hit Ctrl+Shift+P and enter enable neon dreams into the Command Palette.
Click the command Synthwave ’84: Enable Neon Dreams.
A prompt will notify you that VS Code must reload for the change to take effect. Click Restart editor to complete.
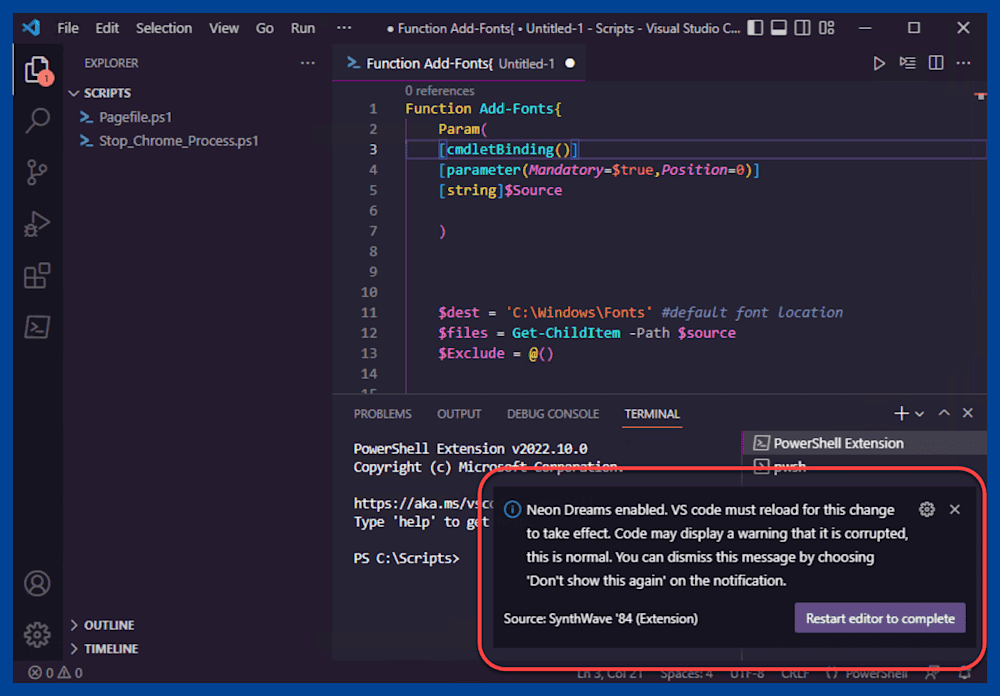
After reloading, your eyes should be bathed in the sweet glow of neon light. You may also receive a message that your code installation appears to be corrupt. You can safely ignore and close this message.


If you run into any issues installing this theme, double-check that you launched VS Code as an administrator.
VS Code pets
If you find yourself hypnotized by the monotony of staring at code all day and the soft neon glow of your theme isn’t enough to snap you out of it, then you need help from the cutest extension in VS Code: vscode-pets.
vscode-pets is an extremely popular extension that helps liven up your VS Code environment by adding a pet panel to your workspace that you can fill with digital dogs, cats, paperclips, and snakes riding in golf carts. Yup, that pretty much sums it up. Here’s how to install it.
Click on the Extensions button in the side bar and enter vscode-pets into the search bar.
Click the Install button next to the vscode-pets extension.
Once the extension is installed, hit Ctrl+Shift+P, enter the command start pet coding session, and hit Enter.
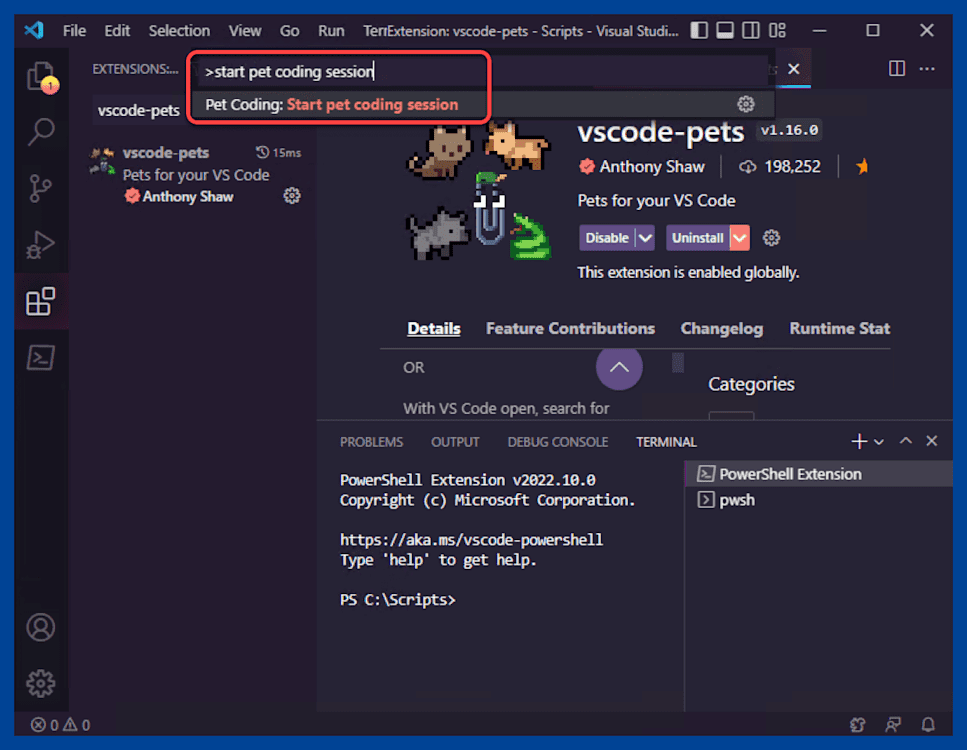
A Pet Panel will open, and you’ll be given a pet.
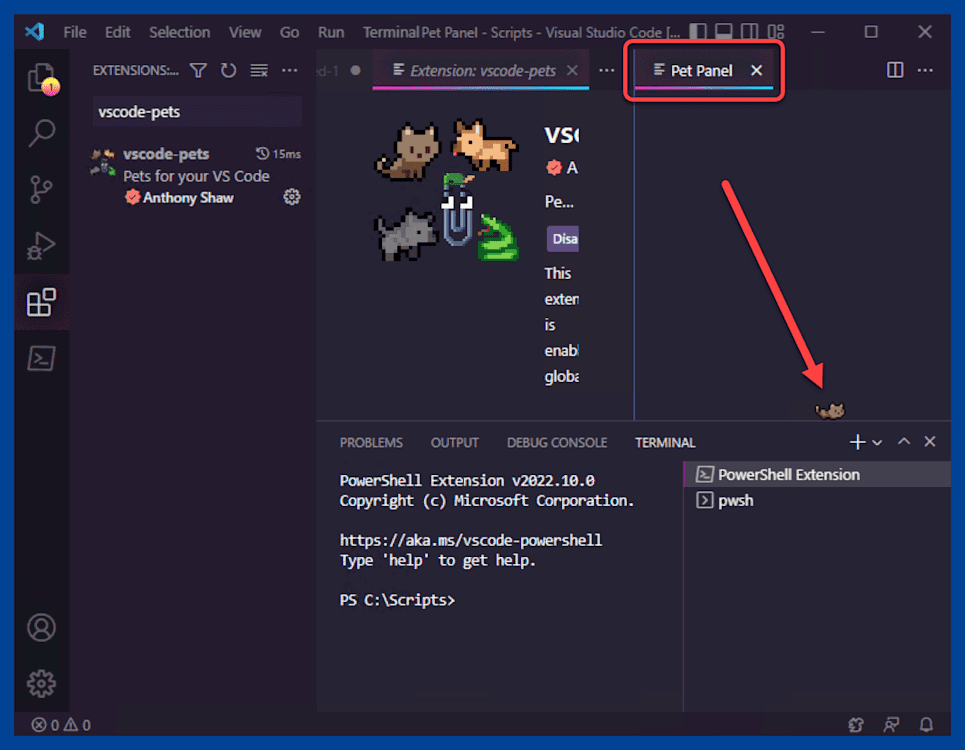


There are several things you can do with your pet. You can move your mouse cursor next to the pet, and it will play with it. You can play ball with your pet by opening the Command Palette and using the command throw ball.
You can spawn additional pets with the spawn additional pet command.

The extension guides you through a selection of pets and colors you can add. But be careful; you can quickly get carried away and spawn a mob of digital pets that will overwhelm you.

If your pets get out of control, simply use the command remove pet to remove one pet at a time or remove all pets to remove all pets from the Pet Panel.
Common problems and troubleshooting tips
When VS Code and the PowerShell extension were first released, there were many challenges for users to overcome. Nowadays, most of the kinks have been worked out, and things run pretty smoothly. However, there are a couple of things that new users might get hung up on.
Accidentally closing the integrated PowerShell terminal
As I mentioned, VS Code has some fantastic features to enhance PowerShell. However, many of those features won’t work unless the integrated PowerShell terminal is running.
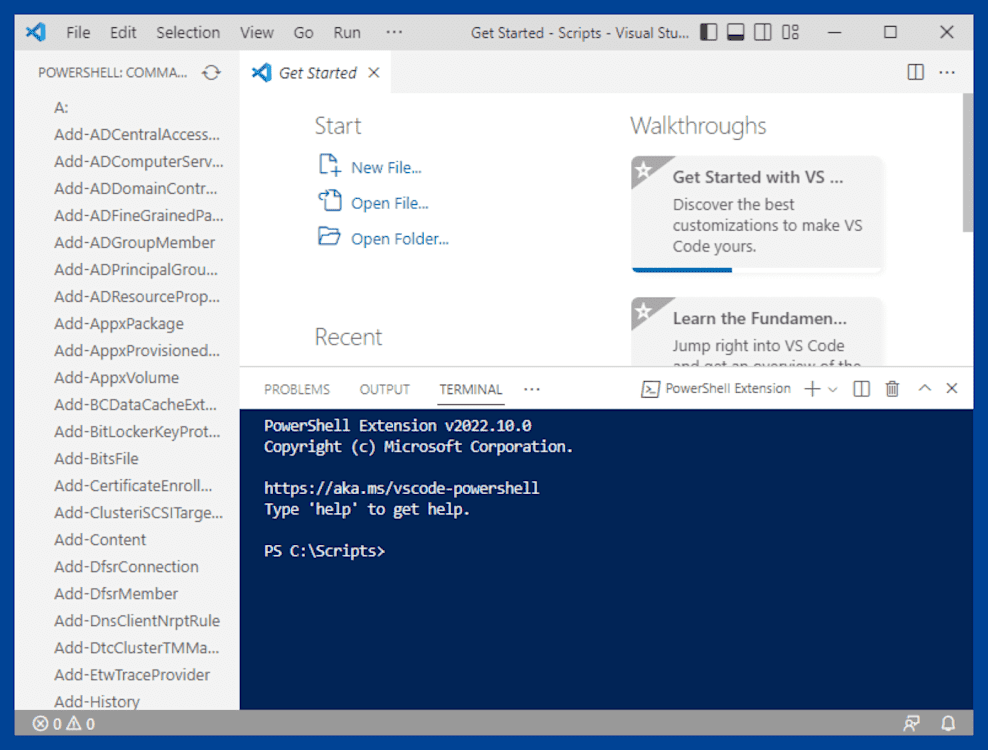
This is what the integrated terminal looks like:

If you click the X at the far right of the terminal window, it closes the terminal but does not kill the terminal process. However, clicking the trash can kills the terminal process, which disables features like IntelliSense.
In case you didn’t intend to kill the terminal, VS Code warns you that the terminal has been stopped and gives you the option to restart it.

If you click Yes, the terminal and all the features that come along with it restart. If you accidentally click no, the integrated terminal remains closed.
There are a couple of ways to restart the terminal if you accidentally close it. The first is to close VS Code and relaunch it. The second, slightly more professional way is to open the Command Palette with Ctrl+Shift+P, enter reload window, and hit Enter. This command reloads the current window and restarts the integrated PowerShell terminal.

Commands not working in the Command Palette
The Command Palette is like Google for VS Code. You can access pretty much every setting and command through the Command Palette. However, it can take a while to get used to it.
One common mistake beginners make in VS Code is to misspell a command in the Command Palette, then delete the entire command, including the right angle bracket character (>) at the beginning of the command prompt. Deleting the bracket causes the Command Palette to search for files instead of commands.


To resolve this issue, simply add the right angle bracket (>) to the beginning of the Command Palette, and it should return command results again.
VS Code: Teaching old sysadmins new tricks
Like many of my sysadmin peers, I prefer comfort and stability over change and chaos. But change is often beneficial, especially when we’re talking about switching to VS Code. VS Code can improve your workflow, handle all your programming/scripting languages, and, of course, we can’t forget the pet panel.
Now, I’m sure you’re wondering how many energy drinks were consumed in the making of this lengthy article about VS Code, and the answer is — way too many. But if it helped make the transition to VS Code easier for some of my sysadmin peers, then it was worth it.


