

TL;DR: When a service account password changes, services break. Use the Windows Services app or PowerShell's Get-Service to spot-check a single device, or use PDQ to build a fleet-wide report of services tied to a specific account in a few clicks.
Service accounts in Windows 10 and 11 control how background services run. If a service account password changes, services can fail and disrupt users. Here’s how to quickly find and manage services tied to specific accounts so you can prevent outages.
Windows services aren’t something we talk about often. But in IT, that’s a good thing. If we’re not talking about something, that means it’s not broken. However, one password change can send services screeching to a halt faster than my productivity when the new Elden Ring DLC trailer dropped.
Loading...
How do I open Windows Services and see the logon account?
The easiest and probably fastest way to open the services manager in Windows 10, Windows 11, and Windows Server is by entering services into the Windows search bar, then clicking on the Services app result. From here, you can browse the various services on your device, their statuses, and the accounts used to run the services.

While the Services app is a great way to view and manage the services on your computer, it’s not feasible to log in to computers one at a time searching for a specific credential in use by a service.
How do I find services by account with PDQ Inventory?
PDQ Inventory scans and collects information from managed devices, including details about the services running on those devices, making it an ideal solution for tracking services using specific credentials.
To access the Services page in PDQ Inventory, double-click on any computer in Inventory, then click the Services menu item from the list on the left.

The Services page in PDQ Inventory contains all the information you need about services running on your managed devices, including each service’s name, status, credentials, and more. Having this information centralized in Inventory makes it much easier to manage. More importantly, it makes it possible to aggregate all the information into an actionable report.
How do I create a report of Windows service accounts across devices?
PDQ Inventory tracks and centralizes all the services data from our managed devices, which we can use to create useful reports. Our goal with these reports is to identify services using specific credentials. As you’ll see, Inventory gives us the tools we need to easily manipulate and customize reports to meet our needs.
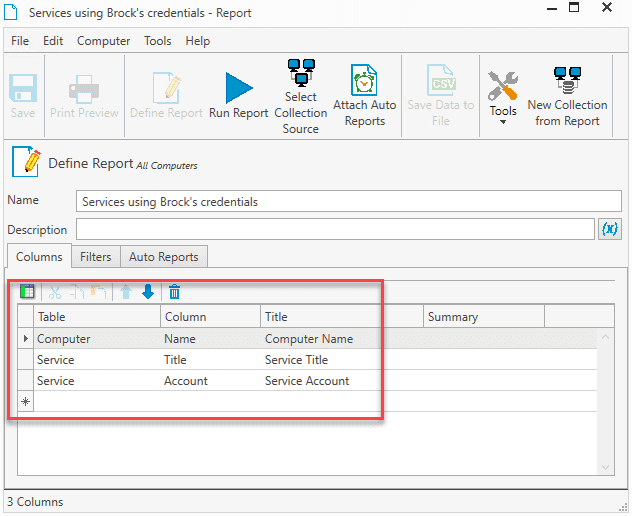
Here’s how to create an account-specific services report in Inventory.
In PDQ Inventory, click New Report > Basic Report.

Enter a name for the report. Hot tip: I like to use descriptive names so I don’t feel guilty when I don’t include an actual description.
The Column should include the Computer | Name | Computer entry by default. Add the Service | Title | Service Title, and the Service | Account | Service Account entries as well.
Click on the Filters tab.
Click the Add Value Filter button, then add the filter Service | Account | Contains | <target_username>.
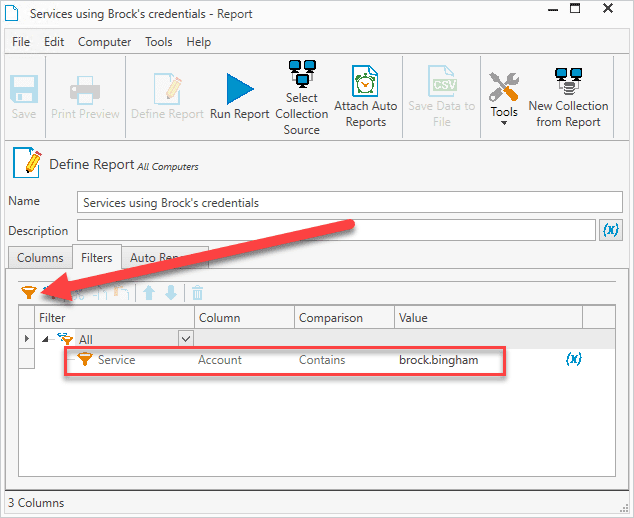
When you’re ready, click Save, then click Run Report.


The finished report should contain the services currently using the specified username and the computer name. In this example, I used my username as the target account, and here are the results.

Feel free to add additional columns to this report, such as the service status, start mode, and description. I would also recommend running a standard scan before running the report to ensure you have the most up-to-date and accurate information. To run a scan, right-click on All Computers, then click Scan Collection > Standard in PDQ Inventory.


Install (and uninstall) without disruption
Try PDQ Deploy & Inventory — free for 14 days.
What are other ways to view services in Windows?
PDQ Inventory is my favorite and arguably the easiest way to manage and track Windows services. Am I biased? Yes. Does that make me wrong? No.
But my goal is always to educate, assist, and encourage my fellow Windows warriors. As such, here are a few alternative ways to view the services running on your endpoints. Spoiler alert: PowerShell is the clear winner.
How to open Services using the Command Prompt
To launch Services from the Command Prompt, enter services.msc. This command launches the services manager as if you had opened it from the Windows search bar.
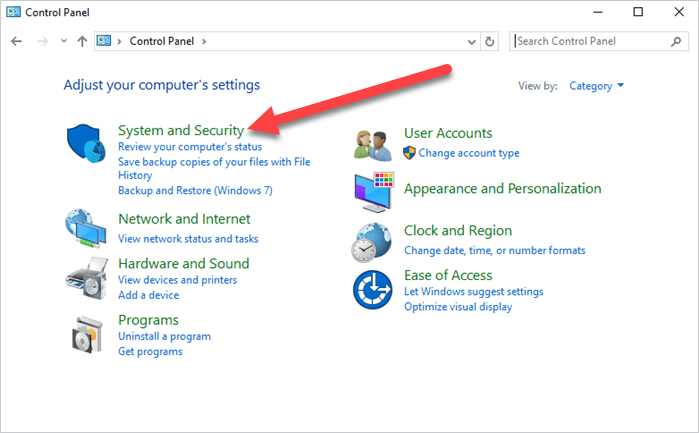
How to open Services through Control Panel
Here’s how to access Services using Control Panel.
With Control Panel open, click System and Security.
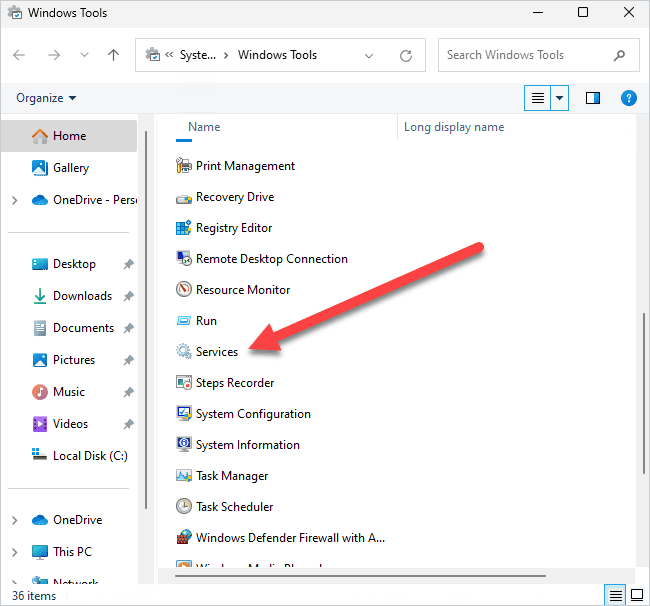
In Windows 10, click Administrative Tools. For Windows 11, click Windows Tools.
Click Services.


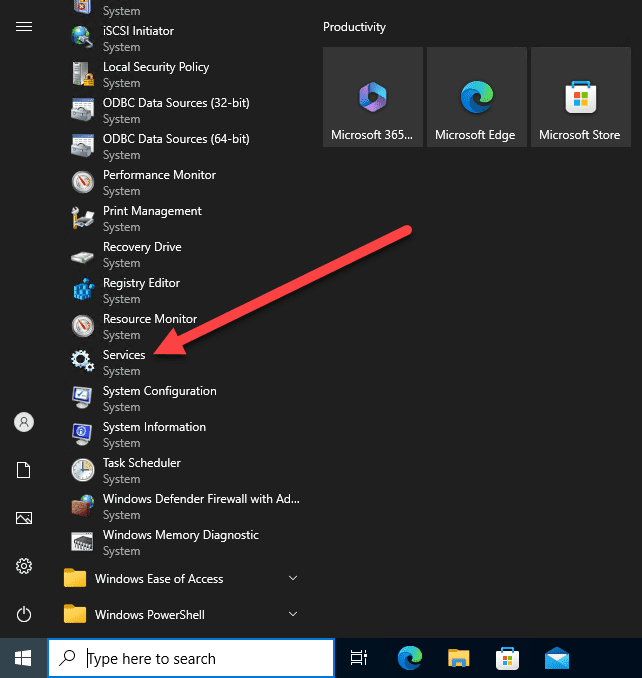
How to open Services from the Start menu in Windows 10
Here’s how to open the Services application from the Start menu in Windows 10.
Click the Start button.
Click to open the Windows Administrative Tools folder.
Click Services.

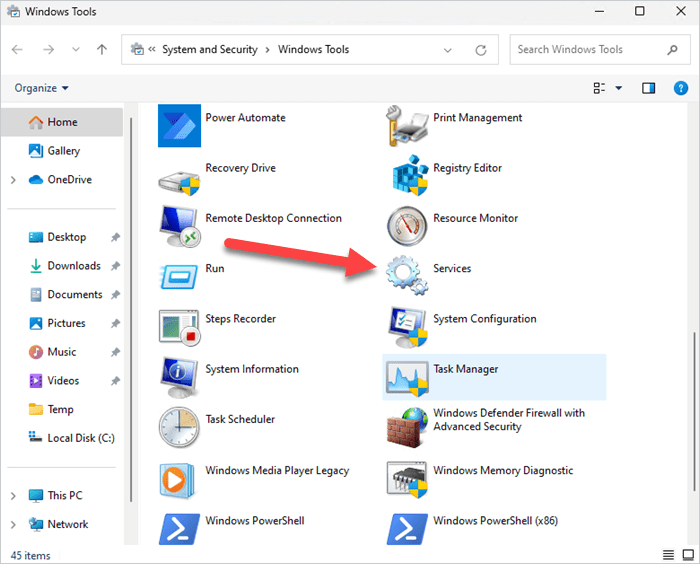
How to open Services from the Start menu in Windows 11
Here’s how to open the Services app from the Start menu in Windows 11.
Click the Start button.
Click All apps.
Click Windows Tools. This opens the Windows Tools window.
Click Services.

How to identify and manipulate services data using PowerShell
To list services in PowerShell, use Get-Service. This cmdlet returns all services on the local computer. You can extend it with the addition of Select-Object and Where-Object to show service accounts and filter by username.

Notice that the username is not automatically returned with just the base command. We can force it to return using the Select-Object cmdlet. Here’s the command:
Get-Service | Select-Object -Property ServiceName, UserName
Now we’ve got the services and the usernames tied to those services. We can take this a step further by filtering for specific usernames using the Where-Object cmdlet. Here’s the full command:
Get-Service | Where-Object -FilterScript {$_.UserName -like '*<username>'} | Select-Object -Property ServiceName, UserName
Make sure you replace the <username> placeholder with the username you want to filter for.
This example highlights how capable PowerShell really is, but this is just the beginning. Here's a PowerShell script that you can use track service account on remote devices. I've manually added several computers to this script, but if you're dealing with a lot of devices, I recommend using a source like a CSV file or Active Directory. Here's the script!
$computers = <"computer1">, <"computer2">, <"computer3">
$user = <"username">

$output = ForEach ($computer in $computers){
    if (Test-Connection -TargetName $computer -Quiet -Count 1 -ErrorAction SilentlyContinue){
    Get-CimInstance -ComputerName $computer -Class Win32_Service | Where-Object -FilterScript {$_.StartName -like "*$user*"} | Select-Object -Property SystemName, DisplayName, StartName
    }
}
$output
Suffice it to say that you can use PowerShell to achieve the results you’re looking for, given enough time and understanding. Or, if you’re like me, you could take the easy route and craft an incredibly valuable report with just a couple of mouse clicks using PDQ Inventory. If that sounds more enticing to you, go ahead and grab yourself a free trial of PDQ Inventory. Your future self will thank you.


