

TL;DR: IT pros can use Git to expand their PDQ PowerShell Scanner library by cloning PDQ’s public PowerShell-Scanners GitHub repository, reviewing the available scanner folders and README files, then importing selected scanners into PDQ Connect or PDQ Inventory for reusable endpoint data collection. The process covers installing Git with PDQ, cloning and updating the repo with git clone and git pull, importing scanner scripts or scan profiles, and running the imported scanners to view results, all without needing to write PowerShell from scratch.
You can expand your PDQ PowerShell Scanner library by using Git to clone PDQ’s PowerShell-Scanners repository from GitHub. After cloning the repo, you can review the included scanners, import them into PDQ Connect or PDQ Inventory, and reuse them to collect endpoint data without writing PowerShell from scratch.
Git can be a bit user-unfriendly if it’s your first time using it. But that won’t stop us. Stick with me, and I’ll show you how to use GitHub to get more out of PDQ with the PowerShell-Scanners repository.
What are Git and GitHub?

Git is an open-source, distributed version control system that tracks changes to files and helps teams collaborate without overwriting each other’s work. It was created by Linus Torvalds, the primary developer behind the Linux kernel. Yeah, he's kind of a big deal.
Torvalds created Git as a way for developers to collaborate on projects while maintaining version control and historical records. Focused on speed, simplicity, and a distributed design, Git makes it easy for developers all over the world to contribute to projects without the fear of accidentally altering a main branch.
GitHub is a cloud-based Git repository hosting service. While Git is traditionally managed from a command-line interface, GitHub provides a simple, intuitive graphical web interface to manage Git repositories. Alright, maybe “simple” and “intuitive” are a bit of a stretch.
GitHub layers in additional features to simplify collaboration, access controls, forking, pull requests, and merging. GitHub's functionality has made it a very popular platform, and not just for developers. A diverse collection of project types now takes advantage of the features of Git and GitHub. In fact, Microsoft thought GitHub was such a useful platform that it acquired the platform in 2018 for $7.5 billion. Meanwhile, I’m still waiting on Microsoft to make an offer for my “Jump to Conclusions” mat.
How can Git expand your PDQ PowerShell Scanner library?
PDQ hosts several public Git repositories on GitHub that people are free to use and contribute to. The PowerShell-Scanners repository specifically is designed to help users expand their PowerShell Scanner libraries. Included are dozens of useful PowerShell Scan Profiles that I’ll show you how to add to PDQ using Git. The best part is you don’t actually need to know PowerShell to follow along or use the prebuilt scanners.
At a high level, the process looks like this:
Install Git on the machine you use to manage PDQ.
Clone the PDQ PowerShell-Scanners repository from GitHub.
Review the available scanner folders and README files.
Import the scanner into PDQ Connect or PDQ Inventory.
Run the scanner and review the results.

Manage Windows & macOS devices from anywhere
With PDQ Connect, get real-time visibility into remote and local devices, deploy software, remediate vulnerabilities, automate routine maintenance, and remotely troubleshoot endpoints from one easy-to-use platform.
How to install Git with PDQ
The first thing we need to do is install Git. Luckily, PDQ has a prebuilt Git package that we can use to make this step super easy.
How to install Git with PDQ Connect
1. In PDQ Connect, go to Deployments and click Deploy.

2. In the Search packages field, search Git. Select the Git for Windows package, then select your target device in the Search devices and groups field. The target device should be the device where you want to clone the GitHub repo, likely your own device. Then, click Deploy.
How to install Git with PDQ Deploy
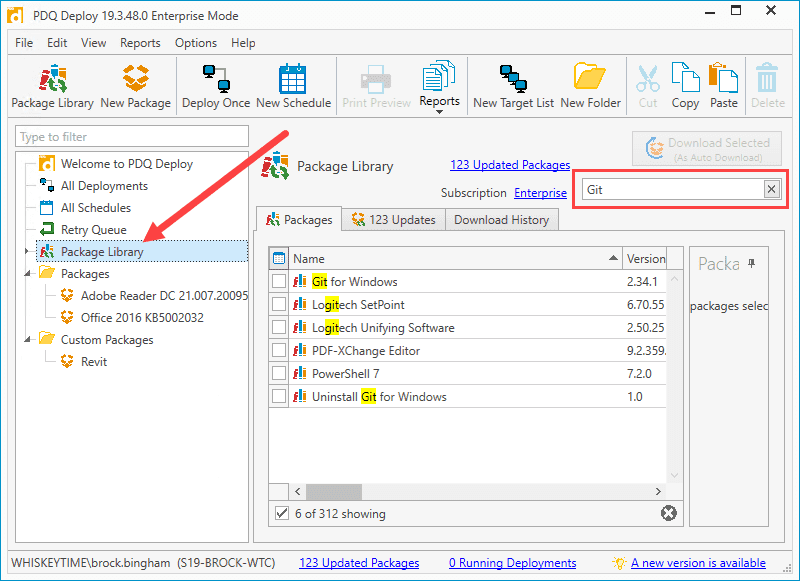
With PDQ Deploy open, click on Package Library.
In the Filter field, enter Git to narrow down the search results.
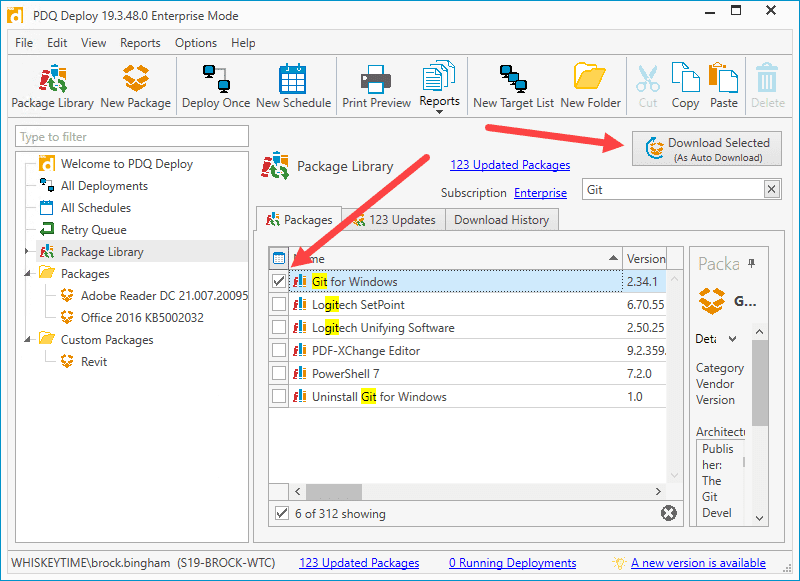
Select Git for Windows, and click Download Selected (As Auto Download).
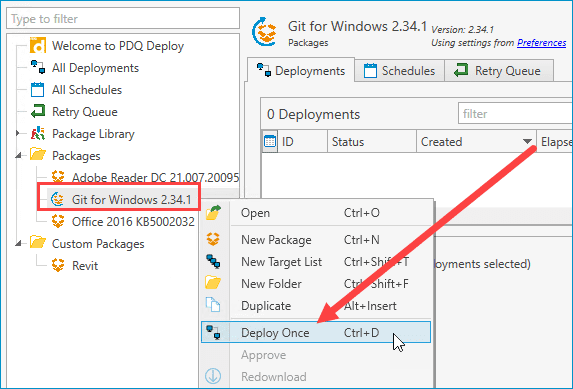
Once the package downloads to your console, right-click on it, then click Deploy Once.
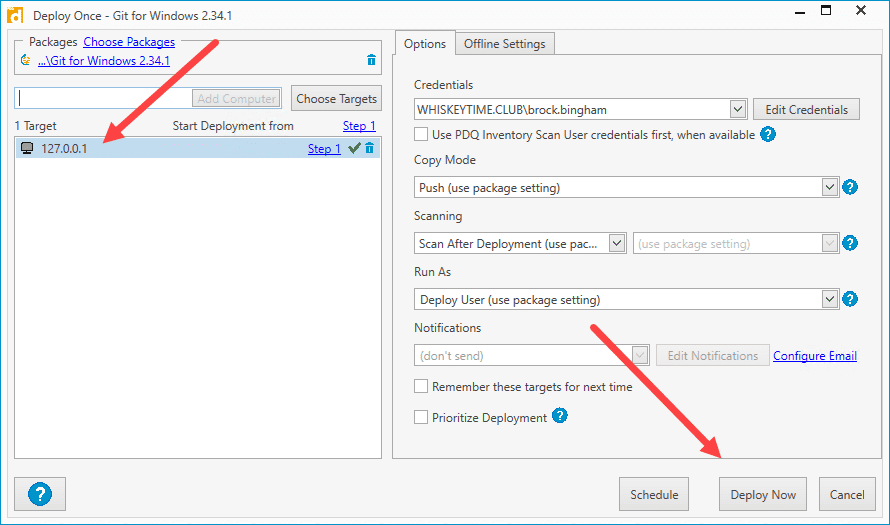
Enter the target machine for this deployment, then click Add Computer. Since I'm installing it locally, I've entered the localhost address 127.0.0.1.
Click Deploy Now when you are ready to deploy the package.


How to clone the PDQ PowerShell-Scanners repository with Git
Once you've installed Git, we can use it to clone the PowerShell-Scanners repo using a one-line Git command.
git clone https://github.com/pdq/PowerShell-Scanners.git C:\PowerShell-Scanners
This Git command creates a copy of the repo onto the root of your C: drive.

If you want to update your local copy of the repository in the future, use this Git command.
cd C:\PowerShell-Scanners
git pull
How do you review PowerShell Scanners before importing them?
Before importing a PowerShell scanner into PDQ, review its folder and README.md file to confirm what data it collects. Each scanner is organized into its own folder, and the README file explains the scanner’s purpose.
For example, if I browse to C:\PowerShell-Scanners\PowerShell Scanners\DNS Servers and open the README.md file, here's the information it gives me about the DNS Servers scanner.

# Instructions
[How to use this repository](../../README.md)

# Description
Retrieves the list of DNS servers the target is configured to use.

# Author
Colby Bouma
Browsing through the available scanners and reading their README files will give you an idea of how you can best utilize the scanners from the repo.
How to import PowerShell Scanners into PDQ
With the PowerShell-Scanners repository cloned, we’re ready to import the scanners into PDQ.
How to import PowerShell Scanners into PDQ Connect
1. With PDQ Connect open, click Scanners > Create scanner.

2. Name your scanner, and select PowerShell from the Type drop-down menu.
3. Click Import.ps1 and select the relevant scanner .ps1 file in the PowerShell-Scanners folder located inside C:\PowerShell-Scanners. Select your test device, then click Run script to validate. If you're satisfied with the results, click Save.

Now, that scanner should appear in your Scanners tab so you can reuse it easily across targets. You can then view returned data from scans in Devices > Device > PowerShell > ScannerName. Here's an example where we have a couple of scanners set up:

How to import PowerShell Scanners into PDQ Inventory
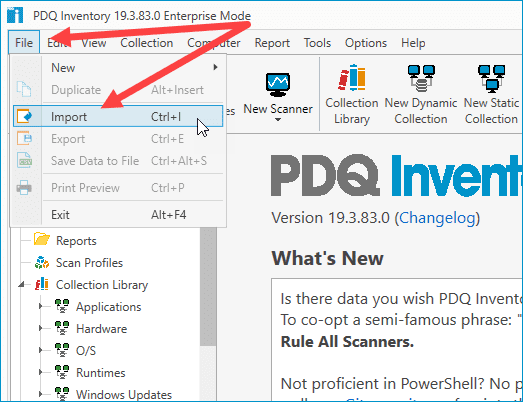
With PDQ Inventory open, click File > Import. This will open a File Explorer window.
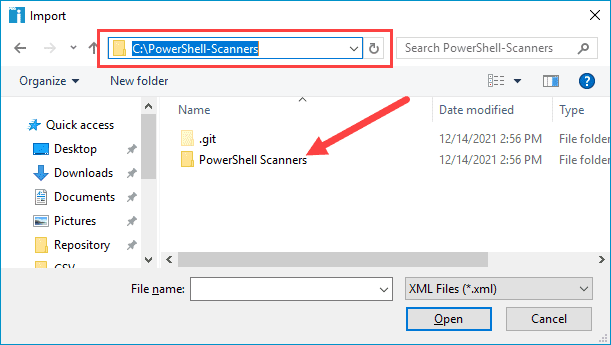
Browse to the location where you cloned the PowerShell-Scanners repo. By default, the location should be C:\PowerShell-Scanners.
Open the PowerShell-Scanners folder located inside C:\PowerShell-Scanners.
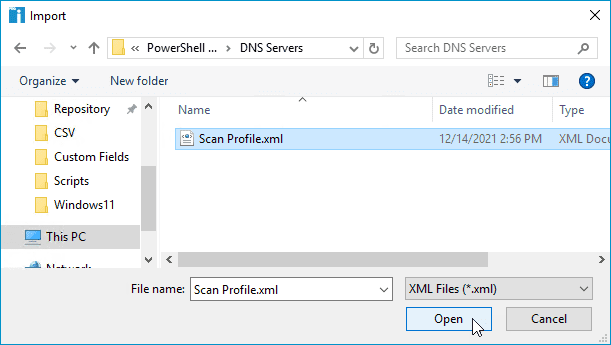
Open the folder of the scanner you want to import. (For this example, I'll use the DNS Servers scanner.)
Select the Scan Profile.xml file and click Open.
You should receive a prompt that says "Import Complete". Click Close.
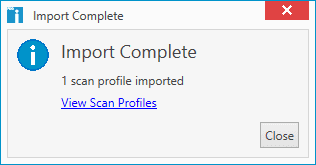
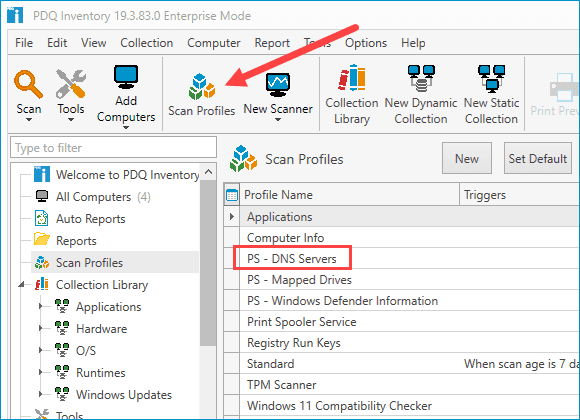
To view your new scan profile, click the Scan Profiles button.


How to run imported PowerShell Scanners in PDQ Inventory
With our new scan profile imported, we can run it just like any of the built-in scan profiles.
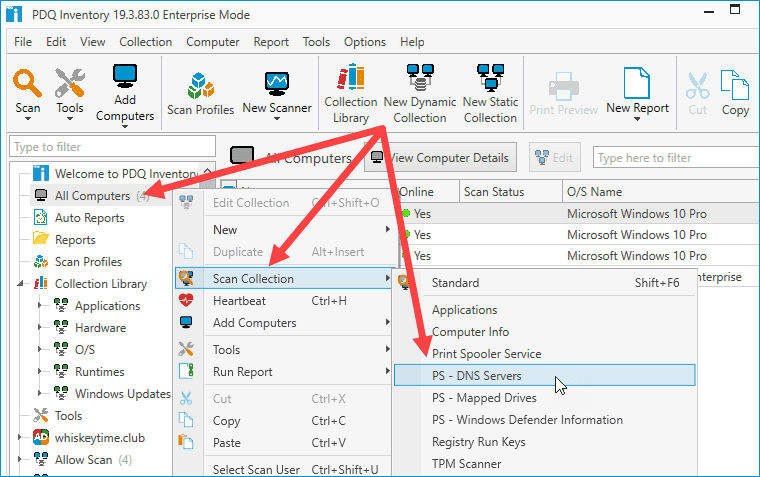
Right-click All Computers, then click Scan Collection > Scan Profile Name (PS - DNS Servers in my example.
The scan status reflects the current progress of the scan.

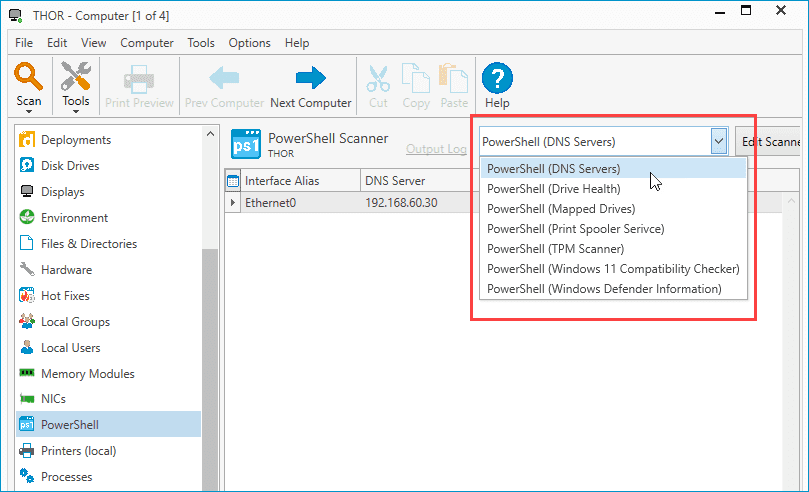
Once the scan is complete, double-click on any of the scanned devices, then click on the PowerShell menu item.

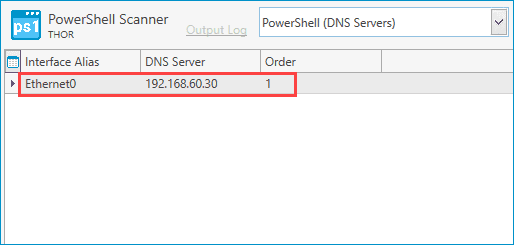
Lastly, click on the drop-down menu button and select the correct scan profile to view the results.


Why Git is useful for PDQ PowerShell Scanners
Git and GitHub make it easier to keep your PDQ PowerShell Scanner library current because you can pull updates from the repository instead of manually rebuilding scanner files. Once the repo is cloned, a quick git pull helps you stay current as new scanners are added.
New content is being added all the time. When you're ready, consider submitting your own super cool custom scanner to the PDQ PowerShell-Scanner repository. Submitting your own scanner is a great way to help out the community and get your work recognized. If you need help submitting your scanner, check out our PowerShell Scanners webcast that guides you through the process.

