Taking inventory of your servers can give you basic information about what’s taking up storage space. But fancy file attributes — such as its size, who created it, and how old it is — can be little harder to collect. Luckily, you can find all this and more using the Get-ChildItem cmdlet.
Get-ChildItem lets us list the items of a specified location. In other words, it helps you get the child item (and other non-hidden items, for that matter). This functionality is very similar to dir on Windows and ls on UNIX-like systems. (In fact, dir and ls are aliases that you can use indirectly in PowerShell in place of Get-ChildItem.) In this PowerShell tutorial, we'll explain how to use Get-ChildItem to find non-hidden files using several different approaches.
As sysadmins, taking inventory of the workstations and servers that we manage is a necessary — but taxing — part of the job. We have probably all stressed ourselves out over similar questions at some point in our jobs:
Which workstations and servers are getting full on space?
Which users are hogging disk space?
Where are all my .mp3 files?
How many marshmallows can I fit into my mouth at once?
These are all important questions, and most can be answered using the Get-ChildItem command.
Loading...
Get-ChildItem parameters
Get-ChildItem has many parameters to help us find our desired results.
Note that this list is not comprehensive. It only shows the parameters we’ll be using today. Other popular parameters include the Name parameter, the Attributes parameter, the Depth parameter, the Include parameter, the Exclude parameter, and the Hidden parameter. Microsoft offers a detailed overview of these parameters and whether they accept a wildcard character.
Easily run PowerShell scripts on remote devices
Need to run your awesome PowerShell scripts on remote devices? PDQ Connect can easily execute PowerShell scripts on any managed device with an active internet connection.
Find files in multiple locations
Deleting files that exist in multiple locations can free up precious space on your servers — if you can find them. Using Get-ChildItem, you can find and delete superfluous files instantly.
You can provide multiple paths as a string array or as several paths separated by commas, like the following example.
Get-ChildItem -Path Path1, Path2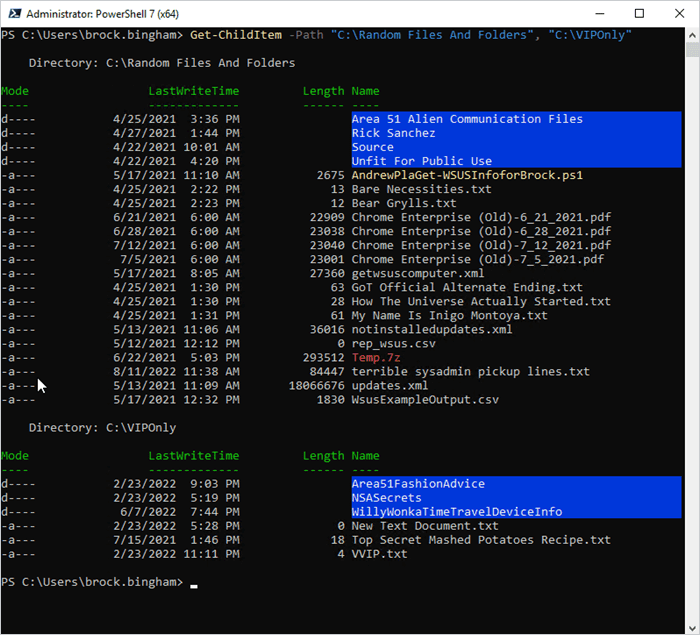
Find specific file types
We can use wildcard characters to specify file types. If we wanted to find all .txt files, we could use this:
Get-ChildItem *.txt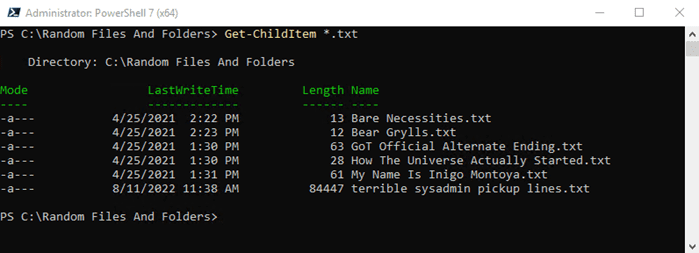
Find large files
Sure, disk space is cheaper than ever, but that doesn’t mean we shouldn’t be proactive in utilizing our disk space efficiently.
PDQ Inventory does a great job at compiling reports and creating collections based on disk space. These reports make it easy to identify who has less than 25% disk space, for example. At a glance, I can tell that my workstation has 77% disk space free.
There is a lot of great information here, but what if you want to know which files are the suspected large files taking up your valuable disk space?
In this case, we’re going to look at the length (or size) of the files. For this example, I’ll specify that I want to see all files larger than 50 KB.
Get-ChildItem | Where-Object {$_.Length -gt 50KB}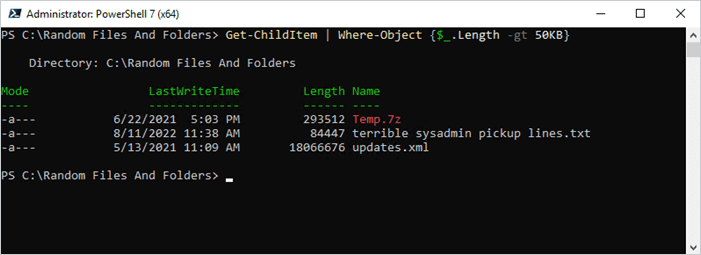
The length is in bytes, so we can use a little trick to get the results back in megabytes (MB), which is far easier to read. In order to do this, we’ll need to specify the columns by name. Then, we’ll perform a calculation on the Length column.
Get-ChildItem | Where-Object {$_.Length -gt 50KB} | `
  Select @{Name="Length";Expression={$_.Length/1MB}}, Name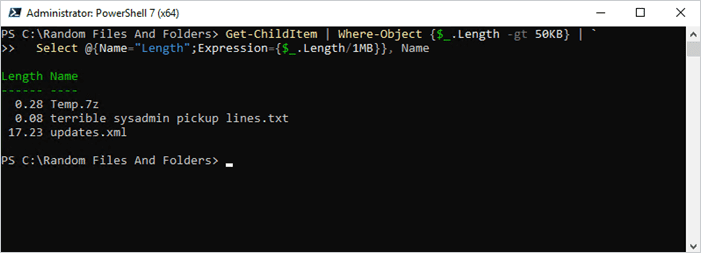
Find old files
Get-ChildItem can be used in a number of ways to locate files that are no longer needed in your system. You can include files that were created before a certain date (or within a specific time range), the date the file was last modified, and more.
In this case, we’re going to look at the LastWriteTime for each file. For the following example, I want to show all files older than 30 days. In order to do that, we have to get the current date with Get-Date, subtract 30 days, and then grab everything less than (older than) the resulting date.
Get-ChildItem | Where-Object {$_.LastWriteTime -lt (Get-Date).AddDays(-30)}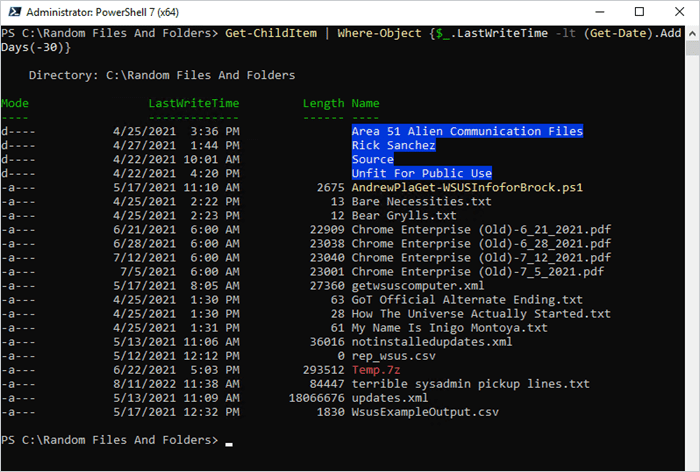
How to combine techniques
The great thing about Get-ChildItem is that it allows you to kill several birds (or several hours of inventory) with one stone. You can combine these techniques, as well as others, to make a PowerShell script that works for you.
For instance, say you want to find all files in two paths (plus any respective subdirectory) that are older than 60 days and larger than 1 MB.
Easy peasy:
$time = (Get-Date).AddDays(-60)
$size = 1MB
Get-ChildItem Path1, Path2 -Recurse | `
  Where-Object {$_.LastWriteTime -lt $time -and $_.Length -gt $size}
Be certain to supply your own paths, of course.
Delete found files
You can even take this a step further to delete the found files by piping them into Remove-Item. Just remember that by using the Force parameter, you'll have no warning when your files are deleted. Make certain that you know which files you're deleting.
<Insert your awesome script> | Remove-Item -Force -Recurse -ErrorAction SilentlyContinueNow you should be able to use Get-ChildItem to find a variety of file and folder details in a variety of ways. Since the registry is exposed as a PowerShell drive, working with a registry key is similar to working with a folder, while a registry hive functions like a top-level directory with different subdirectory levels. Additionally, you can use Get-ChildItem to view not just the registry but also the file system, certificates, or any other provider.
And never fear: We're here to make your life easier (if you're into that kind of thing). PDQ Connect and PDQ Deploy make it easy to run PowerShell scripts. Try them today to see for yourself.
To learn about related topics and enhance your knowledge of the beloved command-line tool, check out our helpful PowerShell content, The PowerShell Podcast or PowerShell commands library, or read related posts on the PDQ blog.

