

TL;DR: Fast Startup is a Windows feature in Windows 10 and 11 that speeds up boot time by saving the system kernel state to disk during shutdown instead of fully powering off. It is enabled by default in Windows 10 and 11, but it can cause issues with troubleshooting, updates, and dual-boot environments. You can disable it through Control Panel or remotely using a PowerShell command with PDQ.
Fast Startup is a very aptly named Windows feature designed to — you guessed it — help your computer start faster. It sounds harmless. Faster boot times, fewer complaints. But in managed environments, it can interfere with patching workflows, prevent clean shutdown states, and complicate troubleshooting.
Here’s how it works, why it causes issues, and how to disable Fast Startup on Windows 10 and 11 devices locally or at scale with PDQ.
Loading...
What is Fast Startup in Windows 10 and 11?
Fast Startup is a Windows feature in Windows 10 and Windows 11 that speeds up boot time by saving the system kernel state during shutdown. Fast Startup was introduced with Windows 8 (shudders) and remains an optional feature in Windows 10 and Windows 11. In fact, chances are you’re using Fast Startup right now since it’s enabled by default.
How does Fast Startup work?
Fast Startup reduces boot time by saving the Windows kernel state to the hiberfil.sys file during shutdown instead of performing a full system shutdown.
But that means that when you shut down your computer, it’s not quite as off as you might think. Instead, it’s in a type of hybrid hibernation, ready to reload the system kernel where it left off from the previous session.
It’s important to note that Fast Startup is only utilized when shutting down your computer. Restarting your system doesn’t use Fast Startup. Instead, restart fully stops all system processes and boots the entire system from scratch, which is why we recommend using restart when troubleshooting Windows issues.
Check out our article on restart vs. shutdown where we compare the two boot options.
Need to keep your users informed about reboots? Learn how to use the BurntToast module to display notifications with PowerShell.
How to turn off Fast Startup in Windows 10 and 11
If you want to disable Fast Startup, I don’t blame you. If you’re anything like me, the seven seconds Fast Startup shaves off my boot time means extra time in my day to be more productive. No thanks.
Jokes aside, there are plenty of reasons why you might want to turn off Fast Startup. Thankfully, the process is simple, and you can reverse it if you ever change your mind. Here’s how it works.
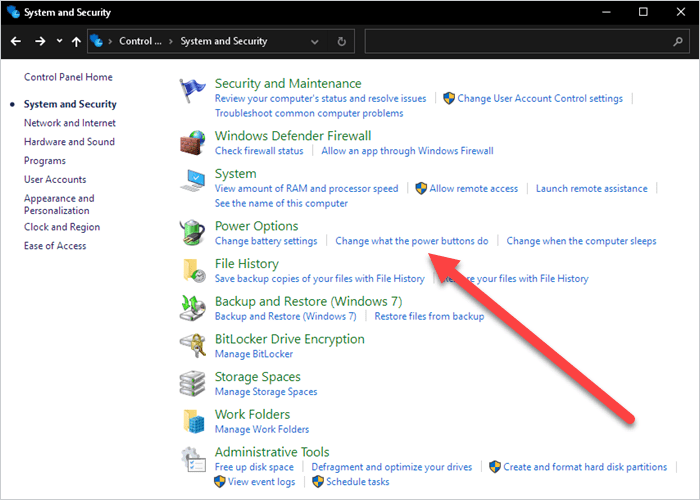
In the Windows search bar, enter control panel, then hit Enter on your keyboard.
In the Control Panel, click System and Security.
Click Change what the power buttons do.
If Turn on fast startup is grayed out, click Change settings that are currently unavailable.
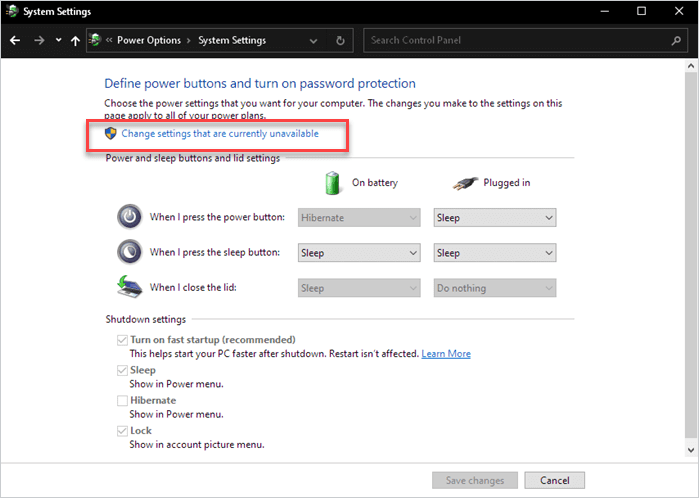
Uncheck Turn on fast startup, then click Save changes.


With Fast Startup disabled, shutdown should revert to how it functioned in the good old days of Windows 7, completely stopping all processes, including the kernel.
How to disable Fast Startup with PDQ
Want to see how easy it is to disable Fast Startup with PDQ products? With PDQ and a simple PowerShell command, you can turn off Fast Startup to an entire fleet of devices in minutes.
Want to follow along with the tutorial but don’t have PDQ? No sweat. Start a free trial of PDQ Connect or PDQ Deploy & Inventory and see how simple system management can be.
Here’s how to disable Fast Startup in PDQ Connect.
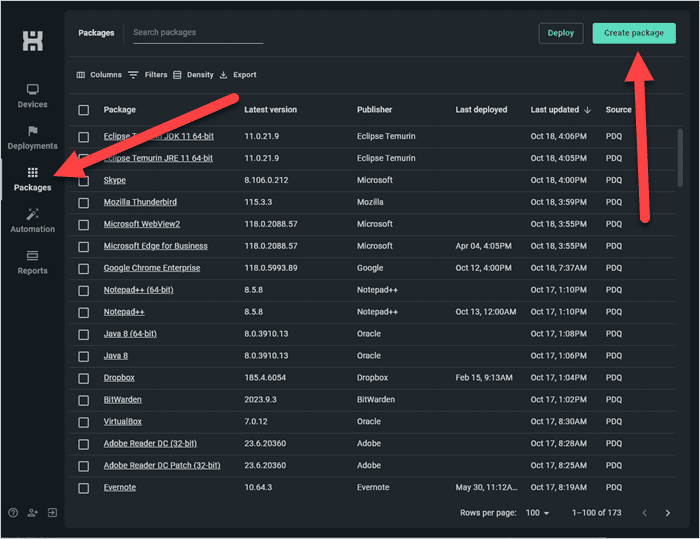
Click the Packages tab, then click Create package.
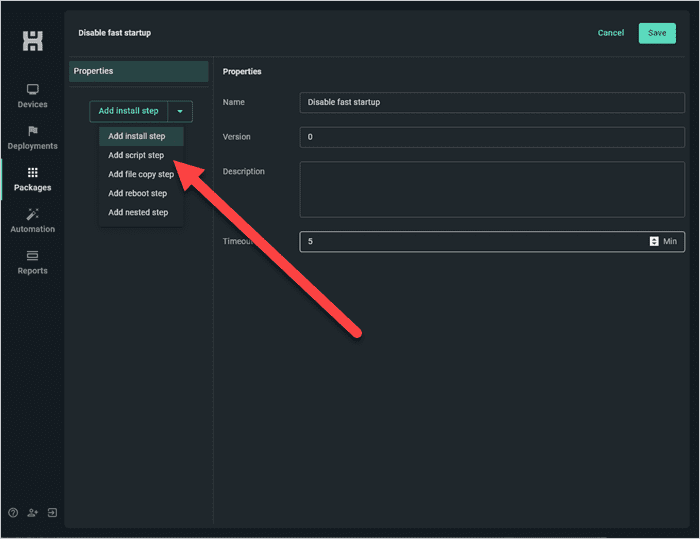
Name the package, click the drop-down button, then click Add script step.
Ensure Type is set to PowerShell, then enter this command to set the HiberbootEnabled registry value to 0 and disable Fast Startup:
Set-ItemProperty -Path ‘HKLM:\SYSTEM\CurrentControlSet\Control\Session Manager\Power’ -Name HiberbootEnabled -Value 0Click Save to save and close the package.


At this point, the package is ready to deploy. Select the package, then click Deploy. Add your targets to the deployment, then click Deploy to start the deployment.

While the UIs differ, the process to disable Fast Startup in PDQ Deploy is similar to the process in Connect.
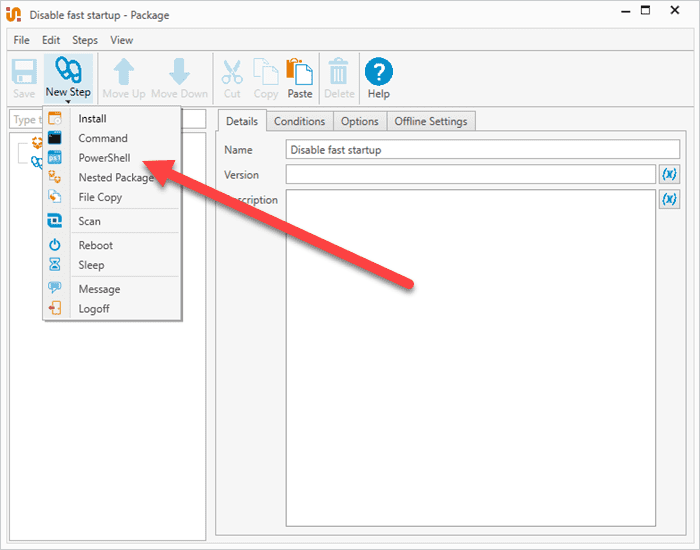
In PDQ Deploy, click New Package.
Name the package, then click New Step > PowerShell.
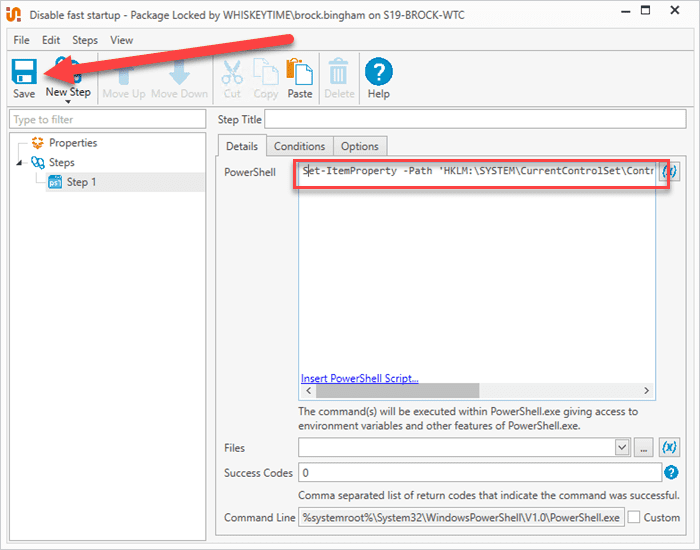
Add the command:
Set-ItemProperty -Path ‘HKLM:\SYSTEM\CurrentControlSet\Control\Session Manager\Power’ -Name HiberbootEnabled -Value 0Click Save, then close the package window.


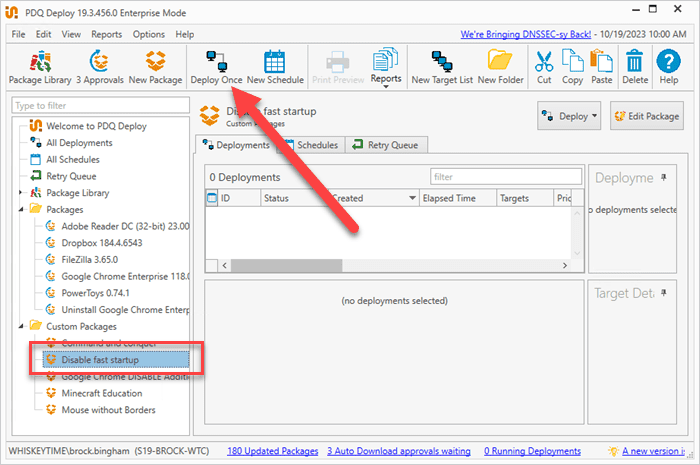
With the package saved, it’s ready to deploy.
Select the package, then click Deploy Once.
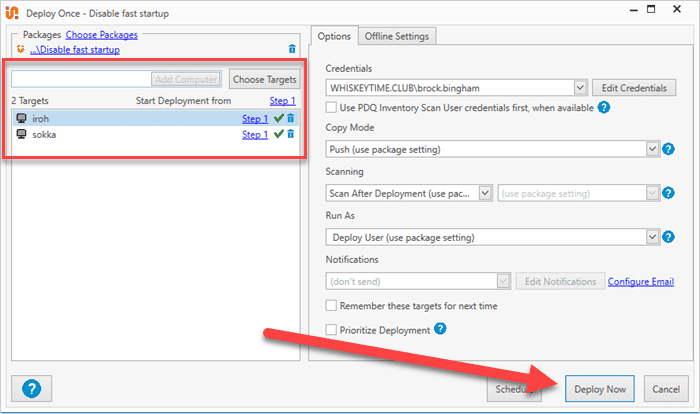
Add your targets to the deployment window.
When you’re ready, click Deploy Now.


With your packages deployed, say goodbye to Fast Startup and hello to old-school shutdown functionality!


