In these examples I will be using PDQ Deploy and PDQ Inventory which are free Systems Management tools available from Admin Arsenal.
The Get-it-done-now-dammit Way
If you haven’t already, download Microsoft .NET Framework 4 (Standalone Installer) from Microsoft. Save it to a directory on your computer (or on an accessible shared directory on your network).
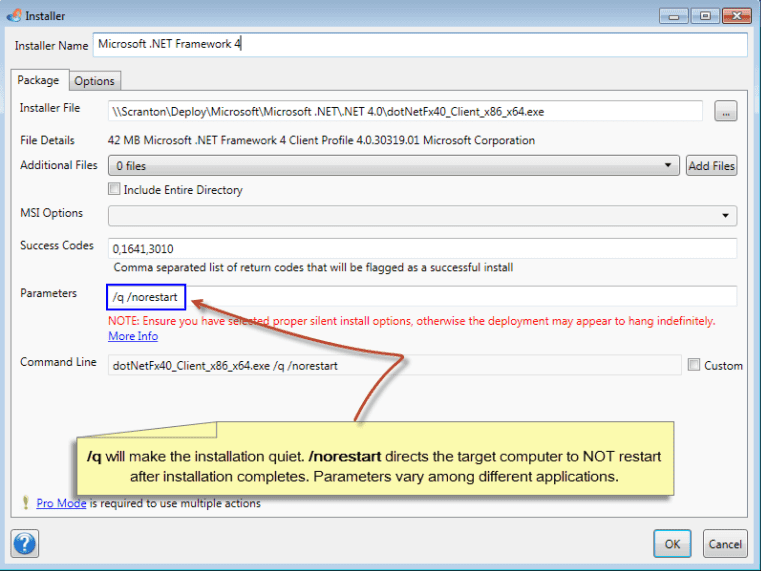
Create a new Installer in PDQ Deploy. (File > New Installer). Name your new PDQ Installer something like “Microsoft .NET Framework 4. In the Install File field enter the path to your .NET 4 executable (actually click the elipsis button and navigate to the .NET 4 executable).

Save your new Installer. Highlight the installer and push the Deploy Now button.
The Deploy Now window appears. This is where we will choose the computers which will receive .NET 4. You can either enter the names of your target computers or you can import computers from PDQ Inventory (the next example will show you how to do this), Active Directory, Spiceworks or text files. In this example we will just type in two target computers: Lebowski and Quintana.

After you have defined your targets simply hit the Deploy Now button.
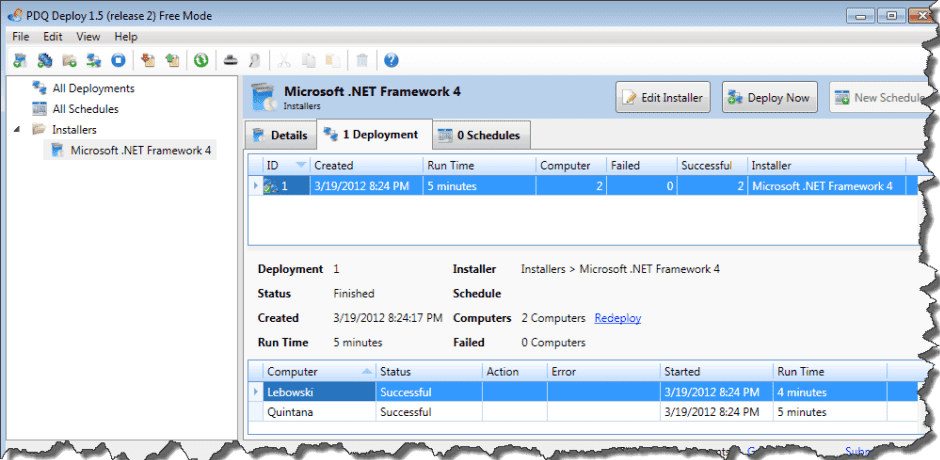
You can see a quick view of your deployment by highlighting the Installer and selecting the Deployment tab.
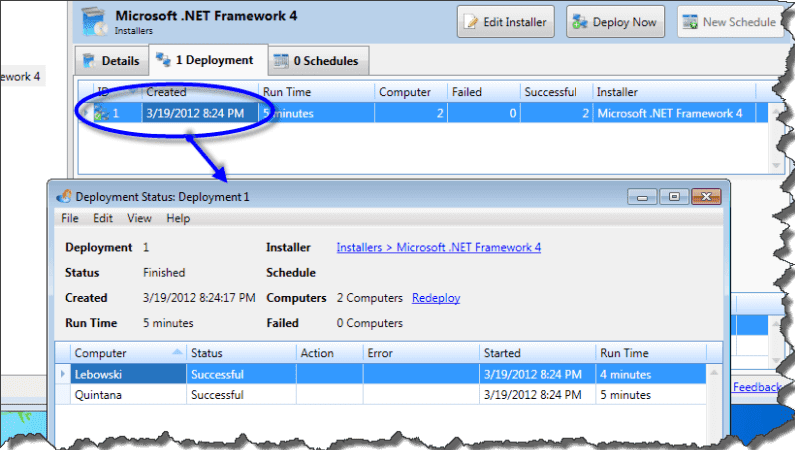
You can see more detailed information by opening up the deployment

The Slightly More Elegant Way
In this example we will take the Installer that we built earlier but instead of just typing in our target computers we will only deploy to workstations (non-server systems) which we know do not have .NET 4 already installed. We will use PDQ Inventory to do this. (The data in PDQ Inventory is only as good as the last scan so make sure you have recently scanned your computers)
Open up PDQ Inventory. Create a new Collection (CTRL+N or Collection > New Dynamic Collection). Give your new Collection a name. Add three different filters.
Computer > .NET Versions does not contain 4.0
Computer > Never Scanned is not true
Operating System > Name does not contain server
The first filter effectively says: Only Show computers that do not have .NET Framework 4 installed.
The second filter effectively says: Only show computers that have a successful inventory scan. (This is important since a computer in PDQ Inventory that has NEVER been scanned will pass the first filter)
The third filter effectively says: Only show me computers with Operating System name that does not contain the word “Server”. All Windows servers have the word server in their OS Name. (e.g. Microsoft Windows Server 2008 Enterprise)
Your Collection filters should look something like this:
Right click on your new collection and select Tools > PDQ Deploy. A window will appear asking you which PDQ Deploy Installer to use. Select the Installer you created earlier.
When you select your Installer PDQ Deploy will display the Deploy Now window with your target computers already populated. These are the workstations which do not have .NET 4 installed.
Hit Deploy Now and go pour yourself a Guinness.


